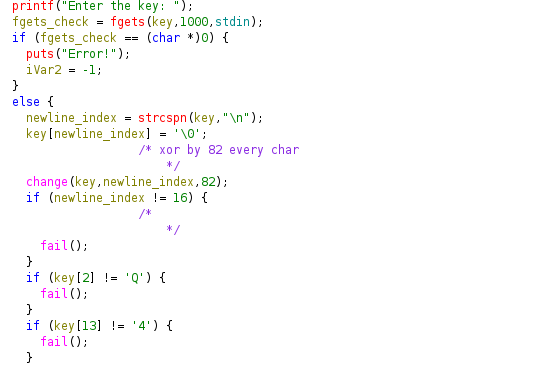
<?xml version="1.0" encoding="utf-8"?><feed xmlns="http://www.w3.org/2005/Atom" xml:lang="en-US"><generator uri="https://jekyllrb.com/" version="3.10.0">Jekyll</generator><link href="/feed.xml" rel="self" type="application/atom+xml" /><link href="/" rel="alternate" type="text/html" hreflang="en-US" /><updated>2026-11-04T02:22:23+00:00</updated><id>/feed.xml</id><title type="html">BitR13x</title><subtitle>Software engineer, penetration tester, and security researcher. Writing about reverse engineering, malware analysis, and building software.</subtitle><author><name>BitR13x</name></author><entry><title type="html">Reverse Engineering 101: Principles, Tools, and Methodologies</title><link href="/articles/reverse-engineering-101-principles-tools-and-methodologies/" rel="alternate" type="text/html" title="Reverse Engineering 101: Principles, Tools, and Methodologies" /><published>2026-08-06T00:00:00+00:00</published><updated>2026-08-06T00:00:00+00:00</updated><id>/articles/reverse-engineering-101-principles-tools-and-methodologies</id><content type="html" xml:base="/articles/reverse-engineering-101-principles-tools-and-methodologies/"><![CDATA[<p>Welcome, traveler! From basic hardware logic to practical reverse engineering, this article serves as a complete beginner’s guide. We’ll place a special focus on static analysis using Ghidra, walking through essential analysis techniques like code coverage, signature matching, and symbolic execution.</p><figure><img alt="" src="https://cdn-images-1.medium.com/max/1024/0*bh7SqCKlCX7jhSj8.png" /></figure><p>Before diving deep into actual reverse engineering, it is recommended to understand the fundamentals of how processes are loaded into memory and their overall layout. It is also definetely worth to be familiar with binary formats, specifically the different sections where code and data reside.</p><p>This foundational knowledge helps you understand how malicious actors can hide code that executes before the main function is even called (such as through TLS Callbacks in Windows), and clarifies why certain structures behave the way they do.</p><h3>How Does a Computer Work? (in short)</h3><p>Before we can deconstruct a compiled program, it is worth understanding the machine that runs it. While modern software feels incredibly complex, it is just a collection of simple building blocks arranged into a larger system. By tracing the path from raw electronic signals up to structured logic, we can see exactly how abstract code is transformed into physical execution.</p><h4>The Rule of Context: Binary Has No Inherent Meaning</h4><p>At its lowest level, a computer operates entirely on ones and zeros. But why exactly ones and zeros? This binary system exists because computers are built on Boolean algebra, which is physically represented by electrical states.</p><figure><img alt="" src="https://cdn-images-1.medium.com/max/1024/1*Y1FPfcCcSJTH1GU9zWi2qQ.png" /><figcaption>Reading program in base 2 format</figcaption></figure><p>However, it is crucial for a reverse engineer to remember that raw binary has no inherent meaning — <strong>context is everything</strong>.</p><p>The exact same sequence of ones and zeros might represent an executable instruction (an opcode) on one CPU architecture, but perform a completely different action — or just be interpreted as raw data — on another.</p><h4>The Engine of Everything: Universal Logic</h4><p>At the physical hardware level, these binary states are controlled by transistors acting as microscopic switches. By wiring these transistors together, we create logic gates, and the most used among them is the NAND gate. Because NAND is <em>logically universal</em>, you can <strong>deduce and create</strong> every other logical operation using only NAND gates. It is the basic block of all computation.</p><figure><img alt="" src="https://cdn-images-1.medium.com/max/362/1*WzJtznWWslSl9nGhdICYTg.png" /><figcaption>NAND in Short</figcaption></figure><h4>The Ladder of Abstraction</h4><p>The entire architecture of a computer is built upon the concept of abstraction. The system is separated into distinct layers, where each layer acts as a simplified interface hiding the immense complexity below it.</p><p>We take incredibly small, simple components and stack them to create highly complex machinery.</p><p>For example by stringing together those universal NAND gates, we can build Full Adders and Arithmetic Logic Units (ALUs) and we have the math core of a CPU.</p><p>And how about memory? At its core, hardware memory is just a logical feedback loop. The most basic memory cell, known as an R-S flip-flop, uses this continuous loop to sustain an electrical state, allowing the machine to effectively “remember” a bit of data.</p><figure><img alt="" src="https://cdn-images-1.medium.com/max/567/1*PB5CNNuvRTOwb62PO5_0Pg.png" /></figure><p>Some kind of layers of abstration is OSI table that is used for isolating problems to a specific layer.</p><p>With a CPU to compute and memory to store state, we have the physical foundation required to execute programs.</p><h4>Process Memory Layout</h4><p>Once a program is executed, the operating system creates a new process and allocates it its own isolated virtual address space. This space is logically split into distinct memory sections:</p><figure><img alt="" src="https://cdn-images-1.medium.com/max/428/1*OMBbQdak9wEL_y_vI5Uq_A.png" /></figure><h4>How a Process is Born</h4><p>If we dive into the granular details of execution — let’s say we run a program from the terminal using ./program</p><p>The operating system (in Unix/Linux environments) begins by creating a new process via the fork() syscall. This relies on a resource-management technique called Copy-on-Write (CoW).</p><pre>pid_t fork(void);</pre><p>Once the new process is created, it invokes the execve() syscall to replace the current process memory with the new program.</p><pre>int execve(const char *pathname, char *const argv[], char *const envp[]);</pre><p>Behind the scenes, execve() performs a critical sequence of operations to properly load your binary into memory:</p><ol><li>Validation (if it is valid binary)</li><li>Clearing the Address Space (inherited from the fork() )</li><li>Parsing the Binary Header (of .text , .data , .bss )</li><li>Memory Mapping (mmap) — creates our address space</li><li>Setting up the Stack (pushes argc, argv, envp )</li></ol><h3>Common Binary Formats</h3><p>As mentioned during the execve() breakdown, the operating system must parse the binary header to understand how to load the file. Depending on the operating system you are analyzing, you will primarily encounter two binary formats.</p><h4>Portable Executable (PE)</h4><p>The standard format for Windows executables</p><p>Extension: (.exe, .dll, .sys, .scr)<br>Signature: 4D 5A (MZ)or 50 45 00 00 (PE\0\0)</p><h4>Executable and Linkable Format (ELF)</h4><p>The standard format for Unix and Linux systems</p><p>Extension: (None, .so, .ko)<br>Signature: 7F 45 4C 46 (.ELF)</p><h4>Function Execution</h4><p>Once the binary is loaded into memory and execution begins, the CPU relies on small, ultra-fast storage locations called <strong>registers</strong> to process data and keep track of state. While modern CPUs have many registers, a few are critical to know when reverse engineering:</p><pre>ebp/rbp — base pointer<br>edi/rdi — index pointer<br>eax/rax — general usage pointer<br>eip/rip/pc — instruction pointer</pre><p>If we want a program to execute smoothly, we must establish strict rules to ensure that jumping between functions doesn’t accidentally corrupt data or overwrite registers.</p><p>To solve this, compilers enforce a <strong>Calling Convention</strong>. This is an agreed-upon standard that dictates exactly how a function should be called, such as whether arguments are passed through specific CPU registers, pushed onto the stack, or a mix of both.</p><p>When a function is called, it creates its own isolated memory workspace known as a <strong>Stack Frame</strong>, which is pushed onto the Call Stack.</p><figure><img alt="" src="https://cdn-images-1.medium.com/max/416/1*SbMSm0n3iIawUkO20R_xxg.png" /></figure><p>To set up and tear down this frame without destroying the calling function’s data, compilers inject standard sequences of assembly at the start and end of a function, known as the <strong>Prologue</strong> and <strong>Epilogue</strong>.</p><p>Here is what standard prologue and epilogue looks like:</p><pre>; x86-64 prologue/epilogue<br>push rbp        ; 1. Save the Base Pointer of the caller<br>mov  rbp, rsp   ; 2. Set the current Stack Pointer as the new Base Pointer<br>sub  rsp, 0x20  ; 3. Allocate space on the stack for local variables (e.g., 32 bytes)<br>; &lt;function instructions&gt;<br>mov rsp, rbp    ; 1. Destroy the local variables (restore the stack pointer)<br>pop rbp         ; 2. Restore the caller&#39;s Base Pointer<br>ret             ; 3. Return to the caller</pre><h4>The Heap (Dynamic Memory Allocation)</h4><p>Unlike the stack, which generally requires the size of its variables to be known at compile time, the heap allows memory to be allocated dynamically during execution.</p><p>The heap is a large pool of memory dedicated to this runtime allocation. When a program needs to store data whose size is unpredictable until the program is actually running, it uses the heap.</p><ul><li>Manual Lifespan (developer controls memory)</li><li>Unstructured Layout (uses linked lists called bins)</li><li>Stack frames are temporary</li></ul><figure><img alt="" src="https://cdn-images-1.medium.com/max/488/1*xQPEUaCP5z71g3kDf7nhWg.png" /><figcaption>Structure of Heap</figcaption></figure><h3>Methods used in RE</h3><p>When analyzing a binary, reverse engineers generally divide their workflow into two main categories: static and dynamic analysis, often supplemented by advanced automated techniques.</p><figure><img alt="" src="https://cdn-images-1.medium.com/max/1024/1*HPuO-YOFjNKaVqQv8PQRDA.png" /></figure><h4>Static analysis</h4><p>Static analysis involves examining the program’s code <em>without</em> actually executing it. This includes disassembling the binary, analyzing its control flow, and reading the assembly or decompiled pseudocode. It is the safest way to analyze malware, as the malicious code is never actively run on your machine.</p><p>We will dive into this method a little bit later.</p><h4>Dynamic analysis</h4><p>Dynamic analysis is the process of observing a running binary. This allows you to get a feel for how the program acts in a controlled environment.</p><p>There are a few different approaches you can take:</p><p><strong>Debugging</strong> — attaching to the process and seeing what it does step by step (pause execution at critical moments to inspect CPU registers and memory)</p><ul><li>Tools: GDB (Linux), winedbg (PE debugger for Linux), x64dbg (Windows)</li></ul><p><strong>API and system monitoring</strong> — we can attach library/program that hooks to certain calls (Side note: binaries often try to detect or overwrite these calls — a known method for bypassing tools like ptrace)</p><ul><li>Tools (Linux): strace (system), ltrace (library)</li><li>Tools (Windows): Sysinternals Process Monitor, API Monitor</li></ul><p><strong>Sandboxing</strong> — executing binary in monitored and isolated virtual machine and recording everything (network traffic, registry, filesystem — read/write calls …)</p><ul><li>Tools: Any.run, Triage, Cuckoo Sandbox</li></ul><h4>Others / Automated analysis</h4><h4>Symbolic Execution</h4><ul><li>Instead of running a program with normal inputs (like a specific string or number), symbolic execution replaces the input with “symbols.”</li><li>The execution engine then calculates the mathematical boundaries required to reach specific paths in the code.</li></ul><p>For example, if we know an input must be a printable ASCII character, we can constrain our solver like this:</p><pre>state.solver.add(byte &gt;= 32)<br>state.solver.add(byte &lt;= 126)</pre><p><em>(We will dive much deeper into the details of this in the #Symbolic Execution section later).</em></p><h4>Taint Analysis</h4><ul><li>This technique focuses on tracking a specific piece of unverified data (called the “taint” — most commonly user input) as it flows through the program.</li><li>The goal is to see if this tainted data reaches a vulnerable function (often called a “sink” or “pit”) without first passing through a “sanitizer” function that cleans the data.</li></ul><p>If you are interested in this type of analysis, I recommend you to read through additional resources.</p><h4>Dynamic Binary Instrumentation (DBI)</h4><ul><li>DBI frameworks allow you to inject custom code into a running process on the fly.</li><li>This provides incredible power to intercept functions, modify arguments, and interact directly with the live memory of the target application without needing to modify the executable file itself.</li></ul><p>Tools: Frida, Intel Pin, Qiling</p><h4>Patching (modifying the binary)</h4><ul><li>Sometimes, you need to permanently change how the binary acts. Patching involves modifying the raw assembly instructions in the compiled file.</li><li>For example, if you find a core branching instruction, you can reverse the flow (changing a JZ (Jump if Zero) to a JNZ (Jump if Not Zero))</li><li>You can completely remove unwanted operations by overwriting them with NOP (No Operation) instructions.</li></ul><p>Tools: Ghidra, IDA, Cutter and radare2</p><h3>Ghidra</h3><p>Ghidra is a free, open-source Software Reverse Engineering (SRE) framework created by the NSA. Written in Java, it is a powerful, completely free alternative to IDA Pro.</p><p>Its core features include a disassembler, a decompiler, and a robust scripting engine.</p><h4>Weirdness of Ghidra (Special shortcuts)</h4><p>Ghidra uses its own pseudo-macros to shorten output and make decompiled C code cleaner. However, this can sometimes lead to confusion.</p><p>For example:</p><ul><li>CONCAT22(a,b) &lt;=&gt; (a &lt;&lt; 16) | b → 32-bit</li><li><em>x.4_4</em> &lt;=&gt; bytes 4–7 of x</li></ul><p>So from where does this syntax come from?</p><p>When you load a binary into Ghidra, it doesn’t translate assembly directly into C code — doing so would require writing a completely different decompiler for every CPU architecture.</p><p>Instead, Ghidra uses a language called <strong>SLEIGH</strong> to translate every CPU’s assembly into a universal, architecture-agnostic language called <strong>P-Code</strong>. From this P-Code, Ghidra constructs the C code.</p><p>In short can be described as:<br>Input (Bytes) =&gt; SLEIGH (P-Code) =&gt; Optimizer (dead variables / branches) =&gt; Type Engine =&gt; Output (C-Code)</p><p>If you ever want to copy-paste Ghidra’s decompiled C code into a compiler (like GCC or Clang), you will need to define these macros manually, like:</p><pre>#define CONCAT44(a, b) (((unsigned long long)(a) &lt;&lt; 32) | (unsigned int)(b))    <br>#define SUB84(a, offset) ((unsigned int)((unsigned long long)(a) &gt;&gt; (offset * 8)))<br>#define ZEXT48(a) ((unsigned long long)(unsigned int)(a))</pre><h4>Deducing Types and Sizes</h4><p>Even though Ghidra’s auto-generated variable names look random, they contain structural hints:</p><ul><li>uVar1, uVar2: Unsigned Variable.</li><li>iVar1, iVar2: Signed Integer Variable.</li><li>puVar1, pbVar1: Pointer to Unsigned Variable, Pointer to Byte.</li><li>cVar1, pcVar1: Char variable, Pointer to Char (often a string).</li><li>DAT_00402000: Raw Data located at address 0x00402000 (likely a global variable).</li><li>local_10, local_14: Stack variables (the numbers usually indicate the offset on the stack).</li><li>in_FS_OFFSET / in_GS_OFFSET: Refers to the FS or GS segment registers (fsbase usually used for canary).</li></ul><figure><img alt="" src="https://cdn-images-1.medium.com/max/930/1*8cLP1jGDlfTxQ3xk-xXQKg.png" /><figcaption>Example of canary bit protection</figcaption></figure><figure><img alt="" src="https://cdn-images-1.medium.com/max/763/1*5Qz3-CUFFZ-cdMSuPtj3Ug.png" /></figure><figure><img alt="" src="https://cdn-images-1.medium.com/max/996/1*J16dY8LttAlR8Zziht8xIQ.png" /></figure><p>Based on the knowledge, we can now just find canary bits using grep (0x28 offset is used for x64)</p><p>When reading decompiled code, look for library calls like malloc, fgets, scanf, or read.</p><pre>char *fgets(char *str, int n, FILE *stream);<br><br>fgets(input, 0x80, stdin);</pre><p>Or for loops:</p><pre>for (i = 0; i &lt; 10; i++) {<br>    *(int *)(local_28 + i * 4) = 0;<br>}</pre><p>From this example, we can see that it goes through local_28 like it’s array of ints of size 10.</p><h4>Custom struct (offsets + size)</h4><p>You might also spot memory offset patterns indicating a custom struct:</p><pre>*(int *)(param_1 + 0x0) = 5;<br>*(char **)(param_1 + 0x4) = &quot;Hello&quot;;<br>*(short *)(param_1 + 0x8) = 10;</pre><p>When you encounter logic like this, you can deduce it’s a structure:</p><pre>/*<br>example, it don&#39;t have to reflect this exact structure<br>but still can help you later on <br>*/<br>struct MyString {<br>  int size;<br>  char *string;<br>  short m_size;<br>};</pre><p>In Ghidra, you can create a custom type for it via the <strong>Data Type Manager</strong> (Right-click your binary name -&gt; New -&gt; Structure)</p><p>Then retype the variable using CTRL+L or by right-click menu.</p><h4>Equetes/Enums</h4><p>An interesting feature of Ghidra is the <strong>Equate</strong>. It is simply a text label applied to a specific, raw number — much like a #define macro in C.</p><p>It is perfect for one-off constants (e.g., changing 0x80000000 to GENERIC_READ).</p><p>Unlike an Equate, an <strong>Enum</strong> is an actual <em>Type</em> that you apply to a variable. Once typed, Ghidra will automatically translate those numbers everywhere that variable is used (e.g., Error codes, or States like Running, Stopped, Paused).</p><h4>Cross-Referencing</h4><p>When you know what specific string you are looking for (like an error message or a password prompt), you can search for it and use cross-referencing (XREF) to track down the exact function utilizing that string.</p><figure><img alt="" src="https://cdn-images-1.medium.com/max/1024/1*iotx6suiYk8WU6zQQYd-4A.png" /><figcaption>Two xref to .data section</figcaption></figure><p>Suppose we would know that we now the correct result should include words “Excellent work”, we can search in memory and find this string (using S shortcut or menu Search)</p><figure><img alt="" src="https://cdn-images-1.medium.com/max/972/1*N8ZPkM6HHPU6GKzvnbHVtQ.png" /><figcaption>Result of search</figcaption></figure><p>and from there we know exactly where we need to end up, without going through the whole binary and through all the nested functions.</p><h4>Code Coverage</h4><p>Code coverage is the process of tracking exactly which lines of assembly code (specifically, which Basic Blocks) were executed when a program ran. You can collect this data using drrun (a tool from the DynamoRIO DBI framework) and the drcov module.</p><p>DynamoRIO acts like a virtual machine running your target binary, allowing you to monitor memory and execution.</p><ul><li>drrun -t drcov -- ./binary [arguments]</li></ul><p>This produces a log that can be loaded directly into decompiler (using a plugin like <em>Lighthouse</em> for IDA or <em>Cartographer</em> for Ghidra).</p><p>This is incredibly useful for revealing crucial branches, such as VM detection evasion in malware, or determining which functions are actually reachable during runtime.</p><figure><img alt="" src="https://cdn-images-1.medium.com/max/1024/1*fr33lhXo-aSFXDNo43FKjQ.png" /><figcaption>Example how Cartographer highlights code in Ghidra</figcaption></figure><h4>Symbolic execution</h4><p>As discussed earlier, symbolic execution is powerful because we treat user input as algebraic symbols rather than concrete values. We can apply constraints to these symbols, pruning the tree of possibilities and solving mathematical equations instead of brute-forcing logic.</p><p><em>Note: You must understand the binary’s structure for this to work. If a program sends data to a remote server for validation, symbolic execution won’t help you. But if the checking algorithm is local, we are green.</em></p><p><strong>Angr</strong> is a powerful Python framework for binary analysis, utilizing a solver called <strong>Claripy</strong> (built on top of Z3). However, it suffers from a major hurdle:</p><h4>Path explosion</h4><p>When Angr evaluates a branch (like an if/else statement) that depends on a symbolic variable, it doesn’t know which path to take.</p><p>Consequently, it duplicates the current program state to explore both. If we have 10 consecutive if statements, Angr generates 2¹⁰ (1024) states.</p><p>Our RAM will fill up rapidly, the Z3 solver will choke on massive equations, and your script will hang forever.</p><p>To reduce or eliminate path explosion, we can:</p><ul><li>Enable Veritesting (tries to merge states back together after a branch)</li><li>Restrict the Search Space (find and avoid)</li><li>Hook Complex Functions (skip/replace printf, strlen, or malloc)</li><li>Limit Loops (if symbolic variable depends on loop)</li><li>Add Constraints Early (example: limit yourself on ASCII)</li><li>Length Limiting (limit the total number of basic blocks evaluated)</li><li>Unicorn Engine (Combine fast concrete execution with symbolic execution)</li></ul><p>In this example we are hooking complex functions (replacing them) and adding constraints early on:</p><pre>import angr<br>import claripy<br><br># auto_load_libs = False = use SimProcedures, do not load libc...<br>proj = angr.Project(&#39;./e4sy_RE.bdsec&#39;, auto_load_libs=False)<br><br># Dummy procedures to skip irrelevant functions<br>class ReturnZero(angr.SimProcedure):<br>    def run(self, *args):<br>        # BVV = known value (do not resolve)<br>        return claripy.BVV(0, 64)<br><br>class SilentPrint(angr.SimProcedure):<br>    def run(self, *args, **kwargs):<br>        return claripy.BVV(1, 32)<br><br># Force strcspn to instantly return 41<br># - bypassing the entire length check<br>class FakeStrcspn(angr.SimProcedure):<br>    def run(self, s, reject):<br>        return claripy.BVV(41, 64)<br><br>for sym, hook in [<br>    (&quot;rand&quot;,   ReturnZero()),<br>    (&quot;time&quot;,   ReturnZero()),<br>    (&quot;clock&quot;,  ReturnZero()),<br>    (&quot;puts&quot;,   SilentPrint()),<br>    (&quot;printf&quot;, SilentPrint()),<br>    (&quot;strcspn&quot;, FakeStrcspn()),<br>]:<br>    proj.hook_symbol(sym, hook, replace=True)<br><br># BVS = unknown value (symbolic value)<br># - 41 symbolic bytes<br>flag_chars = [claripy.BVS(f&#39;c_{i}&#39;, 8) for i in range(41)]<br>flag = claripy.Concat(*flag_chars)<br><br>state = proj.factory.entry_state(stdin=angr.SimFileStream(name=&#39;stdin&#39;, content=flag, has_end=False))<br><br># Standard printable ASCII constraints<br>for ch in flag_chars:<br>    state.solver.add(ch &gt;= 0x20)<br>    state.solver.add(ch &lt;= 0x7e)<br><br>simgr = proj.factory.simulation_manager(state)<br>main_func_addr = proj.loader.find_symbol(&#39;main&#39;).rebased_addr<br># OR proj.loader.main_object.min_addr (returns imagebase)<br><br>SUCCESS_ADDR = main_func_addr + 0x5b8<br>FAILURE_ADDR = main_func_addr + 0x38b<br><br>simgr.explore(find=SUCCESS_ADDR, avoid=FAILURE_ADDR)<br><br>if simgr.found:<br>    print(&quot;\n[+] Found a path!&quot;)<br>    print(simgr.found[0].posix.dumps(0))<br>else:<br>    print(&quot;\n[-] Unsat!&quot;)</pre><p>Another interesting thing is <strong>PIE </strong>(Position Independent Executable), whether you use <strong>address</strong> or <strong>offset</strong> depends on whether the binary is PIE (that can be checked with the checksec tool).</p><h4>Approaches to static analysis</h4><p>When beginning a static analysis session, we typically adopt one of the following mindsets:</p><ul><li>Bottom-Up Approach<strong>:</strong> Starting at the smallest functions or system calls and working backward to see how they fit into the bigger picture</li><li><strong>Top-Down Approach:</strong> Starting at main() or the entry point and following the broad logic branches downward</li><li><strong>Outside-In Approach:</strong> Starting at known interactions (like GUI inputs, network sockets, or specific string references) and tracing how the program handles them (XREFs)</li><li><strong>Pattern-Recognition Approach:</strong> Recognizing standard compiler boilerplate, common library functions, or known algorithms without needing to read every instruction</li></ul><h4>Signature matching</h4><p>Instead of manually reading every line of code, we can use signatures to identify known, constant data within a binary.</p><p>The true power of signatures lies in their ability to rapidly evaluate binaries at scale. Advanced signature engines can apply XOR operations and various transformations to the search patterns. This means that even if a binary has been tampered with or slightly obfuscated, you can still spot reused functions that you have already analyzed.</p><p>Additionally, there are vast repositories of public signatures for various malware families that you can leverage out-of-the-box.</p><ul><li>Tools: Yara rules, FLIRT (FunctionID in Ghidra), Detect It Easy</li></ul><p>In Ghidra, you can use the ghidra_yara plugin to generate custom rules directly from the code you are analyzing and scan the binary for existing rule matches. Or <a href="https://github.com/Neo23x0/yarGen">https://github.com/Neo23x0/yarGen</a> that will extracts strings directly from the binary.</p><p>Applying what we learned earlier about stack frames, we can write a simple YARA rule to detect standard x64 function prologues:</p><pre>rule detect_x64_function_prologues {<br>    meta:<br>        description = &quot;Detects x64 function prologues&quot;<br>        author = &quot;&quot;<br>        date = &quot;&quot;<br><br>    strings:<br>        // push rbp; mov rbp, rsp<br>        $prologue_standard = { 55 48 89 E5 }<br><br>        // push rbp; mov rbp, rsp; sub rsp, XX<br>        $prologue_alloc_short = { 55 48 89 E5 48 83 EC ?? }<br>        $prologue_alloc_long  = { 55 48 89 E5 48 81 EC ?? ?? ?? ?? }<br><br>        // (no RBP save): sub rsp, XX<br>        $prologue_leaf_short = { 48 83 EC ?? }<br>        $prologue_leaf_long  = { 48 81 EC ?? ?? ?? ?? }<br>    condition:<br>        any of them<br>}</pre><figure><img alt="" src="https://cdn-images-1.medium.com/max/795/1*vPYwhQ1bY_3VydcFDBFXbg.png" /></figure><p>By running YARA from the command line with the -s flag (which prints the matching strings and their locations)</p><p>We can find the exact file offset of the match. We then add this offset to the binary&#39;s image base address in your disassembler to jump straight to the hidden or undocumented function.</p><h4>A Note on Ghidra Extensions</h4><p>I want to quickly mention a minor annoyance regarding Ghidra extensions. While they add incredible functionality, managing them can sometimes be frustrating.</p><p>Because Ghidra updates frequently, older extensions will often refuse to load due to strict version matching. To keep your workflow intact after a Ghidra update, you will frequently need to recompile your extensions manually against your current installation.</p><p>You can do this using the Gradle build system included in the extension’s directory:</p><pre>export GHIDRA_INSTALL_DIR=&quot;/&lt;yourpath&gt;/ghidra-public&quot;<br>cd $EXTENSION_DIR # with build.grandle<br>&quot;$GHIDRA_INSTALL_DIR/support/gradle/gradlew&quot; -PGHIDRA_INSTALL_DIR=&quot;$GHIDRA_INSTALL_DIR&quot;</pre><p>While YARA is fantastic for malware hunting and custom logic, <strong>FLIRT</strong> (Fast Library Identification and Recognition Technology) is designed specifically for a different problem: identifying statically linked library functions.</p><p>When developers compile a program statically, standard C/C++ library functions (like printf, memcpy, or malloc) are embedded directly into the executable. Without debugging symbols, the disassembler has no idea what these are and will label them with generic names (e.g., FUN_00401020).</p><p>FLIRT solves this by analyzing the raw bytes of these unknown functions and matching them against a massive database of known library signatures.</p><p>While incredibly useful, byte-matching techniques are somewhat fragile. Because they rely on specific sequences of assembly, they can break easily. If the target binary was compiled with heavy optimizations (like -O3), or if it was written in modern, LLVM-backed languages like Rust, the resulting assembly structure changes drastically. In these scenarios, traditional signatures often fail to recognize the functions.</p><h3>Addictional resources:</h3><ul><li><a href="https://blog.deephacking.tech/en/posts/anatomy-of-the-portable-executable-format/">Anatomy of the Portable Executable (PE) Format - Deep Hacking</a></li><li><a href="https://can-ozkan.medium.com/what-is-taint-analysis-a-guide-for-developers-and-security-researchers-11f2ad876ea3">What Is Taint Analysis? A Guide for Developers and Security Researchers</a></li><li><a href="https://blog.talosintelligence.com/dynamic-binary-instrumentation-dbi-with-dynamorio/">Dynamic binary instrumentation (DBI) with DynamoRio</a></li><li><a href="https://medium.com/@bitr13x/black-boxing-the-z3-solver-solve-equations-and-more-using-z3-595d4de2719c">Solve equations and mathematical games with Z3 solver</a></li><li><a href="https://towardsdev.com/understanding-inter-process-communication-in-linux-fork-pipes-shared-memory-and-message-queues-2503a9e334ad">Understanding Inter-process Communication in Linux: Fork, Pipes, Shared Memory, and Message Queues</a></li></ul><p><a href="https://quackie.at/files/reverse_engineering_rust_programs.pdf">https://quackie.at/files/reverse_engineering_rust_programs.pdf</a></p><ul><li><a href="https://github.com/BitR13x/GhidraSignatures">GitHub - BitR13x/GhidraSignatures: script that will load signatures from file and apply it into ghidra (string matching)</a></li><li><a href="https://github.com/BitR13x/r2ai-workflow">GitHub - BitR13x/r2ai-workflow: AI workflow for radare2 - Connect to Ollama/NVIDIA-api models with context taken from binary function through radare2 (pdg/pdc ...)</a></li></ul><p><a href="https://quackie.at/files/reverse_engineering_rust_programs.pdf">https://quackie.at/files/reverse_engineering_rust_programs.pdf</a></p><h3>Conclusion</h3><p>With these concepts, we are now have a solid foundation for diving into reverse engineering and static analysis.</p><p>From the layers of abstraction — through basic hardware logic to how an operating system manages memory — compiled binaries don’t have to be a black box anymore. You know how processes are built, how to use Ghidra and more.</p><p>At the end of the day, reverse engineering is really just solving a puzzle the compiler left behind. The best way to improve is to do your own research. Try writing some simple C programs (<a href="https://github.com/BitR13x/C-Reverse">https://github.com/BitR13x/C-Reverse</a>), compile them, and throw them straight into Ghidra to see exactly what they look like on the other side.</p><p>If you enjoyed this article, clap and follow me! Thanks for reading, and I wish you the best luck on your journey👋.</p><img src="https://medium.com/_/stat?event=post.clientViewed&referrerSource=full_rss&postId=d2ec04b03281" width="1" height="1" alt="">]]></content><author><name>BitR13x</name></author><category term="ghidra" /><category term="hacking" /><category term="hackthebox" /><category term="ethical-hacking" /><category term="reverse-engineering" /><summary type="html"><![CDATA[Welcome, traveler! From basic hardware logic to practical reverse engineering, this article serves as a complete beginner’s guide. We’ll place a special focus on static analysis using Ghidra, walking through essential analysis techniques like code coverage, signature matching, and symbolic execution.Before diving deep into actual reverse engineering, it is recommended to understand the fundamentals of how processes are loaded into memory and their overall layout. It is also definetely worth to be familiar with binary formats, specifically the different sections where code and data reside.This foundational knowledge helps you understand how malicious actors can hide code that executes before the main function is even called (such as through TLS Callbacks in Windows), and clarifies why certain structures behave the way they do.How Does a Computer Work? (in short)Before we can deconstruct a compiled program, it is worth understanding the machine that runs it. While modern software feels incredibly complex, it is just a collection of simple building blocks arranged into a larger system. By tracing the path from raw electronic signals up to structured logic, we can see exactly how abstract code is transformed into physical execution.The Rule of Context: Binary Has No Inherent MeaningAt its lowest level, a computer operates entirely on ones and zeros. But why exactly ones and zeros? This binary system exists because computers are built on Boolean algebra, which is physically represented by electrical states.Reading program in base 2 formatHowever, it is crucial for a reverse engineer to remember that raw binary has no inherent meaning — context is everything.The exact same sequence of ones and zeros might represent an executable instruction (an opcode) on one CPU architecture, but perform a completely different action — or just be interpreted as raw data — on another.The Engine of Everything: Universal LogicAt the physical hardware level, these binary states are controlled by transistors acting as microscopic switches. By wiring these transistors together, we create logic gates, and the most used among them is the NAND gate. Because NAND is logically universal, you can deduce and create every other logical operation using only NAND gates. It is the basic block of all computation.NAND in ShortThe Ladder of AbstractionThe entire architecture of a computer is built upon the concept of abstraction. The system is separated into distinct layers, where each layer acts as a simplified interface hiding the immense complexity below it.We take incredibly small, simple components and stack them to create highly complex machinery.For example by stringing together those universal NAND gates, we can build Full Adders and Arithmetic Logic Units (ALUs) and we have the math core of a CPU.And how about memory? At its core, hardware memory is just a logical feedback loop. The most basic memory cell, known as an R-S flip-flop, uses this continuous loop to sustain an electrical state, allowing the machine to effectively “remember” a bit of data.Some kind of layers of abstration is OSI table that is used for isolating problems to a specific layer.With a CPU to compute and memory to store state, we have the physical foundation required to execute programs.Process Memory LayoutOnce a program is executed, the operating system creates a new process and allocates it its own isolated virtual address space. This space is logically split into distinct memory sections:How a Process is BornIf we dive into the granular details of execution — let’s say we run a program from the terminal using ./programThe operating system (in Unix/Linux environments) begins by creating a new process via the fork() syscall. This relies on a resource-management technique called Copy-on-Write (CoW).pid_t fork(void);Once the new process is created, it invokes the execve() syscall to replace the current process memory with the new program.int execve(const char *pathname, char *const argv[], char *const envp[]);Behind the scenes, execve() performs a critical sequence of operations to properly load your binary into memory:Validation (if it is valid binary)Clearing the Address Space (inherited from the fork() )Parsing the Binary Header (of .text , .data , .bss )Memory Mapping (mmap) — creates our address spaceSetting up the Stack (pushes argc, argv, envp )Common Binary FormatsAs mentioned during the execve() breakdown, the operating system must parse the binary header to understand how to load the file. Depending on the operating system you are analyzing, you will primarily encounter two binary formats.Portable Executable (PE)The standard format for Windows executablesExtension: (.exe, .dll, .sys, .scr)Signature: 4D 5A (MZ)or 50 45 00 00 (PE\0\0)Executable and Linkable Format (ELF)The standard format for Unix and Linux systemsExtension: (None, .so, .ko)Signature: 7F 45 4C 46 (.ELF)Function ExecutionOnce the binary is loaded into memory and execution begins, the CPU relies on small, ultra-fast storage locations called registers to process data and keep track of state. While modern CPUs have many registers, a few are critical to know when reverse engineering:ebp/rbp — base pointeredi/rdi — index pointereax/rax — general usage pointereip/rip/pc — instruction pointerIf we want a program to execute smoothly, we must establish strict rules to ensure that jumping between functions doesn’t accidentally corrupt data or overwrite registers.To solve this, compilers enforce a Calling Convention. This is an agreed-upon standard that dictates exactly how a function should be called, such as whether arguments are passed through specific CPU registers, pushed onto the stack, or a mix of both.When a function is called, it creates its own isolated memory workspace known as a Stack Frame, which is pushed onto the Call Stack.To set up and tear down this frame without destroying the calling function’s data, compilers inject standard sequences of assembly at the start and end of a function, known as the Prologue and Epilogue.Here is what standard prologue and epilogue looks like:; x86-64 prologue/epiloguepush rbp ; 1. Save the Base Pointer of the callermov rbp, rsp ; 2. Set the current Stack Pointer as the new Base Pointersub rsp, 0x20 ; 3. Allocate space on the stack for local variables (e.g., 32 bytes); &lt;function instructions&gt;mov rsp, rbp ; 1. Destroy the local variables (restore the stack pointer)pop rbp ; 2. Restore the caller&#39;s Base Pointerret ; 3. Return to the callerThe Heap (Dynamic Memory Allocation)Unlike the stack, which generally requires the size of its variables to be known at compile time, the heap allows memory to be allocated dynamically during execution.The heap is a large pool of memory dedicated to this runtime allocation. When a program needs to store data whose size is unpredictable until the program is actually running, it uses the heap.Manual Lifespan (developer controls memory)Unstructured Layout (uses linked lists called bins)Stack frames are temporaryStructure of HeapMethods used in REWhen analyzing a binary, reverse engineers generally divide their workflow into two main categories: static and dynamic analysis, often supplemented by advanced automated techniques.Static analysisStatic analysis involves examining the program’s code without actually executing it. This includes disassembling the binary, analyzing its control flow, and reading the assembly or decompiled pseudocode. It is the safest way to analyze malware, as the malicious code is never actively run on your machine.We will dive into this method a little bit later.Dynamic analysisDynamic analysis is the process of observing a running binary. This allows you to get a feel for how the program acts in a controlled environment.There are a few different approaches you can take:Debugging — attaching to the process and seeing what it does step by step (pause execution at critical moments to inspect CPU registers and memory)Tools: GDB (Linux), winedbg (PE debugger for Linux), x64dbg (Windows)API and system monitoring — we can attach library/program that hooks to certain calls (Side note: binaries often try to detect or overwrite these calls — a known method for bypassing tools like ptrace)Tools (Linux): strace (system), ltrace (library)Tools (Windows): Sysinternals Process Monitor, API MonitorSandboxing — executing binary in monitored and isolated virtual machine and recording everything (network traffic, registry, filesystem — read/write calls …)Tools: Any.run, Triage, Cuckoo SandboxOthers / Automated analysisSymbolic ExecutionInstead of running a program with normal inputs (like a specific string or number), symbolic execution replaces the input with “symbols.”The execution engine then calculates the mathematical boundaries required to reach specific paths in the code.For example, if we know an input must be a printable ASCII character, we can constrain our solver like this:state.solver.add(byte &gt;= 32)state.solver.add(byte &lt;= 126)(We will dive much deeper into the details of this in the #Symbolic Execution section later).Taint AnalysisThis technique focuses on tracking a specific piece of unverified data (called the “taint” — most commonly user input) as it flows through the program.The goal is to see if this tainted data reaches a vulnerable function (often called a “sink” or “pit”) without first passing through a “sanitizer” function that cleans the data.If you are interested in this type of analysis, I recommend you to read through additional resources.Dynamic Binary Instrumentation (DBI)DBI frameworks allow you to inject custom code into a running process on the fly.This provides incredible power to intercept functions, modify arguments, and interact directly with the live memory of the target application without needing to modify the executable file itself.Tools: Frida, Intel Pin, QilingPatching (modifying the binary)Sometimes, you need to permanently change how the binary acts. Patching involves modifying the raw assembly instructions in the compiled file.For example, if you find a core branching instruction, you can reverse the flow (changing a JZ (Jump if Zero) to a JNZ (Jump if Not Zero))You can completely remove unwanted operations by overwriting them with NOP (No Operation) instructions.Tools: Ghidra, IDA, Cutter and radare2GhidraGhidra is a free, open-source Software Reverse Engineering (SRE) framework created by the NSA. Written in Java, it is a powerful, completely free alternative to IDA Pro.Its core features include a disassembler, a decompiler, and a robust scripting engine.Weirdness of Ghidra (Special shortcuts)Ghidra uses its own pseudo-macros to shorten output and make decompiled C code cleaner. However, this can sometimes lead to confusion.For example:CONCAT22(a,b) &lt;=&gt; (a &lt;&lt; 16) | b → 32-bitx.4_4 &lt;=&gt; bytes 4–7 of xSo from where does this syntax come from?When you load a binary into Ghidra, it doesn’t translate assembly directly into C code — doing so would require writing a completely different decompiler for every CPU architecture.Instead, Ghidra uses a language called SLEIGH to translate every CPU’s assembly into a universal, architecture-agnostic language called P-Code. From this P-Code, Ghidra constructs the C code.In short can be described as:Input (Bytes) =&gt; SLEIGH (P-Code) =&gt; Optimizer (dead variables / branches) =&gt; Type Engine =&gt; Output (C-Code)If you ever want to copy-paste Ghidra’s decompiled C code into a compiler (like GCC or Clang), you will need to define these macros manually, like:#define CONCAT44(a, b) (((unsigned long long)(a) &lt;&lt; 32) | (unsigned int)(b)) #define SUB84(a, offset) ((unsigned int)((unsigned long long)(a) &gt;&gt; (offset * 8)))#define ZEXT48(a) ((unsigned long long)(unsigned int)(a))Deducing Types and SizesEven though Ghidra’s auto-generated variable names look random, they contain structural hints:uVar1, uVar2: Unsigned Variable.iVar1, iVar2: Signed Integer Variable.puVar1, pbVar1: Pointer to Unsigned Variable, Pointer to Byte.cVar1, pcVar1: Char variable, Pointer to Char (often a string).DAT_00402000: Raw Data located at address 0x00402000 (likely a global variable).local_10, local_14: Stack variables (the numbers usually indicate the offset on the stack).in_FS_OFFSET / in_GS_OFFSET: Refers to the FS or GS segment registers (fsbase usually used for canary).Example of canary bit protectionBased on the knowledge, we can now just find canary bits using grep (0x28 offset is used for x64)When reading decompiled code, look for library calls like malloc, fgets, scanf, or read.char *fgets(char *str, int n, FILE *stream);fgets(input, 0x80, stdin);Or for loops:for (i = 0; i &lt; 10; i++) { *(int *)(local_28 + i * 4) = 0;}From this example, we can see that it goes through local_28 like it’s array of ints of size 10.Custom struct (offsets + size)You might also spot memory offset patterns indicating a custom struct:*(int *)(param_1 + 0x0) = 5;*(char **)(param_1 + 0x4) = &quot;Hello&quot;;*(short *)(param_1 + 0x8) = 10;When you encounter logic like this, you can deduce it’s a structure:/*example, it don&#39;t have to reflect this exact structurebut still can help you later on */struct MyString { int size; char *string; short m_size;};In Ghidra, you can create a custom type for it via the Data Type Manager (Right-click your binary name -&gt; New -&gt; Structure)Then retype the variable using CTRL+L or by right-click menu.Equetes/EnumsAn interesting feature of Ghidra is the Equate. It is simply a text label applied to a specific, raw number — much like a #define macro in C.It is perfect for one-off constants (e.g., changing 0x80000000 to GENERIC_READ).Unlike an Equate, an Enum is an actual Type that you apply to a variable. Once typed, Ghidra will automatically translate those numbers everywhere that variable is used (e.g., Error codes, or States like Running, Stopped, Paused).Cross-ReferencingWhen you know what specific string you are looking for (like an error message or a password prompt), you can search for it and use cross-referencing (XREF) to track down the exact function utilizing that string.Two xref to .data sectionSuppose we would know that we now the correct result should include words “Excellent work”, we can search in memory and find this string (using S shortcut or menu Search)Result of searchand from there we know exactly where we need to end up, without going through the whole binary and through all the nested functions.Code CoverageCode coverage is the process of tracking exactly which lines of assembly code (specifically, which Basic Blocks) were executed when a program ran. You can collect this data using drrun (a tool from the DynamoRIO DBI framework) and the drcov module.DynamoRIO acts like a virtual machine running your target binary, allowing you to monitor memory and execution.drrun -t drcov -- ./binary [arguments]This produces a log that can be loaded directly into decompiler (using a plugin like Lighthouse for IDA or Cartographer for Ghidra).This is incredibly useful for revealing crucial branches, such as VM detection evasion in malware, or determining which functions are actually reachable during runtime.Example how Cartographer highlights code in GhidraSymbolic executionAs discussed earlier, symbolic execution is powerful because we treat user input as algebraic symbols rather than concrete values. We can apply constraints to these symbols, pruning the tree of possibilities and solving mathematical equations instead of brute-forcing logic.Note: You must understand the binary’s structure for this to work. If a program sends data to a remote server for validation, symbolic execution won’t help you. But if the checking algorithm is local, we are green.Angr is a powerful Python framework for binary analysis, utilizing a solver called Claripy (built on top of Z3). However, it suffers from a major hurdle:Path explosionWhen Angr evaluates a branch (like an if/else statement) that depends on a symbolic variable, it doesn’t know which path to take.Consequently, it duplicates the current program state to explore both. If we have 10 consecutive if statements, Angr generates 2¹⁰ (1024) states.Our RAM will fill up rapidly, the Z3 solver will choke on massive equations, and your script will hang forever.To reduce or eliminate path explosion, we can:Enable Veritesting (tries to merge states back together after a branch)Restrict the Search Space (find and avoid)Hook Complex Functions (skip/replace printf, strlen, or malloc)Limit Loops (if symbolic variable depends on loop)Add Constraints Early (example: limit yourself on ASCII)Length Limiting (limit the total number of basic blocks evaluated)Unicorn Engine (Combine fast concrete execution with symbolic execution)In this example we are hooking complex functions (replacing them) and adding constraints early on:import angrimport claripy# auto_load_libs = False = use SimProcedures, do not load libc...proj = angr.Project(&#39;./e4sy_RE.bdsec&#39;, auto_load_libs=False)# Dummy procedures to skip irrelevant functionsclass ReturnZero(angr.SimProcedure): def run(self, *args): # BVV = known value (do not resolve) return claripy.BVV(0, 64)class SilentPrint(angr.SimProcedure): def run(self, *args, **kwargs): return claripy.BVV(1, 32)# Force strcspn to instantly return 41# - bypassing the entire length checkclass FakeStrcspn(angr.SimProcedure): def run(self, s, reject): return claripy.BVV(41, 64)for sym, hook in [ (&quot;rand&quot;, ReturnZero()), (&quot;time&quot;, ReturnZero()), (&quot;clock&quot;, ReturnZero()), (&quot;puts&quot;, SilentPrint()), (&quot;printf&quot;, SilentPrint()), (&quot;strcspn&quot;, FakeStrcspn()),]: proj.hook_symbol(sym, hook, replace=True)# BVS = unknown value (symbolic value)# - 41 symbolic bytesflag_chars = [claripy.BVS(f&#39;c_{i}&#39;, 8) for i in range(41)]flag = claripy.Concat(*flag_chars)state = proj.factory.entry_state(stdin=angr.SimFileStream(name=&#39;stdin&#39;, content=flag, has_end=False))# Standard printable ASCII constraintsfor ch in flag_chars: state.solver.add(ch &gt;= 0x20) state.solver.add(ch &lt;= 0x7e)simgr = proj.factory.simulation_manager(state)main_func_addr = proj.loader.find_symbol(&#39;main&#39;).rebased_addr# OR proj.loader.main_object.min_addr (returns imagebase)SUCCESS_ADDR = main_func_addr + 0x5b8FAILURE_ADDR = main_func_addr + 0x38bsimgr.explore(find=SUCCESS_ADDR, avoid=FAILURE_ADDR)if simgr.found: print(&quot;\n[+] Found a path!&quot;) print(simgr.found[0].posix.dumps(0))else: print(&quot;\n[-] Unsat!&quot;)Another interesting thing is PIE (Position Independent Executable), whether you use address or offset depends on whether the binary is PIE (that can be checked with the checksec tool).Approaches to static analysisWhen beginning a static analysis session, we typically adopt one of the following mindsets:Bottom-Up Approach: Starting at the smallest functions or system calls and working backward to see how they fit into the bigger pictureTop-Down Approach: Starting at main() or the entry point and following the broad logic branches downwardOutside-In Approach: Starting at known interactions (like GUI inputs, network sockets, or specific string references) and tracing how the program handles them (XREFs)Pattern-Recognition Approach: Recognizing standard compiler boilerplate, common library functions, or known algorithms without needing to read every instructionSignature matchingInstead of manually reading every line of code, we can use signatures to identify known, constant data within a binary.The true power of signatures lies in their ability to rapidly evaluate binaries at scale. Advanced signature engines can apply XOR operations and various transformations to the search patterns. This means that even if a binary has been tampered with or slightly obfuscated, you can still spot reused functions that you have already analyzed.Additionally, there are vast repositories of public signatures for various malware families that you can leverage out-of-the-box.Tools: Yara rules, FLIRT (FunctionID in Ghidra), Detect It EasyIn Ghidra, you can use the ghidra_yara plugin to generate custom rules directly from the code you are analyzing and scan the binary for existing rule matches. Or https://github.com/Neo23x0/yarGen that will extracts strings directly from the binary.Applying what we learned earlier about stack frames, we can write a simple YARA rule to detect standard x64 function prologues:rule detect_x64_function_prologues { meta: description = &quot;Detects x64 function prologues&quot; author = &quot;&quot; date = &quot;&quot; strings: // push rbp; mov rbp, rsp $prologue_standard = { 55 48 89 E5 } // push rbp; mov rbp, rsp; sub rsp, XX $prologue_alloc_short = { 55 48 89 E5 48 83 EC ?? } $prologue_alloc_long = { 55 48 89 E5 48 81 EC ?? ?? ?? ?? } // (no RBP save): sub rsp, XX $prologue_leaf_short = { 48 83 EC ?? } $prologue_leaf_long = { 48 81 EC ?? ?? ?? ?? } condition: any of them}By running YARA from the command line with the -s flag (which prints the matching strings and their locations)We can find the exact file offset of the match. We then add this offset to the binary&#39;s image base address in your disassembler to jump straight to the hidden or undocumented function.A Note on Ghidra ExtensionsI want to quickly mention a minor annoyance regarding Ghidra extensions. While they add incredible functionality, managing them can sometimes be frustrating.Because Ghidra updates frequently, older extensions will often refuse to load due to strict version matching. To keep your workflow intact after a Ghidra update, you will frequently need to recompile your extensions manually against your current installation.You can do this using the Gradle build system included in the extension’s directory:export GHIDRA_INSTALL_DIR=&quot;/&lt;yourpath&gt;/ghidra-public&quot;cd $EXTENSION_DIR # with build.grandle&quot;$GHIDRA_INSTALL_DIR/support/gradle/gradlew&quot; -PGHIDRA_INSTALL_DIR=&quot;$GHIDRA_INSTALL_DIR&quot;While YARA is fantastic for malware hunting and custom logic, FLIRT (Fast Library Identification and Recognition Technology) is designed specifically for a different problem: identifying statically linked library functions.When developers compile a program statically, standard C/C++ library functions (like printf, memcpy, or malloc) are embedded directly into the executable. Without debugging symbols, the disassembler has no idea what these are and will label them with generic names (e.g., FUN_00401020).FLIRT solves this by analyzing the raw bytes of these unknown functions and matching them against a massive database of known library signatures.While incredibly useful, byte-matching techniques are somewhat fragile. Because they rely on specific sequences of assembly, they can break easily. If the target binary was compiled with heavy optimizations (like -O3), or if it was written in modern, LLVM-backed languages like Rust, the resulting assembly structure changes drastically. In these scenarios, traditional signatures often fail to recognize the functions.Addictional resources:Anatomy of the Portable Executable (PE) Format - Deep HackingWhat Is Taint Analysis? A Guide for Developers and Security ResearchersDynamic binary instrumentation (DBI) with DynamoRioSolve equations and mathematical games with Z3 solverUnderstanding Inter-process Communication in Linux: Fork, Pipes, Shared Memory, and Message Queueshttps://quackie.at/files/reverse_engineering_rust_programs.pdfGitHub - BitR13x/GhidraSignatures: script that will load signatures from file and apply it into ghidra (string matching)GitHub - BitR13x/r2ai-workflow: AI workflow for radare2 - Connect to Ollama/NVIDIA-api models with context taken from binary function through radare2 (pdg/pdc ...)https://quackie.at/files/reverse_engineering_rust_programs.pdfConclusionWith these concepts, we are now have a solid foundation for diving into reverse engineering and static analysis.From the layers of abstraction — through basic hardware logic to how an operating system manages memory — compiled binaries don’t have to be a black box anymore. You know how processes are built, how to use Ghidra and more.At the end of the day, reverse engineering is really just solving a puzzle the compiler left behind. The best way to improve is to do your own research. Try writing some simple C programs (https://github.com/BitR13x/C-Reverse), compile them, and throw them straight into Ghidra to see exactly what they look like on the other side.If you enjoyed this article, clap and follow me! Thanks for reading, and I wish you the best luck on your journey👋.]]></summary></entry><entry><title type="html">Everything worth knowing about identity providers: OAuth and OpenID Connect</title><link href="/articles/everything-worth-knowing-about-identity-providers-oauth-and-openid-connect/" rel="alternate" type="text/html" title="Everything worth knowing about identity providers: OAuth and OpenID Connect" /><published>2026-01-01T00:00:00+00:00</published><updated>2026-01-01T00:00:00+00:00</updated><id>/articles/everything-worth-knowing-about-identity-providers-oauth-and-openid-connect</id><content type="html" xml:base="/articles/everything-worth-knowing-about-identity-providers-oauth-and-openid-connect/"><![CDATA[<p>This article defines identity providers (IdPs) and demonstrates how they function by constructing an OpenID connect (OIDC) from scratch. In addition, identify common potential weaknesses that might happen.</p><figure><img alt="" src="https://cdn-images-1.medium.com/max/900/0*Hf-wkrfJB2Wh8Gbz.png" /></figure><p>To avoid confusion, it is best to mention a little something about terminology:</p><p>Authentication: when user sign in without any privileges<br>Authorization: we assign the user privileges (write/read)<br>Client: usually is referred to an API or website that is trying to use the IDP</p><p>Keep in mind that my code does not have to be the best of the best, and you may be able to do better. I demonstrated how to easily integrate this technology into your tech stack.</p><p>if you are just looking for the full code:<br><a href="https://github.com/BitR13x/idp_provider">https://github.com/BitR13x/idp_provider</a></p><h3><strong>So what is that?</strong></h3><p>Have you ever heard of Single Sign-On (SSO), which uses Google, GitHub, and other services? That is essentially what OAuth and OpenID Connect are.</p><p>OAuth is an industry standard for authorizing a user to access third-party software. In other words, the user does not have to sign in several times with the same password to utilize each service.</p><figure><img alt="" src="https://cdn-images-1.medium.com/max/1024/1*BOw7rMADsc79KCM2Tsy4xw.png" /><figcaption>Simplified flow of authentication/authorization</figcaption></figure><p>This diagram depicts how the login is done in a basic manner; we are attempting to redirect authentication to (identity) provider.</p><h4>Difference between OAuth vs OIDC</h4><p>OAuth 2.0 (Authorization): Handles “What can you do?”</p><ul><li>You do not care about the user it self, you only care about what they can do.</li></ul><p>OIDC (Authentication): Handles “Who are you?”</p><ul><li>OIDC is extended OAuth, you care about the user, who is it?</li><li>Authentication + Authorization</li></ul><h3>How it really works?</h3><p>We will start from the login button:</p><p>1) Redirect</p><ul><li>The process begins when a user clicks “Login.”</li><li>Your application (client) doesn’t ask for a password. Instead, it redirects the user’s browser away from site to the OpenID Connect Provider (IdP).</li><li>User will login as usual</li></ul><p>2) Callback</p><ul><li>Once the user successfully logs in and approves the request</li><li>The IdP redirects the browser to a specific URL on your server — usually defined as /callback.</li><li>Attached to this URL is a short-lived (This code is not a key)</li></ul><p>3) Code for Token</p><ul><li>The application (client) sends code to the IdP and IdP sends back access token.</li></ul><p>4) Access Token</p><ul><li>With this token you can access the API’s</li></ul><figure><img alt="" src="https://cdn-images-1.medium.com/max/1024/1*PWLNCLPGCHzTADOvLE7m8g.png" /><figcaption>Diagram showing described flow</figcaption></figure><p>Perhaps you are wondering why we do not return the access token right away?</p><p>The difficulty is that you need to notify the program (client) that you have completed login, which is why the callback is required.</p><p>Why not append the access token directly to the URL? It is possible, but it is considered a security risk because it can be spoof, which is why an AuthCode is issued that is only valid for a certain time.</p><h3>Options for implementation</h3><h4>A few words on current options:</h4><ul><li>SaaS (Auth0, Okta, AWS Cognito)</li><li>Open Source (Keycloak, Ory Hydra)</li></ul><h4>Access tokens:</h4><p>Opaque Tokens — “Reference Tokens”</p><ul><li>The string is simply a pointer to a record in the database.</li></ul><p>Most providers give <strong>JWTs</strong> (JSON Web Tokens), which is why we will concentrate on them.</p><p>Here is an example of the token_id sent to the client:</p><pre>{<br>  &quot;iss&quot;: &quot;https://idp.example.com&quot;,<br>  &quot;sub&quot;: &quot;user_id&quot;,<br>  &quot;aud&quot;: &quot;client&quot;,<br>  &quot;exp&quot;: 1735689600,<br>  &quot;iat&quot;: 1735686000,<br>  &quot;nbf&quot;: 1735686000,<br>  &quot;jti/nonce&quot;: &quot;e9c1a2f4&quot;<br>}</pre><p>Jti, or nonce, protects against replay attacks (re-use of the same token); nonce is used to identify each token and is commonly used as a “kill switch”.</p><ul><li><strong>exp</strong> (expiration)</li><li><strong>iat</strong> (issued at)</li><li><strong>nbf</strong> (not valid before)</li></ul><h4>Login Page</h4><p>One option for smaller infrastructures is to build a login directly on the client and use the IdP as a “Auth provider.” This is less scalable than the standard approach of building a single login page for the IdP and redirecting the client to it.</p><h3>Implementation of IdP in elysia</h3><p>We will be focusing mostly on IdP endpoints because there are numerous methods for implementing database systems or deployments, among other things.</p><p>To begin, it is good practice to make explanation route:</p><pre>    .get(&#39;/.well-known/openid-configuration&#39;, () =&gt; {<br>        const issuer = config.oidc.issuer;<br>        return {<br>            issuer: issuer,<br>            authorization_endpoint: `${issuer}/authorize`,<br>            token_endpoint: `${issuer}/token`,<br>            userinfo_endpoint: `${issuer}/userinfo`,<br>            jwks_uri: `${issuer}/.well-known/jwks.json`,<br>            id_token_signing_alg_values_supported: [&#39;RS256&#39;],<br>            scopes_supported: [&#39;openid&#39;, &#39;default&#39;]<br>        };<br>    })</pre><p>This will introduce our routes, letting the client know where to authorize and obtain tokens.</p><p>Our goal will be implement these routes.</p><p>We’ll need to begin with:</p><h4>Token implementation</h4><p>JWT tokens use a variety of transportation algorithms, most notably HS256 and RS256.</p><p><strong>HS256</strong> is symmetrical and uses a simple <strong>secret</strong> to verify and decode, making it perfect for application authentication (which we will use later).</p><p><strong>RS256</strong>, on the other hand, uses <strong>public/private</strong> keys, which are required for cross-application verification; we simply generate these keys and disclose the public key.</p><pre># generating private/public key<br>openssl genpkey -algorithm RSA -out private.pem -pkeyopt rsa_keygen_bits:2048<br>openssl rsa -pubout -in private.pem -out public.pem</pre><pre>import * as jose from &#39;jose&#39;;<br>import { readFileSync } from &#39;fs&#39;;<br>import { join } from &#39;path&#39;;<br>import { config } from &#39;../config&#39;;<br><br>let privateKey: jose.KeyObject;<br>let publicKey: jose.KeyObject;<br>let jwks: { keys: jose.JWK[] };<br><br>export async const initializeKeys = () =&gt; {<br>    const privateKeyPath = join(import.meta.dir, &#39;../config/private.pem&#39;);<br>    const publicKeyPath = join(import.meta.dir, &#39;../config/public.pem&#39;);<br><br>    const privateKeyPEM = readFileSync(privateKeyPath, &#39;utf8&#39;);<br>    const publicKeyPEM = readFileSync(publicKeyPath, &#39;utf8&#39;);<br><br>    privateKey = await jose.importPKCS8(privateKeyPEM, &#39;RS256&#39;);<br>    publicKey = await jose.importSPKI(publicKeyPEM, &#39;RS256&#39;);<br><br>    const jwk = await jose.exportJWK(publicKey);<br>    jwk.kid = config.oidc.jwt.kid;<br>    jwk.use = &#39;sig&#39;;<br>    jwk.alg = &#39;RS256&#39;;<br><br>    jwks = {<br>        keys: [jwk]<br>    };<br>};<br><br>export const getPrivateKey = () =&gt; {<br>    return privateKey;<br>};<br><br>export const getJWKS = () =&gt; {<br>    return jwks;<br>};</pre><pre>    .get(&#39;/.well-known/jwks.json&#39;, () =&gt; {<br>        return getJWKS();<br>    })</pre><p>With that done we need to implement the authorize route:</p><h4>Authorize</h4><p>Here we need to define our database tables:</p><figure><img alt="" src="https://cdn-images-1.medium.com/max/333/1*zSK_RTmuAj0cBbZ2zxH-_Q.png" /><figcaption>Database tables</figcaption></figure><p>There isn’t much to surprise here. All we need to do for the client is declare the redirect URLs; otherwise, another vulnerability known as open redirect would occur.</p><p>This route must generate the AuthCode and return it to the callback, but we must ensure that everything we receive is correct.</p><p>Client:</p><pre>        const client = await clientRepo.findOneBy({ id: client_id });<br><br>        if (!client) {<br>            return status(400, &quot;Invalid client_id&quot;);<br>        }<br>        if (!client.redirect_uris.includes(redirect_uri)) {<br>            return status(400, &quot;Invalid redirect_uri&quot;);<br>        }</pre><p>User and scope</p><pre>        const requestedScopes = (scope || &#39;&#39;).split(&#39; &#39;);<br>        const allowed = requestedScopes.every(s =&gt; client.allowed_scopes.includes(s));<br>        if (!allowed) return status(400, &quot;Invalid scope&quot;);<br><br>        if (!user) {<br>            const currentUrl = request.url;<br>            return redirect(`/login?return_to=${encodeURIComponent(currentUrl)}`);<br>        };</pre><p>And define model:</p><pre>    .get(&#39;/authorize&#39;, async ({ query: { client_id, redirect_uri, scope, state, nonce }, redirect, status, user, request }) =&gt; {<br>        const clientRepo = AppDataSource.getRepository(Client);<br>        ...<br><br>        const code = uuidv4();<br>        await AuthCode.create({...}).save();<br>        ...<br><br>        // constructing url<br>        const redirectUrl = new URL(redirect_uri);<br>        redirectUrl.searchParams.set(&#39;code&#39;, code);<br>        if (state) redirectUrl.searchParams.set(&#39;state&#39;, state);<br><br>        return redirect(redirectUrl.toString());<br>    }, {<br>        query: t.Object({<br>            client_id: t.String(),<br>            redirect_uri: t.String(),<br>            scope: t.Optional(t.String()),<br>            state: t.Optional(t.String()),<br>            nonce: t.Optional(t.String())<br>        })<br>    })</pre><p>Models in Elysia are checkers (specify what we require for that specific route) and can be simply connected to Swagger or Openapi (api documentation).</p><p>The state guards against Cross-Site Request Forgery (CSRF) attacks.</p><p>The client will transmit it to the IdP and then verify that it is correct.<br>And now that we have virtually everything, all we need to do is generate tokens.</p><h4>Token generation</h4><p>This route will also need to check for the proper client (client id, secret) and code that we received (if it exists, expiration date, and if matching client id).</p><pre>        // ID Token (OIDC)<br>        const idToken = await new jose.SignJWT({<br>            sub: authCode.user.id,<br>            name: authCode.user.username,<br>            email: authCode.user.email,<br>            nonce: authCode.nonce,<br>            aud: client_id,<br>            iss: issuer,<br>        })<br>            .setProtectedHeader({ alg: &#39;RS256&#39;, kid: config.oidc.jwt.kid })<br>            .setIssuedAt()<br>            .setExpirationTime(config.oidc.jwt.idTokenExpiration)<br>            .sign(privateKey);<br><br>        // Access Token (OAuth2)<br>        const accessToken = await new jose.SignJWT({<br>            sub: authCode.user.id,<br>            scope: authCode.scope,<br>            aud: api_aud,<br>            iss: issuer<br>        })<br>            .setProtectedHeader({ alg: &#39;RS256&#39;, kid: config.oidc.jwt.kid })<br>            .setIssuedAt()<br>            .setExpirationTime(config.oidc.jwt.accessTokenExpiration)<br>            .sign(privateKey);</pre><p>This code is the main element of the route. It generates the tokens that the API will check using our public key, therefore we must sign it with our private key and set the appropriate parameters.</p><p>The ID token is intended for the front-end, whereas the access token grants us access to APIs.</p><p>However, you may have noticed that we only received a single aud for the access token, and we would need to repeat the authentication process, you are right.</p><p>We have several approaches that we can take:</p><ul><li>Super Token (listed as aud)</li><li>Separate Tokens (using the refresh token)</li></ul><p>The verification methodology for a refresh token is the same as for code; the refresh token is generated during the phase in which you get correct code.</p><pre>if (code) {<br>   ... // handle code<br>   remove code<br>} else if (refresh_token) {<br>   ... // handle refresh_token<br>   remove refresh_token<br>} else {<br>   return status(400, { error: &quot;unsupported_grant_type&quot; });<br>};<br><br>// generate access_token + token_id + refresh_token</pre><p>For sake of simplicity we will not focus on the this problem.</p><p>And instead use this version:</p><pre>    .post(&#39;/token&#39;, async ({ body: { client_id, client_secret, code }, error, request }) =&gt; {<br>        // Validate Client<br>        ...<br><br>        // Validate Code<br>        const authCode = await AuthCode.findOne({ <br>            where: { code },<br>            relations: [&quot;user&quot;, &quot;client&quot;]<br>        });<br>        ...<br><br>        // Generate Tokens<br>        ...<br>        await codeRepo.remove(authCode);<br><br>        return {<br>            access_token: accessToken,<br>            id_token: idToken,<br>            token_type: &#39;Bearer&#39;,<br>            expires_in: 7200<br>        };<br>    }, {<br>        body: t.Object({<br>            client_id: t.String(),<br>            client_secret: t.String(),<br>            code: t.String(),<br>            api_aud: t.String()<br>        })<br>    })</pre><p>We have now received a token on our client and may interact with the API.</p><p>The following path ‘/userinfo’, however it simply provides information about the logged user from the access_token, as the name implies.</p><p>There is still so-called “database garbage”. This is addressed via Expiration Management.</p><pre>DELETE FROM auth_code WHERE expiresAt &lt; NOW</pre><h3>API side of IdP</h3><p>We do not need to handle login/registration anymore; we can just focus on the tokens. We need to verify that the token is coming from the right source and that the signature is correct:</p><pre>import { createRemoteJWKSet, jwtVerify } from &#39;jose&#39;<br><br>export async function verifyAccessToken(token: string) {<br>  const JWKS = createRemoteJWKSet(<br>    new URL(`${ISSUER}/.well-known/jwks.json`)<br>  );<br><br>  const { payload } = await jwtVerify(token, JWKS, {<br>    issuer: ISSUER,<br>    audience: &#39;API-A&#39;<br>  })<br><br>  return payload<br>};</pre><p>We have now available this token:</p><pre>{<br>  sub: user.id,<br>  scope: scopes,<br>  aud: api_aud,<br>  iss: issuer<br>}</pre><p>Where issuer and audience is validated from “jose” library.</p><p>If you do not have access to these libraries, you must check the issuer and audience, and remember to get the public-key for signature verification from:</p><pre>const iss_url = `${ISSUER}/.well-known/jwks.json`</pre><p>We also set the protected-header during the token creation. This header contains:</p><ul><li><strong>alg</strong>: check protects against “alg: None” algorithm confusion attacks.</li><li><strong>kid</strong>: Token is using an anticipated key.</li><li><strong>type</strong>: token is the expected format.</li></ul><p>We now have the user’s ID, which we may manage as we see fit, as well as scope, which allows us to control what the user can do.</p><h3>Front-end side of IdP (React example)</h3><p>You must implement the ‘/callback’ that will receive the code and then send it to IdP via the ‘/token’ route.</p><p>With that, the login is completed.</p><p>It is quite basic. The only difficulty is that react uses DOM rendering, thus you need to use:</p><pre>window.location.pathname === &#39;/callback&#39;</pre><p>To decide if the current page is callback.<br>Redirect function that will be assigned on SSO button:</p><pre>export const loginWithRedirect = () =&gt; {<br>    const redirectUri = window.location.origin + &#39;/callback&#39;;<br>    const clientId = client_id;<br>    const audience = &#39;test_audience&#39;; // needs to match with API<br>    const scope = &#39;default&#39;;<br>    const responseType = &#39;code&#39;;<br><br>    const authUrl = `${IDP_VHOST}/authorize?` + <br>      `client_id=${encodeURIComponent(clientId)}&amp;` +<br>      `redirect_uri=${encodeURIComponent(redirectUri)}&amp;` +<br>      `response_type=${encodeURIComponent(responseType)}&amp;` +<br>      `scope=${encodeURIComponent(scope)}&amp;` +<br>      `audience=${encodeURIComponent(audience)}`;<br><br>    window.location.href = authUrl;<br>  }</pre><p>Main logic in the callback page will be just:</p><pre>const code = urlParams.get(&#39;code&#39;);<br>const response = await axios.post(`${IDP_VHOST}/token`, {<br>  client_id: client_id,<br>  client_secret: client_secret,<br>  code,<br>  api_aud: &#39;test_audience&#39;<br>});<br>const { access_token, id_token, refresh_token } = response.data;</pre><h3>Benefits</h3><ul><li>Scalable infrastructure (you can make several APIs operate together in harmony, leveraging the capabilities of frameworks)</li><li>Single Sign-On (SSO)</li></ul><h3>Disadvantages</h3><ul><li>Permissions require additional maintenance</li><li>Incorrect implementation may lead to vulnerabilities.</li></ul><h3>Attack surface in OAuth/OIDC</h3><p>Just a quick word on the topic of attack surface.</p><p>This topic is huge at it’s own we gone through a few of options already.</p><p>Identifying the attack surface is critical for assessing risk and determining where to hunt for vulnerabilities.</p><figure><img alt="" src="https://cdn-images-1.medium.com/max/1024/1*cgWtvJxFabM6l0-ZCwNqPg.png" /><figcaption>Diagram that shows part of attack surface</figcaption></figure><p>IdP can create a complex system where can be made a mistake pretty easily and it is good to know where to look for them.</p><h3>Conclusion</h3><p>Identity Providers built on OpenID standards play a huge role in modern digital ecosystems by delivering secure, interoperable, and user-centric authentication. By decoupling identity from individual applications.</p><p>OpenID-based IdPs reduce security risks in larger infrastucture, simplify access management, and enable seamless single sign-on across platforms. As organizations continue to adopt cloud services, APIs, and distributed architectures.</p><p>With everything said, you should be able to create your own IdP that can be used to integrate several applications and query them with a single login.</p><p>On top of that you know the most common vulnerabilies and why they can occure.</p><p>If you enjoyed this article, clap and follow me! Thanks for reading, and I wish you the best luck on your journey👋</p><img src="https://medium.com/_/stat?event=post.clientViewed&referrerSource=full_rss&postId=7a720bae73b1" width="1" height="1" alt="">]]></content><author><name>BitR13x</name></author><category term="typescript" /><category term="programming" /><category term="information-security" /><category term="javascript" /><category term="cybersecurity" /><summary type="html"><![CDATA[This article defines identity providers (IdPs) and demonstrates how they function by constructing an OpenID connect (OIDC) from scratch. In addition, identify common potential weaknesses that might happen.To avoid confusion, it is best to mention a little something about terminology:Authentication: when user sign in without any privilegesAuthorization: we assign the user privileges (write/read)Client: usually is referred to an API or website that is trying to use the IDPKeep in mind that my code does not have to be the best of the best, and you may be able to do better. I demonstrated how to easily integrate this technology into your tech stack.if you are just looking for the full code:https://github.com/BitR13x/idp_providerSo what is that?Have you ever heard of Single Sign-On (SSO), which uses Google, GitHub, and other services? That is essentially what OAuth and OpenID Connect are.OAuth is an industry standard for authorizing a user to access third-party software. In other words, the user does not have to sign in several times with the same password to utilize each service.Simplified flow of authentication/authorizationThis diagram depicts how the login is done in a basic manner; we are attempting to redirect authentication to (identity) provider.Difference between OAuth vs OIDCOAuth 2.0 (Authorization): Handles “What can you do?”You do not care about the user it self, you only care about what they can do.OIDC (Authentication): Handles “Who are you?”OIDC is extended OAuth, you care about the user, who is it?Authentication + AuthorizationHow it really works?We will start from the login button:1) RedirectThe process begins when a user clicks “Login.”Your application (client) doesn’t ask for a password. Instead, it redirects the user’s browser away from site to the OpenID Connect Provider (IdP).User will login as usual2) CallbackOnce the user successfully logs in and approves the requestThe IdP redirects the browser to a specific URL on your server — usually defined as /callback.Attached to this URL is a short-lived (This code is not a key)3) Code for TokenThe application (client) sends code to the IdP and IdP sends back access token.4) Access TokenWith this token you can access the API’sDiagram showing described flowPerhaps you are wondering why we do not return the access token right away?The difficulty is that you need to notify the program (client) that you have completed login, which is why the callback is required.Why not append the access token directly to the URL? It is possible, but it is considered a security risk because it can be spoof, which is why an AuthCode is issued that is only valid for a certain time.Options for implementationA few words on current options:SaaS (Auth0, Okta, AWS Cognito)Open Source (Keycloak, Ory Hydra)Access tokens:Opaque Tokens — “Reference Tokens”The string is simply a pointer to a record in the database.Most providers give JWTs (JSON Web Tokens), which is why we will concentrate on them.Here is an example of the token_id sent to the client:{ &quot;iss&quot;: &quot;https://idp.example.com&quot;, &quot;sub&quot;: &quot;user_id&quot;, &quot;aud&quot;: &quot;client&quot;, &quot;exp&quot;: 1735689600, &quot;iat&quot;: 1735686000, &quot;nbf&quot;: 1735686000, &quot;jti/nonce&quot;: &quot;e9c1a2f4&quot;}Jti, or nonce, protects against replay attacks (re-use of the same token); nonce is used to identify each token and is commonly used as a “kill switch”.exp (expiration)iat (issued at)nbf (not valid before)Login PageOne option for smaller infrastructures is to build a login directly on the client and use the IdP as a “Auth provider.” This is less scalable than the standard approach of building a single login page for the IdP and redirecting the client to it.Implementation of IdP in elysiaWe will be focusing mostly on IdP endpoints because there are numerous methods for implementing database systems or deployments, among other things.To begin, it is good practice to make explanation route: .get(&#39;/.well-known/openid-configuration&#39;, () =&gt; { const issuer = config.oidc.issuer; return { issuer: issuer, authorization_endpoint: `${issuer}/authorize`, token_endpoint: `${issuer}/token`, userinfo_endpoint: `${issuer}/userinfo`, jwks_uri: `${issuer}/.well-known/jwks.json`, id_token_signing_alg_values_supported: [&#39;RS256&#39;], scopes_supported: [&#39;openid&#39;, &#39;default&#39;] }; })This will introduce our routes, letting the client know where to authorize and obtain tokens.Our goal will be implement these routes.We’ll need to begin with:Token implementationJWT tokens use a variety of transportation algorithms, most notably HS256 and RS256.HS256 is symmetrical and uses a simple secret to verify and decode, making it perfect for application authentication (which we will use later).RS256, on the other hand, uses public/private keys, which are required for cross-application verification; we simply generate these keys and disclose the public key.# generating private/public keyopenssl genpkey -algorithm RSA -out private.pem -pkeyopt rsa_keygen_bits:2048openssl rsa -pubout -in private.pem -out public.pemimport * as jose from &#39;jose&#39;;import { readFileSync } from &#39;fs&#39;;import { join } from &#39;path&#39;;import { config } from &#39;../config&#39;;let privateKey: jose.KeyObject;let publicKey: jose.KeyObject;let jwks: { keys: jose.JWK[] };export async const initializeKeys = () =&gt; { const privateKeyPath = join(import.meta.dir, &#39;../config/private.pem&#39;); const publicKeyPath = join(import.meta.dir, &#39;../config/public.pem&#39;); const privateKeyPEM = readFileSync(privateKeyPath, &#39;utf8&#39;); const publicKeyPEM = readFileSync(publicKeyPath, &#39;utf8&#39;); privateKey = await jose.importPKCS8(privateKeyPEM, &#39;RS256&#39;); publicKey = await jose.importSPKI(publicKeyPEM, &#39;RS256&#39;); const jwk = await jose.exportJWK(publicKey); jwk.kid = config.oidc.jwt.kid; jwk.use = &#39;sig&#39;; jwk.alg = &#39;RS256&#39;; jwks = { keys: [jwk] };};export const getPrivateKey = () =&gt; { return privateKey;};export const getJWKS = () =&gt; { return jwks;}; .get(&#39;/.well-known/jwks.json&#39;, () =&gt; { return getJWKS(); })With that done we need to implement the authorize route:AuthorizeHere we need to define our database tables:Database tablesThere isn’t much to surprise here. All we need to do for the client is declare the redirect URLs; otherwise, another vulnerability known as open redirect would occur.This route must generate the AuthCode and return it to the callback, but we must ensure that everything we receive is correct.Client: const client = await clientRepo.findOneBy({ id: client_id }); if (!client) { return status(400, &quot;Invalid client_id&quot;); } if (!client.redirect_uris.includes(redirect_uri)) { return status(400, &quot;Invalid redirect_uri&quot;); }User and scope const requestedScopes = (scope || &#39;&#39;).split(&#39; &#39;); const allowed = requestedScopes.every(s =&gt; client.allowed_scopes.includes(s)); if (!allowed) return status(400, &quot;Invalid scope&quot;); if (!user) { const currentUrl = request.url; return redirect(`/login?return_to=${encodeURIComponent(currentUrl)}`); };And define model: .get(&#39;/authorize&#39;, async ({ query: { client_id, redirect_uri, scope, state, nonce }, redirect, status, user, request }) =&gt; { const clientRepo = AppDataSource.getRepository(Client); ... const code = uuidv4(); await AuthCode.create({...}).save(); ... // constructing url const redirectUrl = new URL(redirect_uri); redirectUrl.searchParams.set(&#39;code&#39;, code); if (state) redirectUrl.searchParams.set(&#39;state&#39;, state); return redirect(redirectUrl.toString()); }, { query: t.Object({ client_id: t.String(), redirect_uri: t.String(), scope: t.Optional(t.String()), state: t.Optional(t.String()), nonce: t.Optional(t.String()) }) })Models in Elysia are checkers (specify what we require for that specific route) and can be simply connected to Swagger or Openapi (api documentation).The state guards against Cross-Site Request Forgery (CSRF) attacks.The client will transmit it to the IdP and then verify that it is correct.And now that we have virtually everything, all we need to do is generate tokens.Token generationThis route will also need to check for the proper client (client id, secret) and code that we received (if it exists, expiration date, and if matching client id). // ID Token (OIDC) const idToken = await new jose.SignJWT({ sub: authCode.user.id, name: authCode.user.username, email: authCode.user.email, nonce: authCode.nonce, aud: client_id, iss: issuer, }) .setProtectedHeader({ alg: &#39;RS256&#39;, kid: config.oidc.jwt.kid }) .setIssuedAt() .setExpirationTime(config.oidc.jwt.idTokenExpiration) .sign(privateKey); // Access Token (OAuth2) const accessToken = await new jose.SignJWT({ sub: authCode.user.id, scope: authCode.scope, aud: api_aud, iss: issuer }) .setProtectedHeader({ alg: &#39;RS256&#39;, kid: config.oidc.jwt.kid }) .setIssuedAt() .setExpirationTime(config.oidc.jwt.accessTokenExpiration) .sign(privateKey);This code is the main element of the route. It generates the tokens that the API will check using our public key, therefore we must sign it with our private key and set the appropriate parameters.The ID token is intended for the front-end, whereas the access token grants us access to APIs.However, you may have noticed that we only received a single aud for the access token, and we would need to repeat the authentication process, you are right.We have several approaches that we can take:Super Token (listed as aud)Separate Tokens (using the refresh token)The verification methodology for a refresh token is the same as for code; the refresh token is generated during the phase in which you get correct code.if (code) { ... // handle code remove code} else if (refresh_token) { ... // handle refresh_token remove refresh_token} else { return status(400, { error: &quot;unsupported_grant_type&quot; });};// generate access_token + token_id + refresh_tokenFor sake of simplicity we will not focus on the this problem.And instead use this version: .post(&#39;/token&#39;, async ({ body: { client_id, client_secret, code }, error, request }) =&gt; { // Validate Client ... // Validate Code const authCode = await AuthCode.findOne({ where: { code }, relations: [&quot;user&quot;, &quot;client&quot;] }); ... // Generate Tokens ... await codeRepo.remove(authCode); return { access_token: accessToken, id_token: idToken, token_type: &#39;Bearer&#39;, expires_in: 7200 }; }, { body: t.Object({ client_id: t.String(), client_secret: t.String(), code: t.String(), api_aud: t.String() }) })We have now received a token on our client and may interact with the API.The following path ‘/userinfo’, however it simply provides information about the logged user from the access_token, as the name implies.There is still so-called “database garbage”. This is addressed via Expiration Management.DELETE FROM auth_code WHERE expiresAt &lt; NOWAPI side of IdPWe do not need to handle login/registration anymore; we can just focus on the tokens. We need to verify that the token is coming from the right source and that the signature is correct:import { createRemoteJWKSet, jwtVerify } from &#39;jose&#39;export async function verifyAccessToken(token: string) { const JWKS = createRemoteJWKSet( new URL(`${ISSUER}/.well-known/jwks.json`) ); const { payload } = await jwtVerify(token, JWKS, { issuer: ISSUER, audience: &#39;API-A&#39; }) return payload};We have now available this token:{ sub: user.id, scope: scopes, aud: api_aud, iss: issuer}Where issuer and audience is validated from “jose” library.If you do not have access to these libraries, you must check the issuer and audience, and remember to get the public-key for signature verification from:const iss_url = `${ISSUER}/.well-known/jwks.json`We also set the protected-header during the token creation. This header contains:alg: check protects against “alg: None” algorithm confusion attacks.kid: Token is using an anticipated key.type: token is the expected format.We now have the user’s ID, which we may manage as we see fit, as well as scope, which allows us to control what the user can do.Front-end side of IdP (React example)You must implement the ‘/callback’ that will receive the code and then send it to IdP via the ‘/token’ route.With that, the login is completed.It is quite basic. The only difficulty is that react uses DOM rendering, thus you need to use:window.location.pathname === &#39;/callback&#39;To decide if the current page is callback.Redirect function that will be assigned on SSO button:export const loginWithRedirect = () =&gt; { const redirectUri = window.location.origin + &#39;/callback&#39;; const clientId = client_id; const audience = &#39;test_audience&#39;; // needs to match with API const scope = &#39;default&#39;; const responseType = &#39;code&#39;; const authUrl = `${IDP_VHOST}/authorize?` + `client_id=${encodeURIComponent(clientId)}&amp;` + `redirect_uri=${encodeURIComponent(redirectUri)}&amp;` + `response_type=${encodeURIComponent(responseType)}&amp;` + `scope=${encodeURIComponent(scope)}&amp;` + `audience=${encodeURIComponent(audience)}`; window.location.href = authUrl; }Main logic in the callback page will be just:const code = urlParams.get(&#39;code&#39;);const response = await axios.post(`${IDP_VHOST}/token`, { client_id: client_id, client_secret: client_secret, code, api_aud: &#39;test_audience&#39;});const { access_token, id_token, refresh_token } = response.data;BenefitsScalable infrastructure (you can make several APIs operate together in harmony, leveraging the capabilities of frameworks)Single Sign-On (SSO)DisadvantagesPermissions require additional maintenanceIncorrect implementation may lead to vulnerabilities.Attack surface in OAuth/OIDCJust a quick word on the topic of attack surface.This topic is huge at it’s own we gone through a few of options already.Identifying the attack surface is critical for assessing risk and determining where to hunt for vulnerabilities.Diagram that shows part of attack surfaceIdP can create a complex system where can be made a mistake pretty easily and it is good to know where to look for them.ConclusionIdentity Providers built on OpenID standards play a huge role in modern digital ecosystems by delivering secure, interoperable, and user-centric authentication. By decoupling identity from individual applications.OpenID-based IdPs reduce security risks in larger infrastucture, simplify access management, and enable seamless single sign-on across platforms. As organizations continue to adopt cloud services, APIs, and distributed architectures.With everything said, you should be able to create your own IdP that can be used to integrate several applications and query them with a single login.On top of that you know the most common vulnerabilies and why they can occure.If you enjoyed this article, clap and follow me! Thanks for reading, and I wish you the best luck on your journey👋]]></summary></entry><entry><title type="html">Google search engine: PageRank, webcrawling and own search engine for directories</title><link href="/articles/google-search-engine-pagerank-webcrawling-and-own-search-engine-for-directories/" rel="alternate" type="text/html" title="Google search engine: PageRank, webcrawling and own search engine for directories" /><published>2025-08-11T00:00:00+00:00</published><updated>2025-08-11T00:00:00+00:00</updated><id>/articles/google-search-engine-pagerank-webcrawling-and-own-search-engine-for-directories</id><content type="html" xml:base="/articles/google-search-engine-pagerank-webcrawling-and-own-search-engine-for-directories/"><![CDATA[<p>One of these days, I began to wonder how Google was able to establish itself as the most popular search engine, what is behind Google, and how he obtained such a large number of URLs.</p><figure><img alt="" src="https://cdn-images-1.medium.com/max/973/1*hf7j5I7jsVw5w1hkOQXhNA.png" /></figure><p>Behind google is complex system and there is lot of caching:</p><ul><li>Crawl + Index High-PageRank URLs</li><li>Preprocessing via LLMs (e.g., BERT, MUM)</li><li>Candidate Document Retrieval</li><li>Neural Matching &amp; RankBrain Filtering</li><li>Ranking Function (Weighted Scoring)</li></ul><p>And I’d like to start at the top and work my way down.</p><h3>One step at a time</h3><p>The first question I asked myself was how Google truly acquires the URLs, because crawling requires at least one URL and does not guarantee that you will get all URLs, and what if the missing URL has the solution you were searching for?</p><figure><img alt="" src="https://cdn-images-1.medium.com/max/566/0*S6bBXbIs4DrLAk9l" /></figure><p>Google uses a variety of sources, including seed URLs (gov, edu, and media), recursive crawling (link discovery — google bot), user contribution via API, and direct ingest from partner APIs or curated sources.</p><p>If we have pages we can search for information. Keyword matching was previously employed in a variety of ways, but Google now uses AI to determine what you’re looking for, such as <a href="https://backlinko.com/google-rankbrain-seo">RankBrain</a>, Neural Matching, and LLMs.</p><h3>Crawling</h3><p>Building your own bot to tour the internet is not a tough effort if you know how to use Python; all you have to do is request a URL and check for an element with a link, then do it recursively. It’s another story if you want it to be efficient and multi-threaded.</p><p>A good example of crawler is <a href="https://github.com/jaeles-project/gospider">gospider</a></p><h3>PageRank</h3><p>Google’s success can be attributed to the Markov chain, which is formed into PageRank.</p><p>By “formed,” I mean that it derives from a Markov chain and the key idea behind <strong>PageRank</strong> is to measure the importance of a webpage in simple words.</p><p>The difference between them is that transition probability is calculated from links and teleportation step (don’t worry, it’s math, but not that difficult).</p><figure><img alt="" src="https://cdn-images-1.medium.com/max/902/1*oxAbAjEHlRZdYjH0ScmFFg.png" /><figcaption>Graph of websites (A-F)</figcaption></figure><p><strong>Transition probability</strong> is declared by outgoing links.<br>When we look at page “A”, we can see that page has 2 outgoing links so the transition probability row is:</p><p>** A - B - C - D - E - F<br>A: [0, .5, 0.5, 0, 0, 0]</p><p>For example: P(B|A) = 1/N = 1/2 = 0.5</p><p>why 0s, because the probability of getting for example to the page A is 0.</p><p>Full transition probability matrix would look like this:</p><pre>     A    B    C     D    E    F<br>A [  0,  0.5, 0.5,   0,   0,   0 ]<br>B [  0,    0, 0.5, 0.5,   0,   0 ]<br>C [  1,    0,   0,   0,   0,   0 ]<br>D [  0,    0, 0.5,   0, 0.5,   0 ]<br>E [  0,    0, 0.5,   0,   0, 0.5 ]<br>F [  0,    0, 1.0,   0,   0,   0 ]</pre><p><strong>Page rank vector</strong> (π) is declared by random state, because after while it converges(reach) to a number, size of page rank vector is number of pages.</p><figure><img alt="" src="https://cdn-images-1.medium.com/max/294/1*6mb4V0pEzSsnM0BvKimG_w.png" /><figcaption>Formula for PageRank</figcaption></figure><p>Where next iteration of rank vector is dot product (previous state and transition probability).</p><p>This is calculated until change is lower then tolerable threshold.</p><h4>Teleportation</h4><p>With that explained, there is one more tiny thing to perform to solve problems such as a person becoming stranded on the internet or sporadically switching pages.</p><p>During the calculating procedure, there is a random state known as the dumping factor.</p><p>P’ = αP + (1 — α)E<br>where:<br>- E = matrix where elements “1/N” (size of P)<br>- α = dumping factor usually “0.85”<br>- P = transition probability</p><p>If you are interested in seeing more or just formal explanation about PageRank I recommend <a href="https://www.youtube.com/watch?v=JGQe4kiPnrU">this video</a>.</p><p>Note a little bit out of context: do not get stuck at the idea of just the webpage, <a href="https://www.youtube.com/watch?v=KZeIEiBrT_w">Markov chain</a> is powerful thing and is also used in AI for predicting next word. If you understand PageRank then you understand Markov chain.</p><h3>RankBrain</h3><p>RankBrain is one of Google’s top 3 ranking factors (along with backlinks[PageRank] &amp; content relevance,).</p><p>In high point of view you can see search like this:</p><blockquote>Query → Query Interpretation (vectorization, context) → Search Similar → Rank → Return</blockquote><p><strong>RankBrain</strong> cooperates with <strong>LLM</strong> (BART or similar), RankBrain will <strong>calculate similarity</strong> to reduce number of results and forward it into the LLM to find perfect match.</p><p>To understand more and apply this knowledge, I chose to create a custom file search that uses RankBrain and LLM to match correct files or directories.</p><p>As our small RankBrain I will be using <a href="https://github.com/facebookresearch">FAISS</a> (<strong>Facebook AI Similarity Search</strong>), it is a library for fast nearest-neighbor search in large vector collections.</p><p>This library include two approaches on searching the large vector collection:</p><ul><li>IndexFlatIP: Exact search using <strong>dot product</strong> similarity.</li><li>IndexHNSWFlat: Approximate search using <strong>Hierarchical Navigable Small World (HNSW)</strong> graphs with flat storage.</li></ul><p>The main idea behind is that FlatIP is focused on accuracy and HNSWFlat is focused on speed.</p><p>next on the list is LLM, this LLM needs to be focused on ranking (giving score for a match) for this I choose CrossEncoder specially model ms-marco-MiniLM-L-6-v2 .</p><h3>Applying this knowledge to create custom file search</h3><p>Whole project can be found on github <a href="https://github.com/BitR13x/MiniRankBrain">here</a>.</p><p>I started with classic file retrieval and used docs to create script that look like this:</p><pre>from sentence_transformers import SentenceTransformer, CrossEncoder<br>import faiss<br>import numpy as np<br><br><br># Load sample documents<br>def read_files_from_dir(dir_path: str):<br>    for root, _, files in os.walk(dir_path):<br>        for file in files:<br>            yield root + &quot;/&quot; + file<br><br><br>dir_path = os.environ[&#39;HOME&#39;]<br>documents = [file for file in read_files_from_dir(dir_path)]<br><br># Encode documents<br>encoder = SentenceTransformer(&#39;all-MiniLM-L6-v2&#39;)<br>doc_vectors = encoder.encode(documents, normalize_embeddings=True)<br><br># Create FAISS index<br>dimension = doc_vectors.shape[1]<br>index = faiss.IndexFlatIP(dimension)<br>index.add(doc_vectors)<br>doc_map = {i: doc for i, doc in enumerate(documents)}<br><br><br>def search_docs(request):<br>    query_vector = encoder.encode([request.query], normalize_embeddings=True)<br>    D, I = index.search(np.array(query_vector), request.top_k)<br><br>    candidates = [doc_map[i] for i in I[0]]<br>    pairs = [(request.query, doc) for doc in candidates]<br>    scores = cross_encoder.predict(pairs)<br><br>    reranked_docs = [doc for _, doc in sorted(zip(scores, candidates), reverse=True)]<br><br>    return QueryResponse(query=request.query, results=reranked_docs)<br><br>print(search_docs({query: &quot;idek attachments&quot;}))</pre><h4>Reading files and directories</h4><p>Quickly I realized kind of hard or impossible problem to solve “performance”, because looping home directory isn’t that good idea as I thought.</p><figure><img alt="" src="https://cdn-images-1.medium.com/max/1024/1*npjOxoJbJXjp0SM4lbDLgA.png" /><figcaption>Number of files in my home directory</figcaption></figure><p>We will be looping around millions of files and we are still in python even in C/++, rust and in other high performance language it still takes around 25 seconds to loop the files and we do not only want to loop it but also encode it into vectors. Well it’s a great start I guess.</p><p>So clearly we need to be more smarter then looping though home directory we need relevance, multiprocessing and caching.</p><p>So I started with the <em>read_directories </em>function that will loop directories when I look back I should just recreate it in C and import it into python, but end up with a much more faster version (compared to single threaded in python) that is using multiprocessing:</p><pre>def read_dirs_from_dir(dir_path: str, max_workers=8):<br>    &quot;&quot;&quot;Yield directories under dir_path as soon as they are found.&quot;&quot;&quot;<br>    base_path = Path(dir_path)<br>    with ThreadPoolExecutor(max_workers=max_workers) as executor:<br>        futures = {executor.submit(scan_dirs, base_path): base_path}<br><br>        while futures:<br>            for future in as_completed(futures.keys()):<br>                futures.pop(future)<br>                try:<br>                    subdirs = future.result()<br>                except OSError:<br>                    # future does not exist<br>                    continue<br><br>                for subdir in subdirs:<br>                    yield str(subdir)<br>                    futures[executor.submit(scan_dirs, subdir)] = subdir</pre><p>Then implemented with similar logic <em>read_files</em> function, but I wanted to add some context to them, so I read 200 bytes from the file, and if it’s a programming language file, I get a function list using regex:</p><pre>def read_n_bytes_from_file(file_path: Path, n: int) -&gt; bytes:<br>    try:<br>        with file_path.open(&quot;rb&quot;) as f:<br>            return f&quot;{str(file_path)}: {f.read(n).decode(&#39;utf-8&#39;, errors=&#39;ignore&#39;)}&quot;<br>    except OSError:<br>        # binary file (cannot decode bytes)<br>        return f&quot;{str(file_path)}: &#39;&#39;&quot;<br><br><br>def process_file(file_path: Path) -&gt; tuple[str, str]:<br>    &quot;&quot;&quot;Return (file_path, text).&quot;&quot;&quot;<br>    ext = file_path.suffix.lstrip(&quot;.&quot;).lower()<br>    regex = COMPILED_PATTERNS.get(ext)<br>    if regex:<br>        return str(file_path), extract_functions_from_file(file_path, regex, ext)<br>    else:<br>        return read_n_bytes_from_file(file_path, 200)</pre><h4>Caching, batching and indexing</h4><p>Okay from this point we got some solid functions for reading files, but we will have memory issues when it comes to large lists of files. So next is caching, I end up creating sqlite3 database.</p><pre>def create_connection(database_path: str = &quot;documents.db&quot;, first_time: bool = False):<br>    cx = sqlite3.connect(database_path)<br>    cu = cx.cursor()<br>    cu.execute(&quot;ATTACH DATABASE &#39;cache.db&#39; AS cache&quot;)<br>    if first_time:<br>        clear_cache(cu, clear_all=True)<br>        create_cache(cu)<br>    return cx, cu<br></pre><p>definitely I didn’t planning to open connecting for every file/directory found So the next step is to break the files/directories into batches and then enter them into the database using pickle and base64; during this process, I also began indexing them in the FAISS index.</p><pre># init cache<br>cx, cu = create_connection(first_time=True)<br>cx.close()<br><br>def index_strings(encoder, dir_path: str, table: str, read_func, index, batch_size=3000, max_workers=8):<br>    &quot;&quot;&quot;indexing in parallel with FAISS&quot;&quot;&quot;<br>    def save_and_clear():<br>        vectors = encoder.encode(batch_buffer, normalize_embeddings=True)<br>        index.add(np.array(vectors, dtype=np.float32))<br><br>        # cache - 3000<br>        cx, cu = create_connection()<br>        <br>        # just database query insert to table<br>        insert_cache(cx, cu, b64e(pickle.dumps(batch_buffer)), table)<br>        cx.close()<br><br>        batch_buffer.clear()<br><br>        # run garbage collection after batch<br>        gc.collect()<br><br>    batch_buffer = []<br><br>    for string in read_func(dir_path, max_workers=max_workers):<br>        batch_buffer.append(string)<br><br>        if len(batch_buffer) &gt;= batch_size:<br>            save_and_clear()<br><br>    if batch_buffer:<br>        save_and_clear()</pre><p>The reason for exiting the database at the start is that we are going to run a multiprocessing function, and if we get a connection in a different thread, we will run into a lot of problems, so we need to create a new connection for each thread.</p><p>I also made this function into general purpose in order to swap type of index at the fly.</p><h4>Only batching</h4><p>Now we could have used the rest of the code from the beginning, but hold on, we must figure out the batching from database.</p><p>It’s small normalization, but painful to be honest:</p><pre>def batch_normalization(candidates, I):<br>    indices = []<br>    for i in I[0]:<br>        tmp = int((i // BATCH_SIZE) + 1)<br>        if not tmp in indices:<br>            indices.append(tmp)<br><br>    candidates = get_docs_by_ids(cu, indices, &quot;cache.directories&quot;)<br>    valid_candidates = []<br>    for c, index in zip(candidates, indices):<br>        for i in I[0]:<br>            if int((i // BATCH_SIZE) + 1) == index:<br>                candidate = pickle.loads(b64d(c.encode(&quot;utf-8&quot;)))[i % BATCH_SIZE]<br>                valid_candidates.append(candidate)<br><br>    return valid_candidates</pre><p>The problem here is that database starts from index 1 instead of 0 and we need to find the correct batch using:</p><pre># F_index from FAISS starts from 0<br>F_index // BATCH_SIZE + 1<br><br>BATCH_SIZE # just our batch size<br><br># this will get from the n file/directory<br>i % BATCH_SIZE<br># i = index of the array saved that&#39;s why not again +1<br><br># F_index = 4532, BATCH_SIZE = 2000<br># to query: 4532 // 2000 (+1) = 2 (+ 1) we get correct batch<br># then correct position [532] = [4532 % 2000]</pre><p>At the end I’ve wrapped it into web interface:</p><figure><img alt="" src="https://cdn-images-1.medium.com/max/1024/1*DolLK023FpPZhz_kSsBYQQ.png" /><figcaption>Results of search</figcaption></figure><figure><img alt="" src="https://cdn-images-1.medium.com/max/1024/1*v1KAN-9k7NELdg-E2icG3Q.png" /><figcaption>Indices and unsorted results</figcaption></figure><h3>Conclusion and final words</h3><p>Still it’s far from good optimization, because even 2411 directories took 13 seconds, but it was interesting experience.</p><p>Some potential upgrades include rewriting into rust or just a few functions into C, and to not loop without relevance for example each folder is known for some purpose (.git, node_moduls, vendor) and git repositories have usually README.md, the name can tell you whether it is worth continuing or not.</p><p>I was planning to also use summaries from models to add more context, but even looping directories took a lot of time so it’s just left it there and not used.</p><p>If you enjoyed this article, clap and follow me! Thanks for reading, and I wish you the best luck on your journey👋.</p><img src="https://medium.com/_/stat?event=post.clientViewed&referrerSource=full_rss&postId=052517cb2a3b" width="1" height="1" alt="">]]></content><author><name>BitR13x</name></author><category term="ai" /><category term="rankbrain" /><category term="llm" /><category term="google" /><category term="programming" /><summary type="html"><![CDATA[One of these days, I began to wonder how Google was able to establish itself as the most popular search engine, what is behind Google, and how he obtained such a large number of URLs.Behind google is complex system and there is lot of caching:Crawl + Index High-PageRank URLsPreprocessing via LLMs (e.g., BERT, MUM)Candidate Document RetrievalNeural Matching &amp; RankBrain FilteringRanking Function (Weighted Scoring)And I’d like to start at the top and work my way down.One step at a timeThe first question I asked myself was how Google truly acquires the URLs, because crawling requires at least one URL and does not guarantee that you will get all URLs, and what if the missing URL has the solution you were searching for?Google uses a variety of sources, including seed URLs (gov, edu, and media), recursive crawling (link discovery — google bot), user contribution via API, and direct ingest from partner APIs or curated sources.If we have pages we can search for information. Keyword matching was previously employed in a variety of ways, but Google now uses AI to determine what you’re looking for, such as RankBrain, Neural Matching, and LLMs.CrawlingBuilding your own bot to tour the internet is not a tough effort if you know how to use Python; all you have to do is request a URL and check for an element with a link, then do it recursively. It’s another story if you want it to be efficient and multi-threaded.A good example of crawler is gospiderPageRankGoogle’s success can be attributed to the Markov chain, which is formed into PageRank.By “formed,” I mean that it derives from a Markov chain and the key idea behind PageRank is to measure the importance of a webpage in simple words.The difference between them is that transition probability is calculated from links and teleportation step (don’t worry, it’s math, but not that difficult).Graph of websites (A-F)Transition probability is declared by outgoing links.When we look at page “A”, we can see that page has 2 outgoing links so the transition probability row is:** A - B - C - D - E - FA: [0, .5, 0.5, 0, 0, 0]For example: P(B|A) = 1/N = 1/2 = 0.5why 0s, because the probability of getting for example to the page A is 0.Full transition probability matrix would look like this: A B C D E FA [ 0, 0.5, 0.5, 0, 0, 0 ]B [ 0, 0, 0.5, 0.5, 0, 0 ]C [ 1, 0, 0, 0, 0, 0 ]D [ 0, 0, 0.5, 0, 0.5, 0 ]E [ 0, 0, 0.5, 0, 0, 0.5 ]F [ 0, 0, 1.0, 0, 0, 0 ]Page rank vector (π) is declared by random state, because after while it converges(reach) to a number, size of page rank vector is number of pages.Formula for PageRankWhere next iteration of rank vector is dot product (previous state and transition probability).This is calculated until change is lower then tolerable threshold.TeleportationWith that explained, there is one more tiny thing to perform to solve problems such as a person becoming stranded on the internet or sporadically switching pages.During the calculating procedure, there is a random state known as the dumping factor.P’ = αP + (1 — α)Ewhere:- E = matrix where elements “1/N” (size of P)- α = dumping factor usually “0.85”- P = transition probabilityIf you are interested in seeing more or just formal explanation about PageRank I recommend this video.Note a little bit out of context: do not get stuck at the idea of just the webpage, Markov chain is powerful thing and is also used in AI for predicting next word. If you understand PageRank then you understand Markov chain.RankBrainRankBrain is one of Google’s top 3 ranking factors (along with backlinks[PageRank] &amp; content relevance,).In high point of view you can see search like this:Query → Query Interpretation (vectorization, context) → Search Similar → Rank → ReturnRankBrain cooperates with LLM (BART or similar), RankBrain will calculate similarity to reduce number of results and forward it into the LLM to find perfect match.To understand more and apply this knowledge, I chose to create a custom file search that uses RankBrain and LLM to match correct files or directories.As our small RankBrain I will be using FAISS (Facebook AI Similarity Search), it is a library for fast nearest-neighbor search in large vector collections.This library include two approaches on searching the large vector collection:IndexFlatIP: Exact search using dot product similarity.IndexHNSWFlat: Approximate search using Hierarchical Navigable Small World (HNSW) graphs with flat storage.The main idea behind is that FlatIP is focused on accuracy and HNSWFlat is focused on speed.next on the list is LLM, this LLM needs to be focused on ranking (giving score for a match) for this I choose CrossEncoder specially model ms-marco-MiniLM-L-6-v2 .Applying this knowledge to create custom file searchWhole project can be found on github here.I started with classic file retrieval and used docs to create script that look like this:from sentence_transformers import SentenceTransformer, CrossEncoderimport faissimport numpy as np# Load sample documentsdef read_files_from_dir(dir_path: str): for root, _, files in os.walk(dir_path): for file in files: yield root + &quot;/&quot; + filedir_path = os.environ[&#39;HOME&#39;]documents = [file for file in read_files_from_dir(dir_path)]# Encode documentsencoder = SentenceTransformer(&#39;all-MiniLM-L6-v2&#39;)doc_vectors = encoder.encode(documents, normalize_embeddings=True)# Create FAISS indexdimension = doc_vectors.shape[1]index = faiss.IndexFlatIP(dimension)index.add(doc_vectors)doc_map = {i: doc for i, doc in enumerate(documents)}def search_docs(request): query_vector = encoder.encode([request.query], normalize_embeddings=True) D, I = index.search(np.array(query_vector), request.top_k) candidates = [doc_map[i] for i in I[0]] pairs = [(request.query, doc) for doc in candidates] scores = cross_encoder.predict(pairs) reranked_docs = [doc for _, doc in sorted(zip(scores, candidates), reverse=True)] return QueryResponse(query=request.query, results=reranked_docs)print(search_docs({query: &quot;idek attachments&quot;}))Reading files and directoriesQuickly I realized kind of hard or impossible problem to solve “performance”, because looping home directory isn’t that good idea as I thought.Number of files in my home directoryWe will be looping around millions of files and we are still in python even in C/++, rust and in other high performance language it still takes around 25 seconds to loop the files and we do not only want to loop it but also encode it into vectors. Well it’s a great start I guess.So clearly we need to be more smarter then looping though home directory we need relevance, multiprocessing and caching.So I started with the read_directories function that will loop directories when I look back I should just recreate it in C and import it into python, but end up with a much more faster version (compared to single threaded in python) that is using multiprocessing:def read_dirs_from_dir(dir_path: str, max_workers=8): &quot;&quot;&quot;Yield directories under dir_path as soon as they are found.&quot;&quot;&quot; base_path = Path(dir_path) with ThreadPoolExecutor(max_workers=max_workers) as executor: futures = {executor.submit(scan_dirs, base_path): base_path} while futures: for future in as_completed(futures.keys()): futures.pop(future) try: subdirs = future.result() except OSError: # future does not exist continue for subdir in subdirs: yield str(subdir) futures[executor.submit(scan_dirs, subdir)] = subdirThen implemented with similar logic read_files function, but I wanted to add some context to them, so I read 200 bytes from the file, and if it’s a programming language file, I get a function list using regex:def read_n_bytes_from_file(file_path: Path, n: int) -&gt; bytes: try: with file_path.open(&quot;rb&quot;) as f: return f&quot;{str(file_path)}: {f.read(n).decode(&#39;utf-8&#39;, errors=&#39;ignore&#39;)}&quot; except OSError: # binary file (cannot decode bytes) return f&quot;{str(file_path)}: &#39;&#39;&quot;def process_file(file_path: Path) -&gt; tuple[str, str]: &quot;&quot;&quot;Return (file_path, text).&quot;&quot;&quot; ext = file_path.suffix.lstrip(&quot;.&quot;).lower() regex = COMPILED_PATTERNS.get(ext) if regex: return str(file_path), extract_functions_from_file(file_path, regex, ext) else: return read_n_bytes_from_file(file_path, 200)Caching, batching and indexingOkay from this point we got some solid functions for reading files, but we will have memory issues when it comes to large lists of files. So next is caching, I end up creating sqlite3 database.def create_connection(database_path: str = &quot;documents.db&quot;, first_time: bool = False): cx = sqlite3.connect(database_path) cu = cx.cursor() cu.execute(&quot;ATTACH DATABASE &#39;cache.db&#39; AS cache&quot;) if first_time: clear_cache(cu, clear_all=True) create_cache(cu) return cx, cudefinitely I didn’t planning to open connecting for every file/directory found So the next step is to break the files/directories into batches and then enter them into the database using pickle and base64; during this process, I also began indexing them in the FAISS index.# init cachecx, cu = create_connection(first_time=True)cx.close()def index_strings(encoder, dir_path: str, table: str, read_func, index, batch_size=3000, max_workers=8): &quot;&quot;&quot;indexing in parallel with FAISS&quot;&quot;&quot; def save_and_clear(): vectors = encoder.encode(batch_buffer, normalize_embeddings=True) index.add(np.array(vectors, dtype=np.float32)) # cache - 3000 cx, cu = create_connection() # just database query insert to table insert_cache(cx, cu, b64e(pickle.dumps(batch_buffer)), table) cx.close() batch_buffer.clear() # run garbage collection after batch gc.collect() batch_buffer = [] for string in read_func(dir_path, max_workers=max_workers): batch_buffer.append(string) if len(batch_buffer) &gt;= batch_size: save_and_clear() if batch_buffer: save_and_clear()The reason for exiting the database at the start is that we are going to run a multiprocessing function, and if we get a connection in a different thread, we will run into a lot of problems, so we need to create a new connection for each thread.I also made this function into general purpose in order to swap type of index at the fly.Only batchingNow we could have used the rest of the code from the beginning, but hold on, we must figure out the batching from database.It’s small normalization, but painful to be honest:def batch_normalization(candidates, I): indices = [] for i in I[0]: tmp = int((i // BATCH_SIZE) + 1) if not tmp in indices: indices.append(tmp) candidates = get_docs_by_ids(cu, indices, &quot;cache.directories&quot;) valid_candidates = [] for c, index in zip(candidates, indices): for i in I[0]: if int((i // BATCH_SIZE) + 1) == index: candidate = pickle.loads(b64d(c.encode(&quot;utf-8&quot;)))[i % BATCH_SIZE] valid_candidates.append(candidate) return valid_candidatesThe problem here is that database starts from index 1 instead of 0 and we need to find the correct batch using:# F_index from FAISS starts from 0F_index // BATCH_SIZE + 1BATCH_SIZE # just our batch size# this will get from the n file/directoryi % BATCH_SIZE# i = index of the array saved that&#39;s why not again +1# F_index = 4532, BATCH_SIZE = 2000# to query: 4532 // 2000 (+1) = 2 (+ 1) we get correct batch# then correct position [532] = [4532 % 2000]At the end I’ve wrapped it into web interface:Results of searchIndices and unsorted resultsConclusion and final wordsStill it’s far from good optimization, because even 2411 directories took 13 seconds, but it was interesting experience.Some potential upgrades include rewriting into rust or just a few functions into C, and to not loop without relevance for example each folder is known for some purpose (.git, node_moduls, vendor) and git repositories have usually README.md, the name can tell you whether it is worth continuing or not.I was planning to also use summaries from models to add more context, but even looping directories took a lot of time so it’s just left it there and not used.If you enjoyed this article, clap and follow me! Thanks for reading, and I wish you the best luck on your journey👋.]]></summary></entry><entry><title type="html">Building your own network protection with Hybrid WAF and iptables</title><link href="/articles/building-your-own-network-protection-with-hybrid-waf-and-iptables/" rel="alternate" type="text/html" title="Building your own network protection with Hybrid WAF and iptables" /><published>2025-04-23T00:00:00+00:00</published><updated>2025-04-23T00:00:00+00:00</updated><id>/articles/building-your-own-network-protection-with-hybrid-waf-and-iptables</id><content type="html" xml:base="/articles/building-your-own-network-protection-with-hybrid-waf-and-iptables/"><![CDATA[<p>In this article I’ll introduce types of firewalls, more specifically IPS/IDS, WAF and iptables. And how to implement your own WAF and iptables rules with python.</p><figure><img alt="" src="https://cdn-images-1.medium.com/max/1024/1*WqQYvRdvibHXsNTplyHPfw.png" /><figcaption>Animated representation of firewall (taken from: exa.net.uk)</figcaption></figure><p>Code in this article is publicly available right here:</p><p><a href="https://github.com/BitR13x/AI-WAF">GitHub - BitR13x/AI-WAF: Web Firewall that is powered by AI and signatures</a></p><h3>So theory comes first, what is firewall?</h3><p>It is usually a hardware or software-based system which monitors all incoming and outgoing traffic and, based on a defined set of security rules, it accepts, rejects, or drops that specific traffic. Web application firewall (WAF) is simply a firewall for web application.</p><p>In order to secure the internal network from unauthorized traffic, we need a <a href="https://www.geeksforgeeks.org/introduction-of-firewall-in-computer-network/">Firewall</a>.</p><h4>How about the IPS/IDS?</h4><p><strong>Intrusion Detection System (IDS): </strong>Looking for the signature of known attack types or detecting activity that deviates from a prescribed normal and then report it.</p><p>I<strong>ntrusion Prevention System (IPS): </strong>Basically the same, but it can block the packet/request.</p><p>Example of an open-source IPS/IDS: <strong>Suricata</strong></p><figure><img alt="" src="https://cdn-images-1.medium.com/max/225/0*8aqm07E_PiaZUuxk" /><figcaption>Suricata icon</figcaption></figure><p>Interesting sources related to IPS/IDS:<br><a href="https://cheatography.com/g33k247/cheat-sheets/suricata-nsm-more-than-an-ids/">Suricata cheetsheet</a><br><a href="https://github.com/ntop/nDPI">nDIP</a> — Deep Packet Inspection<br><a href="https://github.com/noushinpervez/Intrusion-Detection-CICIDS2017">Intrusion-Detection-CICIDS2017</a> — in-depth analysis of the CICIDS2017 dataset</p><h4>Comparison IPS/IDS and firewall:</h4><figure><img alt="" src="https://cdn-images-1.medium.com/max/894/1*PCg59K37m1HcbnRTRwbyrA.png" /><figcaption>Table from chatgpt</figcaption></figure><p>The differences are on thin ice, so I will not go deeper, because you could argue that the WAF or iptables can detect attacks and block them, meaning it would be something more complex than just a firewall.</p><h3><strong>Let’s move on, implementation of iptables?</strong></h3><p>By combining iptables and Python, you can create a custom intrusion detection and prevention system (IDS/IPS) that can intercept network packets before they reach the target service.</p><p>For example, using libraries such as NFQueue or Scapy in Python, you can:</p><ul><li>Analyze packets in real time</li><li>Detect suspicious patterns</li><li>Perform an automated action (e.g. dropping a packet or blocking an IP address).</li></ul><p>For example, here is a python script that blocks all IP addresses that are not in <em>whitelist.txt</em>:</p><pre>def process_packet(packet):<br>    scapy_packet = IP(packet.get_payload())<br>    features = extract_features(scapy_packet, packet)<br>    with open(&quot;./whitelist.txt&quot;) as file:<br>        for line in file:<br>            if line[0] == &quot;&quot; or line[0] == &quot;\n&quot;:<br>                continue<br><br>            if scapy_packet.src == line.strip().replace(&quot;\n&quot;, &quot;&quot;):<br>                print(f&quot;❌ Dropping Packet: {scapy_packet.summary()}&quot;)<br>                packet.drop()<br>        <br>    packet.accept()<br><br><br># Start Netfilter Queue<br>nfqueue = NetfilterQueue()<br>nfqueue.bind(1, process_packet)<br><br>print(&quot;Monitoring Traffic in Real-Time&quot;)<br>try:<br>    nfqueue.run()<br>except KeyboardInterrupt:<br>    print(&quot;\nStopping Firewall...&quot;)<br>    nfqueue.unbind()</pre><p>It works by using <em>NFQUEUE</em>, which is queueing packets to userspace. In simple terms, you get access to the packet using python. But you need to specify a queue number:</p><pre>sudo iptables -D INPUT -p tcp --dport 80 -j NFQUEUE --queue-num 1</pre><p>And you can do pretty neat stuff with this.</p><h3>Implementation of WAF</h3><p>We need to intercept HTTP(S) requests before they are delivered to the target server. This gives us the ability to analyze the content of the request and decide if it contains potentially malicious code.</p><p>We implement this step using a reverse-proxy component that I have programmed in Python using the library HTTPServer (a possible different approach is with the mitmproxy library).</p><p>The reverse-proxy acts as an intermediary between the user and the server. All traffic goes through this proxy first, which then decides whether to forward the request.</p><p>(The whole code is in the repository mentioned in the introduction)</p><figure><img alt="" src="https://cdn-images-1.medium.com/max/1024/1*RhBwYy7FD4myEppWoUgJcA.png" /><figcaption>Implemented WAF architecture</figcaption></figure><p>This is how we forward the request:</p><pre>def do_GET(self, body=True):<br>  url = protocol+f&#39;{hostname}{self.path}&#39;<br>  resp = requests.get(url, headers=self.headers, verify=False)<br>  self.wfile.write(resp.text.encode(encoding=&#39;UTF-8&#39;,errors=&#39;strict&#39;))</pre><p>If we want to check the URL, we simply do something like this:</p><pre>def do_GET(self, body=True):<br>  url = protocol+f&#39;{hostname}{self.path}&#39;<br>  if verify_url(self.path): # we know that hostname is safe (from init)<br>    resp = requests.get(url, headers=self.headers, verify=False)<br>    self.wfile.write(resp.text.encode(encoding=&#39;UTF-8&#39;,errors=&#39;strict&#39;))<br>  else:<br>    self.send_error(403, &quot;Not allowed&quot;)</pre><h4>Signature-based</h4><p>A signature-based WAF is a security mechanism designed to detect known patterns or signatures of malicious activity.</p><p>I’ve collected rules from <a href="https://github.com/coreruleset/coreruleset">coreruleset</a>, <a href="https://user-agents.net/">user-agents</a> and <a href="https://rules.emergingthreats.net/">suricata</a>.</p><p>Then made a regex search to match if any string is in the request or response.</p><pre>    def __get_files_in_dir(self, dir_path: str) -&gt; list:<br>        if os.path.isdir(dir_path):<br>            return os.listdir(dir_path)<br>        else:<br>            return []<br><br>    def __search_string_in_file(self, file_path: str, string: str) -&gt; bool:        <br>        with open(file_path, &quot;r&quot;) as f:<br>            for line in f:<br>                # empty line or comment<br>                if line[0] == &quot;#&quot; or line[0] == &quot;\n&quot;:<br>                    continue<br>                <br>                # remove newline<br>                if line[-1]:<br>                    line = line[:-1]<br><br>                if re.search(re.escape(line), string):<br>                    return True # packet dangerous<br><br>        return False<br><br>    def __verify_signature(self, string: str, var: str) -&gt; bool:<br>        files = self.__get_files_in_dir(self.signatures_paths[var])<br>        if len(files) &gt; 0:<br>            for file in files:<br>                file_path = os.path.join(relative_path(self.signatures_paths[var]), file)<br>                if self.__search_string_in_file(file_path, string):<br>                    return False<br>        <br>        # returning True if path does not exist!<br>        return True</pre><h4>AI-based</h4><p>AI-powered Web Application Firewall uses artificial intelligence and machine learning to detect and block web attacks in real time.</p><p>I used <a href="https://www.kaggle.com/datasets/evg3n1j/fwaf-dataset">fwaf-dataset</a> and <a href="https://github.com/swisskyrepo/PayloadsAllTheThings">PayloadAllThethings</a> to train two models using PyTorch.</p><p>I didn’t create new model, but fine-tuned <em>distilbert-base-uncased </em>(you can use<em> </em>llama or any different model for classification).</p><pre>    def verify_url(self, url: str) -&gt; bool:<br>        inputs = self.tokenizer(url,<br>            truncation=True,<br>            padding=True,<br>            return_tensors=&quot;pt&quot;,<br>            max_length=500<br>        ).to(self.device)<br><br>        with torch.no_grad():<br>            outputs = self.url_model(**inputs)<br><br>        probabilities = torch.nn.functional.softmax(outputs.logits, dim=-1)<br>        predicted_class_index = torch.argmax(probabilities, dim=-1).item()<br><br>        predicted_class_name = self.url_labels[predicted_class_index]<br>        logging.info(f&quot;Probabilities for each class: {probabilities.numpy()}: {predicted_class_name}&quot;)<br><br>        if max(probabilities[0]) &lt; self.probability_catch:<br>            # We are not that certain<br>            return True<br><br>        if predicted_class_name == &quot;goodqueries&quot;:<br>            return True<br>        else:<br>            return False</pre><h3>Main disadvantages</h3><p><strong>Complexity: </strong>Setting up and keeping up a firewall can be time-consuming and difficult<strong><br>Limited Flexibility for developers<br>Limited adaptability: </strong>frequently rule-based for signatures and AI can’t be that much trusted</p><h4>Possible upgrade to this project</h4><p>One option is anomaly-based detection.<br>Once we gather enough data to define normal network flow, we can take action on anomalies.</p><figure><img alt="" src="https://cdn-images-1.medium.com/max/550/0*peHxraS7p5QI45_B.png" /><figcaption>Abstract example of statistically represented network flow in graph</figcaption></figure><h3>Conclusion</h3><p>Creating a comprehensive security system for a server environment is not only possible, but also highly effective when using a combination of multiple layers of protection, including WAF and iptables.</p><p>A good security architecture can significantly reduce the risk of successful cyber-attacks such as XSS, XXE, CSRF, DDoS or SQL injection.</p><p>If you enjoyed this article, clap and follow me! Thanks for reading, and I wish you the best luck on your journey👋.</p><img src="https://medium.com/_/stat?event=post.clientViewed&referrerSource=full_rss&postId=3e9d21b35c7a" width="1" height="1" alt=""><hr><p><a href="https://systemweakness.com/writing-your-own-network-protection-for-server-waf-and-iptables-3e9d21b35c7a">Building your own network protection with Hybrid WAF and iptables</a> was originally published in <a href="https://systemweakness.com">System Weakness</a> on Medium, where people are continuing the conversation by highlighting and responding to this story.</p>]]></content><author><name>BitR13x</name></author><category term="network-security" /><category term="web-security" /><category term="firewall" /><category term="programming" /><category term="cybersecurity" /><summary type="html"><![CDATA[In this article I’ll introduce types of firewalls, more specifically IPS/IDS, WAF and iptables. And how to implement your own WAF and iptables rules with python.Animated representation of firewall (taken from: exa.net.uk)Code in this article is publicly available right here:GitHub - BitR13x/AI-WAF: Web Firewall that is powered by AI and signaturesSo theory comes first, what is firewall?It is usually a hardware or software-based system which monitors all incoming and outgoing traffic and, based on a defined set of security rules, it accepts, rejects, or drops that specific traffic. Web application firewall (WAF) is simply a firewall for web application.In order to secure the internal network from unauthorized traffic, we need a Firewall.How about the IPS/IDS?Intrusion Detection System (IDS): Looking for the signature of known attack types or detecting activity that deviates from a prescribed normal and then report it.Intrusion Prevention System (IPS): Basically the same, but it can block the packet/request.Example of an open-source IPS/IDS: SuricataSuricata iconInteresting sources related to IPS/IDS:Suricata cheetsheetnDIP — Deep Packet InspectionIntrusion-Detection-CICIDS2017 — in-depth analysis of the CICIDS2017 datasetComparison IPS/IDS and firewall:Table from chatgptThe differences are on thin ice, so I will not go deeper, because you could argue that the WAF or iptables can detect attacks and block them, meaning it would be something more complex than just a firewall.Let’s move on, implementation of iptables?By combining iptables and Python, you can create a custom intrusion detection and prevention system (IDS/IPS) that can intercept network packets before they reach the target service.For example, using libraries such as NFQueue or Scapy in Python, you can:Analyze packets in real timeDetect suspicious patternsPerform an automated action (e.g. dropping a packet or blocking an IP address).For example, here is a python script that blocks all IP addresses that are not in whitelist.txt:def process_packet(packet): scapy_packet = IP(packet.get_payload()) features = extract_features(scapy_packet, packet) with open(&quot;./whitelist.txt&quot;) as file: for line in file: if line[0] == &quot;&quot; or line[0] == &quot;\n&quot;: continue if scapy_packet.src == line.strip().replace(&quot;\n&quot;, &quot;&quot;): print(f&quot;❌ Dropping Packet: {scapy_packet.summary()}&quot;) packet.drop() packet.accept()# Start Netfilter Queuenfqueue = NetfilterQueue()nfqueue.bind(1, process_packet)print(&quot;Monitoring Traffic in Real-Time&quot;)try: nfqueue.run()except KeyboardInterrupt: print(&quot;\nStopping Firewall...&quot;) nfqueue.unbind()It works by using NFQUEUE, which is queueing packets to userspace. In simple terms, you get access to the packet using python. But you need to specify a queue number:sudo iptables -D INPUT -p tcp --dport 80 -j NFQUEUE --queue-num 1And you can do pretty neat stuff with this.Implementation of WAFWe need to intercept HTTP(S) requests before they are delivered to the target server. This gives us the ability to analyze the content of the request and decide if it contains potentially malicious code.We implement this step using a reverse-proxy component that I have programmed in Python using the library HTTPServer (a possible different approach is with the mitmproxy library).The reverse-proxy acts as an intermediary between the user and the server. All traffic goes through this proxy first, which then decides whether to forward the request.(The whole code is in the repository mentioned in the introduction)Implemented WAF architectureThis is how we forward the request:def do_GET(self, body=True): url = protocol+f&#39;{hostname}{self.path}&#39; resp = requests.get(url, headers=self.headers, verify=False) self.wfile.write(resp.text.encode(encoding=&#39;UTF-8&#39;,errors=&#39;strict&#39;))If we want to check the URL, we simply do something like this:def do_GET(self, body=True): url = protocol+f&#39;{hostname}{self.path}&#39; if verify_url(self.path): # we know that hostname is safe (from init) resp = requests.get(url, headers=self.headers, verify=False) self.wfile.write(resp.text.encode(encoding=&#39;UTF-8&#39;,errors=&#39;strict&#39;)) else: self.send_error(403, &quot;Not allowed&quot;)Signature-basedA signature-based WAF is a security mechanism designed to detect known patterns or signatures of malicious activity.I’ve collected rules from coreruleset, user-agents and suricata.Then made a regex search to match if any string is in the request or response. def __get_files_in_dir(self, dir_path: str) -&gt; list: if os.path.isdir(dir_path): return os.listdir(dir_path) else: return [] def __search_string_in_file(self, file_path: str, string: str) -&gt; bool: with open(file_path, &quot;r&quot;) as f: for line in f: # empty line or comment if line[0] == &quot;#&quot; or line[0] == &quot;\n&quot;: continue # remove newline if line[-1]: line = line[:-1] if re.search(re.escape(line), string): return True # packet dangerous return False def __verify_signature(self, string: str, var: str) -&gt; bool: files = self.__get_files_in_dir(self.signatures_paths[var]) if len(files) &gt; 0: for file in files: file_path = os.path.join(relative_path(self.signatures_paths[var]), file) if self.__search_string_in_file(file_path, string): return False # returning True if path does not exist! return TrueAI-basedAI-powered Web Application Firewall uses artificial intelligence and machine learning to detect and block web attacks in real time.I used fwaf-dataset and PayloadAllThethings to train two models using PyTorch.I didn’t create new model, but fine-tuned distilbert-base-uncased (you can use llama or any different model for classification). def verify_url(self, url: str) -&gt; bool: inputs = self.tokenizer(url, truncation=True, padding=True, return_tensors=&quot;pt&quot;, max_length=500 ).to(self.device) with torch.no_grad(): outputs = self.url_model(**inputs) probabilities = torch.nn.functional.softmax(outputs.logits, dim=-1) predicted_class_index = torch.argmax(probabilities, dim=-1).item() predicted_class_name = self.url_labels[predicted_class_index] logging.info(f&quot;Probabilities for each class: {probabilities.numpy()}: {predicted_class_name}&quot;) if max(probabilities[0]) &lt; self.probability_catch: # We are not that certain return True if predicted_class_name == &quot;goodqueries&quot;: return True else: return FalseMain disadvantagesComplexity: Setting up and keeping up a firewall can be time-consuming and difficultLimited Flexibility for developersLimited adaptability: frequently rule-based for signatures and AI can’t be that much trustedPossible upgrade to this projectOne option is anomaly-based detection.Once we gather enough data to define normal network flow, we can take action on anomalies.Abstract example of statistically represented network flow in graphConclusionCreating a comprehensive security system for a server environment is not only possible, but also highly effective when using a combination of multiple layers of protection, including WAF and iptables.A good security architecture can significantly reduce the risk of successful cyber-attacks such as XSS, XXE, CSRF, DDoS or SQL injection.If you enjoyed this article, clap and follow me! Thanks for reading, and I wish you the best luck on your journey👋.Building your own network protection with Hybrid WAF and iptables was originally published in System Weakness on Medium, where people are continuing the conversation by highlighting and responding to this story.]]></summary></entry><entry><title type="html">HackTheBox Cyber Apocalypse CTF 2025 writeup: Reverse Engineering (endlesscycle, impossimaze)</title><link href="/articles/hackthebox-cyber-apocalypse-ctf-2025-writeup-reverse-engineering-endlesscycle-impossimaze/" rel="alternate" type="text/html" title="HackTheBox Cyber Apocalypse CTF 2025 writeup: Reverse Engineering (endlesscycle, impossimaze)" /><published>2025-03-31T00:00:00+00:00</published><updated>2025-03-31T00:00:00+00:00</updated><id>/articles/hackthebox-cyber-apocalypse-ctf-2025-writeup-reverse-engineering-endlesscycle-impossimaze</id><content type="html" xml:base="/articles/hackthebox-cyber-apocalypse-ctf-2025-writeup-reverse-engineering-endlesscycle-impossimaze/"><![CDATA[<p>Two easy rated challenges from the HackTheBox CTF event. In this article we look into the Step-by-step breakdown of how to approach and solve these challenges.</p><p>The original binaries are saved <a href="https://github.com/BitR13x/CTF-Collection/tree/main/Cyber%20Apocalypse%202025">here</a>.</p><h3>Endlesscycle</h3><figure><img alt="" src="https://cdn-images-1.medium.com/max/986/1*RldR_Q_SXRC1TYF7fmVpVA.png" /></figure><p>After de-compilation and renaming I end-up with this code:</p><pre>int main(int argc,char **argv) {<br>  int iVar1;<br>  char *pcVar2;<br>  int i;<br>  int i2;<br>  <br>  pcVar2 = (char *)mmap((void *)0,158,7,33,-1,0);<br>                    /* 3486694491 */<br>  srand(UINT_001042b8);<br>  for (_i = 0; _i &lt; 158; _i = _i + 1) {<br>    for (_i2 = 0; _i2 &lt; (ulong)(long)INT_ARRAY_00104040[_i]; _i2 = _i2 + 1) {<br>      rand();<br>    }<br>    iVar1 = rand();<br>    pcVar2[_i] = (char)iVar1;<br>  }<br>                    /* construct function using rand */<br>  iVar1 = (*(code *)pcVar2)();<br>  if (iVar1 == 1) {<br>    puts(&quot;You catch a brief glimpse of the Dragon\&#39;s Heart - the truth has been revealed to you&quot;);<br>  }<br>  else {<br>    puts(&quot;The mysteries of the universe remain closed to you...&quot;);<br>  }<br>  return 0;<br>}</pre><p>This binary is initialized with srand and creates a function based on the rand function and it should be possible to recreate this function by setting the srand (for example in python), but I choose the easiest way by examining it in GDB.</p><pre>=&gt; 0x7ffff7fbf000: push   rbp // init<br>   0x7ffff7fbf001: mov    rbp,rsp<br>   0x7ffff7fbf004: push   0x101213e<br>   0x7ffff7fbf009: xor    DWORD PTR [rsp],0x1010101 <br>                           // 0x101213e ^ 0x101213e <br>   0x7ffff7fbf010: movabs rax,0x67616c6620656874<br>   0x7ffff7fbf01a: push   rax<br>   0x7ffff7fbf01b: movabs rax,0x2073692074616857<br>   0x7ffff7fbf025: push   rax<br>   0x7ffff7fbf026: push   0x1<br>   0x7ffff7fbf028: pop    rax<br>   0x7ffff7fbf029: push   0x1<br>   0x7ffff7fbf02b: pop    rdi<br>   0x7ffff7fbf02c: push   0x12<br>   0x7ffff7fbf02e: pop    rdx<br>   0x7ffff7fbf02f: mov    rsi,rsp<br>   0x7ffff7fbf032: syscall // write 18 bytes from stack f01b, f010<br>                              // What is the flag?<br>   0x7ffff7fbf034: sub    rsp,0x100 // 256 bytes reserved for buffer<br>   0x7ffff7fbf03b: mov    r12,rsp<br>   0x7ffff7fbf03e: xor    eax,eax <br>   0x7ffff7fbf040: xor    edi,edi<br>   0x7ffff7fbf042: xor    edx,edx // cleaning<br>   0x7ffff7fbf044: mov    dh,0x1<br>   0x7ffff7fbf046: mov    rsi,r12<br>   0x7ffff7fbf049: syscall         // read into r12<br>   0x7ffff7fbf04b: test   rax,rax // if read is not empty<br>   0x7ffff7fbf04e: jle    0x7ffff7fbf082<br><br><br>   // for loop sliding 4 bytes with xor<br>   0x7ffff7fbf050: push   0x1a // 26<br>   0x7ffff7fbf052: pop    rax<br>   0x7ffff7fbf053: mov    rcx,r12 // rcx = r12<br>   0x7ffff7fbf056: add    rax,rcx // rax += rcx + 26<br>   0x7ffff7fbf059: xor    DWORD PTR [rcx],0xbeefcafe<br>   0x7ffff7fbf05f: add    rcx,0x4 // rcx += 4<br>   0x7ffff7fbf063: cmp    rcx,rax // if rcx &lt; rax<br>   0x7ffff7fbf066: jb     0x7ffff7fbf059<br><br><br>   0x7ffff7fbf068: mov    rdi,r12<br>   0x7ffff7fbf06b: lea    rsi,[rip+0x12]        # 0x7ffff7fbf084<br>   0x7ffff7fbf072: mov    rcx,0x1a<br>   0x7ffff7fbf079: cld<br><br>   // comparing rdi (r12, input) with rsi (0x1a bytes = 26 bytes)<br>   0x7ffff7fbf07a: repz cmps BYTE PTR ds:[rsi],BYTE PTR es:[rdi]<br>   0x7ffff7fbf07c: sete   al<br>   0x7ffff7fbf07f: movzx  eax,al<br>   0x7ffff7fbf082: leave<br>   0x7ffff7fbf083: ret</pre><p>You can notice on the end there is a comparison RDI with RSI, where RDI is input. I dumped the memory:</p><pre>// 0x7ffff7fbf084: memory dump<br>0x7ffff7fbf084:   0xb6  0x9e  0xad  0xc5  0x92  0xfa  0xdf  0xd5<br>0x7ffff7fbf08c:   0xa1  0xa8  0xdc  0xc7  0xce  0xa4  0x8b  0xe1<br>0x7ffff7fbf094:   0x8a  0xa2  0xdc  0xe1  0x89  0xfa  0x9d  0xd2<br>0x7ffff7fbf09c:   0x9a  0xb7</pre><p>When reconstructing the behavior in C it should look something like this:</p><pre>int main() {<br>    char buffer[256];<br>    char message[] = &quot;What is flag?&quot;;<br>    char expected[] = &quot;...&quot;; // 0x7ffff7fbf084<br>    ssize_t bytes_read;<br>    <br>    // Print message<br>    write(STDOUT_FILENO, message, sizeof(message) - 1);<br>    <br>    // Read user input<br>    bytes_read = read(STDIN_FILENO, buffer, 256);<br>    if (bytes_read &lt;= 0) {<br>        return 0;<br>    }<br>    <br>    // XOR first few bytes with 0xBEEFCAFE<br>    for (int i = 0; i &lt; bytes_read - 4; i += 4) {<br>        *(int *)(buffer + i) ^= 0xBEEFCAFE;<br>    }<br>    <br>    // Compare with expected string<br>    if (memcmp(buffer, expected, 26) == 0) {<br>        puts(&quot;You got the flag!&quot;);<br>        return 1;<br>    }<br>    <br>    puts(&quot;Try again...&quot;);<br>    return 0;<br>}</pre><p>So now we can get the hands on python and reverse it:</p><pre>import struct<br><br># copied from memory dump<br>encrypted_data = [<br>    0xb6, 0x9e, 0xad, 0xc5, 0x92, 0xfa, 0xdf, 0xd5,<br>    0xa1, 0xa8, 0xdc, 0xc7, 0xce, 0xa4, 0x8b, 0xe1,<br>    0x8a, 0xa2, 0xdc, 0xe1, 0x89, 0xfa, 0x9d, 0xd2,<br>    0x9a, 0xb7<br>]<br><br># the key that is used<br>xor_key = 0xBEEFCAFE<br><br>original_bytes = bytearray()<br>for i in range(0, len(encrypted_data), 4):<br>    # XOR is applied to 4-byte chunks<br>    chunk = encrypted_data[i:i+4]<br>    while len(chunk) &lt; 4:<br>        chunk.append(0)<br>    <br>    # unpack it into int and back<br>    # (reverse of XOR is another XOR with same value)<br>    encrypted_int = struct.unpack(&quot;&lt;I&quot;, bytes(chunk))[0]<br>    decrypted_int = encrypted_int ^ xor_key<br>    original_bytes.extend(struct.pack(&quot;&lt;I&quot;, decrypted_int))<br><br>original_input = original_bytes.decode(errors=&quot;ignore&quot;)<br><br>print(&quot;Original input:&quot;, original_input)</pre><p>Next on the list is:</p><h3><strong>Impossimaze</strong></h3><figure><img alt="" src="https://cdn-images-1.medium.com/max/540/1*ufh8Zh8Lo5Ndy-tK1aQZmw.png" /></figure><p>When trying to make sense in the binary I’ve ended up with this code:</p><pre>int main(int argc,char **argv) {<br>  int iVar1;<br>  uint uVar2;<br>  uint max_y_2;<br>  uint max_x_2;<br>  ulong max_x;<br>  char char_to_write;<br>  int x;<br>  int y;<br>  int *char_index;<br>  undefined4 in_register_0000003c;<br>  long in_FS_OFFSET;<br>  int half_x;<br>  int max_y;<br>  char position_x_y [24];<br>  long canary;<br>  <br>  canary = *(long *)(in_FS_OFFSET + 40);<br>                    /* newterm(getenv(&quot;TERM&quot;), stdout, stdin); */<br>  initscr(CONCAT44(in_register_0000003c,argc));<br>  cbreak();<br>  noecho();<br>  curs_set(0);<br>  keypad(window,1);<br>  max_y = getmaxy(window);<br>  max_x = getmaxx(window);<br>                    /* ensures half */<br>  half_x = (int)(((uint)(max_x &gt;&gt; 31) &amp; 1) + (int)max_x) &gt;&gt; 1;<br>  max_y = max_y / 2;<br>  x = 0;<br>  do {<br>    max_y_2 = getmaxy(window);<br>    max_x_2 = getmaxx(window);<br>    if (x == 260) {<br>      half_x = half_x - (uint)(1 &lt; half_x);<br>    }<br>    else if (x &lt; 261) {<br>      if (x == 258) {<br>        max_y = max_y + 1;<br>      }<br>      else if (x == 259) {<br>        max_y = max_y - (uint)(1 &lt; max_y);<br>      }<br>    }<br>    else {<br>      half_x = half_x + (uint)(x == 261);<br>    }<br>    werase(window);<br>    wattr_on(window,1048576,0);<br>    wborder(window,0,0,0,0,0,0,0,0);<br>    if (2 &lt; (int)max_x_2) {<br>      x = 1;<br>      do {<br>        y = 1;<br>        if (2 &lt; (int)max_y_2) {<br>          do {<br>            uVar2 = get_char(x,y);<br>            if ((int)uVar2 &lt; 61) {<br>              char_to_write = &#39;A&#39;;<br>              if ((int)uVar2 &lt; 31) {<br>                char_to_write = (-(uVar2 &lt; 31) &amp; 133U) + 86;<br>              }<br>            }<br>            else {<br>              char_to_write = (-(uVar2 - 61 &lt; 120) &amp; 202U) + 86;<br>            }<br>            iVar1 = wmove(window,y,x);<br>            if (iVar1 != -1) {<br>              waddch(window,(int)char_to_write);<br>            }<br>            y = y + 1;<br>          } while (y != max_y_2 - 1);<br>        }<br>        x = x + 1;<br>      } while (max_x_2 - 1 != x);<br>    }<br>    wattr_off(window,1048576,0);<br>    wattr_on(window,2097152,0);<br>    x = wmove(window,max_y,half_x);<br>    if (x != -1) {<br>      waddch(window,88);<br>    }<br>    wattr_off(window,2097152,0);<br>    snprintf(position_x_y,16,&quot;%d:%d&quot;,(ulong)max_y_2,(ulong)max_x_2);<br>    x = wmove(window,0,0);<br>    if (x != -1) {<br>      waddnstr(window,position_x_y,4294967295);<br>    }<br>    if ((max_y_2 == 13) &amp;&amp; (max_x_2 == 37)) {<br>      wattr_on(window,524288,0);<br>      wattr_on(window,2097152,0);<br>      char_index = &amp;INT_001040c0;<br>      x = 6;<br>      do {<br>        y = x + 1;<br>        x = wmove(window,6,x);<br>        if (x != -1) {<br>                    /* add a character (with attributes) to a curses window and advance cursor  */<br>          waddch(window,(&amp;DAT_00104120)[*char_index]);<br>        }<br>        char_index = char_index + 1;<br>        x = y;<br>      } while (y != 30);<br>      wattr_off(window,2097152,0);<br>      wattr_off(window,524288,0);<br>    }<br>    x = wgetch(window);<br>  } while (x != 113);<br>  endwin();<br>  if (canary != *(long *)(in_FS_OFFSET + 40)) {<br>                    /* WARNING: Subroutine does not return */<br>    __stack_chk_fail();<br>  }<br>  return 0;<br>}</pre><p>This binary is keeping track of window size, position x-y and moving cursor using <em>wmove </em>and <em>waddch</em>.</p><p>My approach was to search for printing any method, that may print out our flag. There were a few functions that caught my eye:</p><pre>uVar2 = get_char(x,y);<br>if ((int)uVar2 &lt; 61) {<br>    char_to_write = &#39;A&#39;;<br>    if ((int)uVar2 &lt; 31) {<br>      char_to_write = (-(uVar2 &lt; 31) &amp; 133U) + 86;<br>    }<br>}<br>else {<br>  char_to_write = (-(uVar2 - 61 &lt; 120) &amp; 202U) + 86;<br>}<br><br>waddch(window,(int)char_to_write);<br><br>// Write formatted output to sized buffer<br>snprintf(position_x_y,16,&quot;%d:%d&quot;,(ulong)max_y_2,(ulong)max_x_2);<br>waddnstr(window,position_x_y,4294967295);<br><br>char_index = &amp;INT_001040c0;<br>waddch(window,(&amp;DAT_00104120)[*char_index]);</pre><p><em>waddch</em> is used add a character to a curses window and advance cursor.</p><p>So we got few options, we will try to eliminate it one by one by thinking what it does, the first is kind of complex shifting of the char depending on <em>get_char</em> function:</p><pre>int get_char(int x,int y) {<br>  return *(int *)(&amp;DAT_00102020 +<br>                 (long)((x + *(int *)(&amp;DAT_00102020 + (long)((y + 1337) % 256) * 4)) % 256) * 4);<br>}</pre><p>But I stepped out and was thinking about the “<strong><em>char_to_write = ‘A’;”</em></strong>, it seemed weird to me, so I moved on.</p><p>Next we just printing position x-y, that’s clearly not what we are searching for.</p><p>Moving on we end-up here:</p><pre>char_index = &amp;INT_001040c0;<br>waddch(window,(&amp;DAT_00104120)[*char_index]);</pre><p>I noticed that the <em>char_index</em> variable is actually an array of <em>ints</em> and if some conditions are met then the char is printed.</p><p>So I tried to extract some of the non-null ints from the memory and added it to the<em> DAT_00104120 </em>and what we got here: “<em>HTB{“</em>, beginning of the flag and I knew that I was on the right path.</p><pre>00104205 H<br>0010413c T<br>001041d8 B<br>001041d2 {<br>00104160 T<br>00104188 H<br>001041f2 3<br>001041aa _<br>00104170 c<br>001041a6 u<br>0010421c r<br>00104193 s<br>001041f2 3<br>001041aa _<br>0010420d i<br>00104193 s<br>001041aa _<br>00104165 b<br>0010421c r<br>00104176 o<br>001041eb k<br>001041f2 3<br>0010420f n<br>001041e0 }<br><br># HTB{th3_curs3_is_brok3n}</pre><h3>Final words</h3><p>Thanks for reading, if someone is interested in collaboration write me on discord (bitr13x) or email me (<a href="mailto:sw33tbit@protonmail.com">sw33tbit@protonmail.com</a>).</p><img src="https://medium.com/_/stat?event=post.clientViewed&referrerSource=full_rss&postId=254b349ba227" width="1" height="1" alt="">]]></content><author><name>BitR13x</name></author><category term="cybersecurity" /><category term="hackthebox" /><category term="reverse-engineering" /><category term="ctf-writeup" /><summary type="html"><![CDATA[Two easy rated challenges from the HackTheBox CTF event. In this article we look into the Step-by-step breakdown of how to approach and solve these challenges.The original binaries are saved here.EndlesscycleAfter de-compilation and renaming I end-up with this code:int main(int argc,char **argv) { int iVar1; char *pcVar2; int i; int i2; pcVar2 = (char *)mmap((void *)0,158,7,33,-1,0); /* 3486694491 */ srand(UINT_001042b8); for (_i = 0; _i &lt; 158; _i = _i + 1) { for (_i2 = 0; _i2 &lt; (ulong)(long)INT_ARRAY_00104040[_i]; _i2 = _i2 + 1) { rand(); } iVar1 = rand(); pcVar2[_i] = (char)iVar1; } /* construct function using rand */ iVar1 = (*(code *)pcVar2)(); if (iVar1 == 1) { puts(&quot;You catch a brief glimpse of the Dragon\&#39;s Heart - the truth has been revealed to you&quot;); } else { puts(&quot;The mysteries of the universe remain closed to you...&quot;); } return 0;}This binary is initialized with srand and creates a function based on the rand function and it should be possible to recreate this function by setting the srand (for example in python), but I choose the easiest way by examining it in GDB.=&gt; 0x7ffff7fbf000: push rbp // init 0x7ffff7fbf001: mov rbp,rsp 0x7ffff7fbf004: push 0x101213e 0x7ffff7fbf009: xor DWORD PTR [rsp],0x1010101 // 0x101213e ^ 0x101213e 0x7ffff7fbf010: movabs rax,0x67616c6620656874 0x7ffff7fbf01a: push rax 0x7ffff7fbf01b: movabs rax,0x2073692074616857 0x7ffff7fbf025: push rax 0x7ffff7fbf026: push 0x1 0x7ffff7fbf028: pop rax 0x7ffff7fbf029: push 0x1 0x7ffff7fbf02b: pop rdi 0x7ffff7fbf02c: push 0x12 0x7ffff7fbf02e: pop rdx 0x7ffff7fbf02f: mov rsi,rsp 0x7ffff7fbf032: syscall // write 18 bytes from stack f01b, f010 // What is the flag? 0x7ffff7fbf034: sub rsp,0x100 // 256 bytes reserved for buffer 0x7ffff7fbf03b: mov r12,rsp 0x7ffff7fbf03e: xor eax,eax 0x7ffff7fbf040: xor edi,edi 0x7ffff7fbf042: xor edx,edx // cleaning 0x7ffff7fbf044: mov dh,0x1 0x7ffff7fbf046: mov rsi,r12 0x7ffff7fbf049: syscall // read into r12 0x7ffff7fbf04b: test rax,rax // if read is not empty 0x7ffff7fbf04e: jle 0x7ffff7fbf082 // for loop sliding 4 bytes with xor 0x7ffff7fbf050: push 0x1a // 26 0x7ffff7fbf052: pop rax 0x7ffff7fbf053: mov rcx,r12 // rcx = r12 0x7ffff7fbf056: add rax,rcx // rax += rcx + 26 0x7ffff7fbf059: xor DWORD PTR [rcx],0xbeefcafe 0x7ffff7fbf05f: add rcx,0x4 // rcx += 4 0x7ffff7fbf063: cmp rcx,rax // if rcx &lt; rax 0x7ffff7fbf066: jb 0x7ffff7fbf059 0x7ffff7fbf068: mov rdi,r12 0x7ffff7fbf06b: lea rsi,[rip+0x12] # 0x7ffff7fbf084 0x7ffff7fbf072: mov rcx,0x1a 0x7ffff7fbf079: cld // comparing rdi (r12, input) with rsi (0x1a bytes = 26 bytes) 0x7ffff7fbf07a: repz cmps BYTE PTR ds:[rsi],BYTE PTR es:[rdi] 0x7ffff7fbf07c: sete al 0x7ffff7fbf07f: movzx eax,al 0x7ffff7fbf082: leave 0x7ffff7fbf083: retYou can notice on the end there is a comparison RDI with RSI, where RDI is input. I dumped the memory:// 0x7ffff7fbf084: memory dump0x7ffff7fbf084: 0xb6 0x9e 0xad 0xc5 0x92 0xfa 0xdf 0xd50x7ffff7fbf08c: 0xa1 0xa8 0xdc 0xc7 0xce 0xa4 0x8b 0xe10x7ffff7fbf094: 0x8a 0xa2 0xdc 0xe1 0x89 0xfa 0x9d 0xd20x7ffff7fbf09c: 0x9a 0xb7When reconstructing the behavior in C it should look something like this:int main() { char buffer[256]; char message[] = &quot;What is flag?&quot;; char expected[] = &quot;...&quot;; // 0x7ffff7fbf084 ssize_t bytes_read; // Print message write(STDOUT_FILENO, message, sizeof(message) - 1); // Read user input bytes_read = read(STDIN_FILENO, buffer, 256); if (bytes_read &lt;= 0) { return 0; } // XOR first few bytes with 0xBEEFCAFE for (int i = 0; i &lt; bytes_read - 4; i += 4) { *(int *)(buffer + i) ^= 0xBEEFCAFE; } // Compare with expected string if (memcmp(buffer, expected, 26) == 0) { puts(&quot;You got the flag!&quot;); return 1; } puts(&quot;Try again...&quot;); return 0;}So now we can get the hands on python and reverse it:import struct# copied from memory dumpencrypted_data = [ 0xb6, 0x9e, 0xad, 0xc5, 0x92, 0xfa, 0xdf, 0xd5, 0xa1, 0xa8, 0xdc, 0xc7, 0xce, 0xa4, 0x8b, 0xe1, 0x8a, 0xa2, 0xdc, 0xe1, 0x89, 0xfa, 0x9d, 0xd2, 0x9a, 0xb7]# the key that is usedxor_key = 0xBEEFCAFEoriginal_bytes = bytearray()for i in range(0, len(encrypted_data), 4): # XOR is applied to 4-byte chunks chunk = encrypted_data[i:i+4] while len(chunk) &lt; 4: chunk.append(0) # unpack it into int and back # (reverse of XOR is another XOR with same value) encrypted_int = struct.unpack(&quot;&lt;I&quot;, bytes(chunk))[0] decrypted_int = encrypted_int ^ xor_key original_bytes.extend(struct.pack(&quot;&lt;I&quot;, decrypted_int))original_input = original_bytes.decode(errors=&quot;ignore&quot;)print(&quot;Original input:&quot;, original_input)Next on the list is:ImpossimazeWhen trying to make sense in the binary I’ve ended up with this code:int main(int argc,char **argv) { int iVar1; uint uVar2; uint max_y_2; uint max_x_2; ulong max_x; char char_to_write; int x; int y; int *char_index; undefined4 in_register_0000003c; long in_FS_OFFSET; int half_x; int max_y; char position_x_y [24]; long canary; canary = *(long *)(in_FS_OFFSET + 40); /* newterm(getenv(&quot;TERM&quot;), stdout, stdin); */ initscr(CONCAT44(in_register_0000003c,argc)); cbreak(); noecho(); curs_set(0); keypad(window,1); max_y = getmaxy(window); max_x = getmaxx(window); /* ensures half */ half_x = (int)(((uint)(max_x &gt;&gt; 31) &amp; 1) + (int)max_x) &gt;&gt; 1; max_y = max_y / 2; x = 0; do { max_y_2 = getmaxy(window); max_x_2 = getmaxx(window); if (x == 260) { half_x = half_x - (uint)(1 &lt; half_x); } else if (x &lt; 261) { if (x == 258) { max_y = max_y + 1; } else if (x == 259) { max_y = max_y - (uint)(1 &lt; max_y); } } else { half_x = half_x + (uint)(x == 261); } werase(window); wattr_on(window,1048576,0); wborder(window,0,0,0,0,0,0,0,0); if (2 &lt; (int)max_x_2) { x = 1; do { y = 1; if (2 &lt; (int)max_y_2) { do { uVar2 = get_char(x,y); if ((int)uVar2 &lt; 61) { char_to_write = &#39;A&#39;; if ((int)uVar2 &lt; 31) { char_to_write = (-(uVar2 &lt; 31) &amp; 133U) + 86; } } else { char_to_write = (-(uVar2 - 61 &lt; 120) &amp; 202U) + 86; } iVar1 = wmove(window,y,x); if (iVar1 != -1) { waddch(window,(int)char_to_write); } y = y + 1; } while (y != max_y_2 - 1); } x = x + 1; } while (max_x_2 - 1 != x); } wattr_off(window,1048576,0); wattr_on(window,2097152,0); x = wmove(window,max_y,half_x); if (x != -1) { waddch(window,88); } wattr_off(window,2097152,0); snprintf(position_x_y,16,&quot;%d:%d&quot;,(ulong)max_y_2,(ulong)max_x_2); x = wmove(window,0,0); if (x != -1) { waddnstr(window,position_x_y,4294967295); } if ((max_y_2 == 13) &amp;&amp; (max_x_2 == 37)) { wattr_on(window,524288,0); wattr_on(window,2097152,0); char_index = &amp;INT_001040c0; x = 6; do { y = x + 1; x = wmove(window,6,x); if (x != -1) { /* add a character (with attributes) to a curses window and advance cursor */ waddch(window,(&amp;DAT_00104120)[*char_index]); } char_index = char_index + 1; x = y; } while (y != 30); wattr_off(window,2097152,0); wattr_off(window,524288,0); } x = wgetch(window); } while (x != 113); endwin(); if (canary != *(long *)(in_FS_OFFSET + 40)) { /* WARNING: Subroutine does not return */ __stack_chk_fail(); } return 0;}This binary is keeping track of window size, position x-y and moving cursor using wmove and waddch.My approach was to search for printing any method, that may print out our flag. There were a few functions that caught my eye:uVar2 = get_char(x,y);if ((int)uVar2 &lt; 61) { char_to_write = &#39;A&#39;; if ((int)uVar2 &lt; 31) { char_to_write = (-(uVar2 &lt; 31) &amp; 133U) + 86; }}else { char_to_write = (-(uVar2 - 61 &lt; 120) &amp; 202U) + 86;}waddch(window,(int)char_to_write);// Write formatted output to sized buffersnprintf(position_x_y,16,&quot;%d:%d&quot;,(ulong)max_y_2,(ulong)max_x_2);waddnstr(window,position_x_y,4294967295);char_index = &amp;INT_001040c0;waddch(window,(&amp;DAT_00104120)[*char_index]);waddch is used add a character to a curses window and advance cursor.So we got few options, we will try to eliminate it one by one by thinking what it does, the first is kind of complex shifting of the char depending on get_char function:int get_char(int x,int y) { return *(int *)(&amp;DAT_00102020 + (long)((x + *(int *)(&amp;DAT_00102020 + (long)((y + 1337) % 256) * 4)) % 256) * 4);}But I stepped out and was thinking about the “char_to_write = ‘A’;”, it seemed weird to me, so I moved on.Next we just printing position x-y, that’s clearly not what we are searching for.Moving on we end-up here:char_index = &amp;INT_001040c0;waddch(window,(&amp;DAT_00104120)[*char_index]);I noticed that the char_index variable is actually an array of ints and if some conditions are met then the char is printed.So I tried to extract some of the non-null ints from the memory and added it to the DAT_00104120 and what we got here: “HTB{“, beginning of the flag and I knew that I was on the right path.00104205 H0010413c T001041d8 B001041d2 {00104160 T00104188 H001041f2 3001041aa _00104170 c001041a6 u0010421c r00104193 s001041f2 3001041aa _0010420d i00104193 s001041aa _00104165 b0010421c r00104176 o001041eb k001041f2 30010420f n001041e0 }# HTB{th3_curs3_is_brok3n}Final wordsThanks for reading, if someone is interested in collaboration write me on discord (bitr13x) or email me (sw33tbit@protonmail.com).]]></summary></entry><entry><title type="html">TryHackMe CTF HackfinityBattle Writeup: Reverse Engineering (computemagic, oldauth)</title><link href="/articles/tryhackme-ctf-hackfinitybattle-writeup-reverse-engineering-computemagic-oldauth/" rel="alternate" type="text/html" title="TryHackMe CTF HackfinityBattle Writeup: Reverse Engineering (computemagic, oldauth)" /><published>2025-03-27T00:00:00+00:00</published><updated>2025-03-27T00:00:00+00:00</updated><id>/articles/tryhackme-ctf-hackfinitybattle-writeup-reverse-engineering-computemagic-oldauth</id><content type="html" xml:base="/articles/tryhackme-ctf-hackfinitybattle-writeup-reverse-engineering-computemagic-oldauth/"><![CDATA[<p>In this article, we will look into the process of solving two reverse engineering challenges from the TryHackMe CTF event. Step-by-step breakdown of how to approach and solve these puzzles.</p><figure><img alt="" src="https://cdn-images-1.medium.com/max/1024/0*wA6dJ8KKstpQZZcr.png" /></figure><p>The original binaries are saved <a href="https://github.com/BitR13x/CTF-Collection/tree/main/Hackinfinity/reverse_engineering">here</a>.</p><h3>Recommended knowledge</h3><p>First get familiar with C (often you will end-up in de-compiler), it is very useful to learn little bit of assembly, registers and calling conventions if you need to use GDB.</p><p>Most important is to learn how to google build-in functions and more.</p><h3>Few tips how to approach these types challenges</h3><p>Find your de-compiler (Ghidra, IDA, Binary ninja, cutter, radare2 and more), there are lot’s of options just find what you are comfortable.</p><p>I stick with Ghidra and cutter (switching to the cutter if Ghidra does not decompile built-in functions or cannot find the main, just to check).</p><p>Get the bigger picture do not look into one part of the code too long if you look at a function from a different part, you can spot what is it for and decide if you need to understand it.</p><p>When looking for the main function, look for common patterns (the main function is usually loaded in the same manner from the entry point of the binary).</p><p>Plot graph of the execution flow for bigger binaries, it can help with clarity.</p><p>Make comments (the same reason).</p><h3>Computemagic</h3><p>When opening a binary usually you would see weird names and types.</p><p>After some renaming and figuring out what does what. I end up with this code:</p><pre> <br>int main(int argc,char **argv) {<br>  int error_res;<br>  ssize_t read_return;<br>  long in_FS_OFFSET;<br>  undefined4 option_value;<br>  socklen_t address_len;<br>  int socket;<br>  int socket_filedesc;<br>  int check;<br>  size_t length;<br>  sockaddr socketAddr;<br>  char buffer [24];<br>  undefined8 local_10;<br>  <br>  local_10 = *(undefined8 *)(in_FS_OFFSET + 40);<br>  option_value = 1;<br>  address_len = 16;<br>  while( true ) {<br>                    /* int socket(int domain, int type, int protocol); */<br>    socket = ::socket(2,1,0);<br>    if (socket == 0) {<br>      perror(&quot;socket failed&quot;);<br>                    /* WARNING: Subroutine does not return */<br>      exit(1);<br>    }<br>    error_res = setsockopt(socket,1,15,&amp;option_value,4);<br>    if (error_res != 0) {<br>      perror(&quot;setsockopt failed&quot;);<br>                    /* WARNING: Subroutine does not return */<br>      exit(1);<br>    }<br>    socketAddr.sa_family = 2;<br>    socketAddr.sa_data[2] = &#39;\0&#39;;<br>    socketAddr.sa_data[3] = &#39;\0&#39;;<br>    socketAddr.sa_data[4] = &#39;\0&#39;;<br>    socketAddr.sa_data[5] = &#39;\0&#39;;<br>    socketAddr.sa_data._0_2_ = htons(9003);<br>    error_res = bind(socket,&amp;socketAddr,16);<br>    if (error_res &lt; 0) {<br>      perror(&quot;bind failed&quot;);<br>                    /* WARNING: Subroutine does not return */<br>      exit(1);<br>    }<br>    error_res = listen(socket,3);<br>    if (error_res &lt; 0) break;<br>    socket_filedesc = accept(socket,&amp;socketAddr,&amp;address_len);<br>    if (socket_filedesc &lt; 0) {<br>      perror(&quot;accept failed&quot;);<br>                    /* WARNING: Subroutine does not return */<br>      exit(1);<br>    }<br>    sendBanner(socket_filedesc);<br>    read_return = read(socket_filedesc,buffer,16);<br>    if (read_return &lt; 0) {<br>      perror(&quot;read failed&quot;);<br>                    /* WARNING: Subroutine does not return */<br>      exit(1);<br>    }<br>    length = strlen(buffer);<br>    if ((length != 0) &amp;&amp; (socketAddr.sa_data[length + 13] == &#39;\n&#39;)) {<br>      socketAddr.sa_data[length + 13] = &#39;\0&#39;;<br>    }<br>    check = checkSpell(buffer,socket_filedesc);<br>    if (check == 1) {<br>      puts(&quot;\nSpell check successful.&quot;);<br>    }<br>    else {<br>      puts(&quot;\nSpell check failed.&quot;);<br>    }<br>    close(socket_filedesc);<br>    close(socket);<br>  }<br>  perror(&quot;listen failed&quot;);<br>                    /* WARNING: Subroutine does not return */<br>  exit(1);<br>}</pre><p>The binary starting a socket and waiting for connection.</p><p>Here is the most interesting parts of the code:</p><pre>socket_filedesc = accept(socket,&amp;socketAddr,&amp;address_len);<br>read_return = read(socket_filedesc,buffer,16);<br>length = strlen(buffer);<br>if ((length != 0) &amp;&amp; (socketAddr.sa_data[length + 13] == &#39;\n&#39;)) {<br>  socketAddr.sa_data[length + 13] = &#39;\0&#39;;<br>}<br>check = checkSpell(buffer,socket_filedesc);<br>if (check == 1) {<br>  puts(&quot;\nSpell check successful.&quot;);<br>}<br>else {<br>  puts(&quot;\nSpell check failed.&quot;);<br>}</pre><p>Now we know how large the input string must be and we know what function is used to validate if the input is correct.</p><pre>int checkSpell(char *buffer,int filedesc) {<br>  int return_val;<br>  size_t length;<br>  <br>  length = strlen(buffer);<br>  if ((int)length &lt; 1) {<br>    puts(&quot;Empty string.&quot;);<br>    return_val = 0;<br>  }<br>  else {<br>    switch(*buffer) {<br>    case &#39;A&#39;:<br>      func_1(buffer,filedesc);<br>      break;<br>    ...<br>    ...<br>    case &#39;Z&#39;:<br>      func_26(buffer,filedesc);<br>    }<br>    return_val = 1;<br>  }<br>  return return_val;<br>}</pre><p>Switch case, that is calling different functions depending on the first letter.</p><p>It can look complex, but I realized it has to take parameters in order to check the actual string and I end up look into each function that has parameters and found:</p><pre>void func_13(char *buf,int filedsc) {<br>  int result;<br>  <br>  result = check_other(buf);<br>  if (result != 0) {<br>    read_flag(filedsc);<br>  }<br>  return;<br>}</pre><p>Where the real validation happens:</p><pre><br>bool check_other(char *buf) {<br>  int res_strcmp;<br>  long in_FS_OFFSET;<br>  int i;<br>  char hardcoded [16];<br>  long canary;<br>  <br>  canary = *(long *)(in_FS_OFFSET + 40);<br>  // all what we need to reverse:<br>  for (i = 0; i &lt; 16; i = i + 1) {<br>    hardcoded[i] = buf[i] + 0x4U ^ 13;<br>  }<br><br>  res_strcmp = strcmp(hardcoded,&quot;AhhF1ag1571GHFDS&quot;);<br>  if (res_strcmp != 0) {<br>    printf(&quot;Incorrect: %s\n&quot;,buf);<br>  }<br>  else {<br>    printf(&quot;Correct: %s\n&quot;,buf);<br>  }<br>  if (canary != *(long *)(in_FS_OFFSET + 40)) {<br>                    /* WARNING: Subroutine does not return */<br>    __stack_chk_fail();<br>  }<br>  return res_strcmp == 0;<br>}</pre><p>Which I reverse by using python (the 0x4U means unsigned 4):</p><pre>a = &quot;AhhF1ag1571GHFDS&quot;<br>buf = [&quot;&quot;] * len(a)<br><br>for i in range(len(buf)):<br>    buf[i] = chr(ord(a[i]) + 4 ^ 13)<br><br>print(&quot;&quot;.join(buf)) # HaaG8hf8468FAGEZ</pre><h3>Oldauth</h3><p>Here is the same process rename everything and type it:</p><pre><br>int main(int argc,char **argv,char **envp) {<br>  bool bVar1;<br>  int iVar2;<br>  char *fgets_check;<br>  size_t newline_index;<br>  undefined7 extraout_var;<br>  undefined7 extraout_var_00;<br>  undefined7 extraout_var_01;<br>  undefined7 extraout_var_02;<br>  undefined4 in_register_0000003c;<br>  long in_FS_OFFSET;<br>  char username [112];<br>  char key [1000];<br>  long canary_bit;<br>  <br>  canary_bit = *(long *)(in_FS_OFFSET + 40);<br>  setup(CONCAT44(in_register_0000003c,argc));<br>  printf(&quot;Enter the key: &quot;);<br>  fgets_check = fgets(key,1000,stdin);<br>  if (fgets_check == (char *)0) {<br>    puts(&quot;Error!&quot;);<br>    iVar2 = -1;<br>  }<br>  else {<br>    newline_index = strcspn(key,&quot;\n&quot;);<br>    key[newline_index] = &#39;\0&#39;;<br>                    /* xor by 82 every char<br>                        */<br>    change(key,newline_index,82);<br>    if (newline_index != 16) {<br>                    /* <br>                        */<br>      fail();<br>    }<br>    if (key[2] != &#39;Q&#39;) {<br>      fail();<br>    }<br>    if (key[13] != &#39;4&#39;) {<br>      fail();<br>    }<br>                    /* suma of chars and modulo (4: how many chars, 3: modulo) */<br>    bVar1 = check(key,4,3);<br>    if ((int)CONCAT71(extraout_var,bVar1) == 0) {<br>      fail();<br>    }<br>    bVar1 = check(key + 4,5,8);<br>    if ((int)CONCAT71(extraout_var_00,bVar1) == 0) {<br>      fail();<br>    }<br>    bVar1 = check(key + 8,4,5);<br>    if ((int)CONCAT71(extraout_var_01,bVar1) == 0) {<br>      fail();<br>    }<br>    bVar1 = check(key + 12,4,3);<br>    if ((int)CONCAT71(extraout_var_02,bVar1) == 0) {<br>      fail();<br>    }<br>    printf(&quot;Enter the username: &quot;);<br>    fgets_check = fgets(username,100,stdin);<br>    if (fgets_check == (char *)0) {<br>      puts(&quot;Error!&quot;);<br>      iVar2 = -1;<br>    }<br>    else {<br>      newline_index = strcspn(username,&quot;\n&quot;);<br>      iVar2 = compare_with_target(username,newline_index);<br>      if (iVar2 == 0) {<br>        fail();<br>      }<br>      succeed();<br>      iVar2 = 0;<br>    }<br>  }<br>  if (canary_bit != *(long *)(in_FS_OFFSET + 40)) {<br>                    /* WARNING: Subroutine does not return */<br>    __stack_chk_fail();<br>  }<br>  return iVar2;<br>}</pre><p>Find interesting parts of code:</p><p>(I’ve named the first input as key)</p><figure><img alt="" src="https://cdn-images-1.medium.com/max/557/1*HXLml5CZaEt0EmEN9mAUnA.png" /><figcaption>This tells us the size and few letters</figcaption></figure><p>Next there is called four times on an input check function.</p><pre>    bVar1 = check(key,4,3);<br>    if ((int)CONCAT71(extraout_var,bVar1) == 0) {<br>      fail();<br>    }<br>    bVar1 = check(key + 4,5,8);<br>    if ((int)CONCAT71(extraout_var_00,bVar1) == 0) {<br>      fail();<br>    }<br>    bVar1 = check(key + 8,4,5);<br>    if ((int)CONCAT71(extraout_var_01,bVar1) == 0) {<br>      fail();<br>    }<br>    bVar1 = check(key + 12,4,3);<br>    if ((int)CONCAT71(extraout_var_02,bVar1) == 0) {<br>      fail();<br>    }</pre><p>After some adjustments for the function:</p><pre>bool check(char *key,int for_end,int modulo) {<br>  int suma;<br>  int i;<br>  <br>  suma = 0;<br>  for (i = 0; i &lt; for_end; i = i + 1) {<br>    suma = suma + key[i];<br>  }<br>  return suma % modulo == 0;<br>}</pre><p>I also noticed a second <em>fgets</em> meaning there are two parts (password and username). I started with reversing the check function using python:</p><pre>key = [&quot;&quot;, &quot;&quot;, &quot;Q&quot;, &quot;&quot;, &quot;&quot;, &quot;&quot;, &quot;&quot;, &quot;&quot;, &quot;&quot;, &quot;&quot;, &quot;&quot;, &quot;&quot;, &quot;&quot;, &quot;4&quot;, &quot;&quot;, &quot;&quot;]<br>def rev_check(start, end, modulo):<br>    suma = 0<br>    def_letter = &quot;d&quot;<br>    for i in range(start, start+end):<br>        if not key[i]:<br>            key[i] = def_letter<br>        <br>        suma += ord(key[i])<br><br>    if suma % modulo != 0:<br>        tmp = suma % modulo<br>        key[i] = chr(ord(def_letter) - tmp)<br><br># from the binary<br>rev_check(0, 4, 3)<br>rev_check(4, 5, 8)<br>rev_check(8, 4, 5)<br>rev_check(12, 4, 3)<br><br>print(&quot;REV Check:&quot;, key)<br>for c in range(len(key)):<br>    key[c] = chr(ord(key[c]) ^ 82)<br><br>print(&quot;XOR:&quot;, key)<br><br>with open(&quot;rev_out&quot;, &quot;w&quot;) as f:<br>    f.write(&quot;&quot;.join(key))<br><br>print(&quot;password:&quot;, &quot;&quot;.join(key).encode())</pre><p>Not the prettiest code, but hey it works.</p><p>2nd part is username:</p><pre>    printf(&quot;Enter the username: &quot;);<br>    fgets_check = fgets(username,100,stdin);<br>    if (fgets_check == (char *)0) {<br>      puts(&quot;Error!&quot;);<br>      iVar2 = -1;<br>    }<br>    else {<br>      newline_index = strcspn(username,&quot;\n&quot;);<br>      iVar2 = compare_with_target(username,newline_index);<br>      if (iVar2 == 0) {<br>        fail();<br>      }<br>      succeed();<br>      iVar2 = 0;<br>    }</pre><p>Noticed that there is called the <em>compare_with_target</em> function, to check if the username is correct.</p><figure><img alt="" src="https://cdn-images-1.medium.com/max/467/1*5qg_WrTfl5JoqVEGBGmPLw.png" /></figure><p>Don’t get confused with the return “!=” it has to return the “<em>1”.</em></p><p>This function is a straight forward checking hard-coded variable with a small ASCII shift (+2).</p><p>The reverse of this function in python would look like this:</p><pre># username<br>username = &quot;&quot;<br>for c in &quot;elb4rt0pwn&quot;:<br>    username += chr(ord(c) - 2)<br><br>print(&quot;username:&quot;, username)</pre><p>After sending it all together into the binary you would get a flag.</p><h3>Final words</h3><p>Thanks for reading, if someone is interested in collaboration write me on discord (bitr13x) or email me (<a href="mailto:sw33tbit@protonmail.com">sw33tbit@protonmail.com</a>).</p><img src="https://medium.com/_/stat?event=post.clientViewed&referrerSource=full_rss&postId=ae99c70409c5" width="1" height="1" alt="">]]></content><author><name>BitR13x</name></author><category term="tryhackme" /><category term="reverse-engineering" /><category term="ctf" /><category term="cybersecurity" /><summary type="html"><![CDATA[In this article, we will look into the process of solving two reverse engineering challenges from the TryHackMe CTF event. Step-by-step breakdown of how to approach and solve these puzzles.The original binaries are saved here.Recommended knowledgeFirst get familiar with C (often you will end-up in de-compiler), it is very useful to learn little bit of assembly, registers and calling conventions if you need to use GDB.Most important is to learn how to google build-in functions and more.Few tips how to approach these types challengesFind your de-compiler (Ghidra, IDA, Binary ninja, cutter, radare2 and more), there are lot’s of options just find what you are comfortable.I stick with Ghidra and cutter (switching to the cutter if Ghidra does not decompile built-in functions or cannot find the main, just to check).Get the bigger picture do not look into one part of the code too long if you look at a function from a different part, you can spot what is it for and decide if you need to understand it.When looking for the main function, look for common patterns (the main function is usually loaded in the same manner from the entry point of the binary).Plot graph of the execution flow for bigger binaries, it can help with clarity.Make comments (the same reason).ComputemagicWhen opening a binary usually you would see weird names and types.After some renaming and figuring out what does what. I end up with this code: int main(int argc,char **argv) { int error_res; ssize_t read_return; long in_FS_OFFSET; undefined4 option_value; socklen_t address_len; int socket; int socket_filedesc; int check; size_t length; sockaddr socketAddr; char buffer [24]; undefined8 local_10; local_10 = *(undefined8 *)(in_FS_OFFSET + 40); option_value = 1; address_len = 16; while( true ) { /* int socket(int domain, int type, int protocol); */ socket = ::socket(2,1,0); if (socket == 0) { perror(&quot;socket failed&quot;); /* WARNING: Subroutine does not return */ exit(1); } error_res = setsockopt(socket,1,15,&amp;option_value,4); if (error_res != 0) { perror(&quot;setsockopt failed&quot;); /* WARNING: Subroutine does not return */ exit(1); } socketAddr.sa_family = 2; socketAddr.sa_data[2] = &#39;\0&#39;; socketAddr.sa_data[3] = &#39;\0&#39;; socketAddr.sa_data[4] = &#39;\0&#39;; socketAddr.sa_data[5] = &#39;\0&#39;; socketAddr.sa_data._0_2_ = htons(9003); error_res = bind(socket,&amp;socketAddr,16); if (error_res &lt; 0) { perror(&quot;bind failed&quot;); /* WARNING: Subroutine does not return */ exit(1); } error_res = listen(socket,3); if (error_res &lt; 0) break; socket_filedesc = accept(socket,&amp;socketAddr,&amp;address_len); if (socket_filedesc &lt; 0) { perror(&quot;accept failed&quot;); /* WARNING: Subroutine does not return */ exit(1); } sendBanner(socket_filedesc); read_return = read(socket_filedesc,buffer,16); if (read_return &lt; 0) { perror(&quot;read failed&quot;); /* WARNING: Subroutine does not return */ exit(1); } length = strlen(buffer); if ((length != 0) &amp;&amp; (socketAddr.sa_data[length + 13] == &#39;\n&#39;)) { socketAddr.sa_data[length + 13] = &#39;\0&#39;; } check = checkSpell(buffer,socket_filedesc); if (check == 1) { puts(&quot;\nSpell check successful.&quot;); } else { puts(&quot;\nSpell check failed.&quot;); } close(socket_filedesc); close(socket); } perror(&quot;listen failed&quot;); /* WARNING: Subroutine does not return */ exit(1);}The binary starting a socket and waiting for connection.Here is the most interesting parts of the code:socket_filedesc = accept(socket,&amp;socketAddr,&amp;address_len);read_return = read(socket_filedesc,buffer,16);length = strlen(buffer);if ((length != 0) &amp;&amp; (socketAddr.sa_data[length + 13] == &#39;\n&#39;)) { socketAddr.sa_data[length + 13] = &#39;\0&#39;;}check = checkSpell(buffer,socket_filedesc);if (check == 1) { puts(&quot;\nSpell check successful.&quot;);}else { puts(&quot;\nSpell check failed.&quot;);}Now we know how large the input string must be and we know what function is used to validate if the input is correct.int checkSpell(char *buffer,int filedesc) { int return_val; size_t length; length = strlen(buffer); if ((int)length &lt; 1) { puts(&quot;Empty string.&quot;); return_val = 0; } else { switch(*buffer) { case &#39;A&#39;: func_1(buffer,filedesc); break; ... ... case &#39;Z&#39;: func_26(buffer,filedesc); } return_val = 1; } return return_val;}Switch case, that is calling different functions depending on the first letter.It can look complex, but I realized it has to take parameters in order to check the actual string and I end up look into each function that has parameters and found:void func_13(char *buf,int filedsc) { int result; result = check_other(buf); if (result != 0) { read_flag(filedsc); } return;}Where the real validation happens:bool check_other(char *buf) { int res_strcmp; long in_FS_OFFSET; int i; char hardcoded [16]; long canary; canary = *(long *)(in_FS_OFFSET + 40); // all what we need to reverse: for (i = 0; i &lt; 16; i = i + 1) { hardcoded[i] = buf[i] + 0x4U ^ 13; } res_strcmp = strcmp(hardcoded,&quot;AhhF1ag1571GHFDS&quot;); if (res_strcmp != 0) { printf(&quot;Incorrect: %s\n&quot;,buf); } else { printf(&quot;Correct: %s\n&quot;,buf); } if (canary != *(long *)(in_FS_OFFSET + 40)) { /* WARNING: Subroutine does not return */ __stack_chk_fail(); } return res_strcmp == 0;}Which I reverse by using python (the 0x4U means unsigned 4):a = &quot;AhhF1ag1571GHFDS&quot;buf = [&quot;&quot;] * len(a)for i in range(len(buf)): buf[i] = chr(ord(a[i]) + 4 ^ 13)print(&quot;&quot;.join(buf)) # HaaG8hf8468FAGEZOldauthHere is the same process rename everything and type it:int main(int argc,char **argv,char **envp) { bool bVar1; int iVar2; char *fgets_check; size_t newline_index; undefined7 extraout_var; undefined7 extraout_var_00; undefined7 extraout_var_01; undefined7 extraout_var_02; undefined4 in_register_0000003c; long in_FS_OFFSET; char username [112]; char key [1000]; long canary_bit; canary_bit = *(long *)(in_FS_OFFSET + 40); setup(CONCAT44(in_register_0000003c,argc)); printf(&quot;Enter the key: &quot;); fgets_check = fgets(key,1000,stdin); if (fgets_check == (char *)0) { puts(&quot;Error!&quot;); iVar2 = -1; } else { newline_index = strcspn(key,&quot;\n&quot;); key[newline_index] = &#39;\0&#39;; /* xor by 82 every char */ change(key,newline_index,82); if (newline_index != 16) { /* */ fail(); } if (key[2] != &#39;Q&#39;) { fail(); } if (key[13] != &#39;4&#39;) { fail(); } /* suma of chars and modulo (4: how many chars, 3: modulo) */ bVar1 = check(key,4,3); if ((int)CONCAT71(extraout_var,bVar1) == 0) { fail(); } bVar1 = check(key + 4,5,8); if ((int)CONCAT71(extraout_var_00,bVar1) == 0) { fail(); } bVar1 = check(key + 8,4,5); if ((int)CONCAT71(extraout_var_01,bVar1) == 0) { fail(); } bVar1 = check(key + 12,4,3); if ((int)CONCAT71(extraout_var_02,bVar1) == 0) { fail(); } printf(&quot;Enter the username: &quot;); fgets_check = fgets(username,100,stdin); if (fgets_check == (char *)0) { puts(&quot;Error!&quot;); iVar2 = -1; } else { newline_index = strcspn(username,&quot;\n&quot;); iVar2 = compare_with_target(username,newline_index); if (iVar2 == 0) { fail(); } succeed(); iVar2 = 0; } } if (canary_bit != *(long *)(in_FS_OFFSET + 40)) { /* WARNING: Subroutine does not return */ __stack_chk_fail(); } return iVar2;}Find interesting parts of code:(I’ve named the first input as key)This tells us the size and few lettersNext there is called four times on an input check function. bVar1 = check(key,4,3); if ((int)CONCAT71(extraout_var,bVar1) == 0) { fail(); } bVar1 = check(key + 4,5,8); if ((int)CONCAT71(extraout_var_00,bVar1) == 0) { fail(); } bVar1 = check(key + 8,4,5); if ((int)CONCAT71(extraout_var_01,bVar1) == 0) { fail(); } bVar1 = check(key + 12,4,3); if ((int)CONCAT71(extraout_var_02,bVar1) == 0) { fail(); }After some adjustments for the function:bool check(char *key,int for_end,int modulo) { int suma; int i; suma = 0; for (i = 0; i &lt; for_end; i = i + 1) { suma = suma + key[i]; } return suma % modulo == 0;}I also noticed a second fgets meaning there are two parts (password and username). I started with reversing the check function using python:key = [&quot;&quot;, &quot;&quot;, &quot;Q&quot;, &quot;&quot;, &quot;&quot;, &quot;&quot;, &quot;&quot;, &quot;&quot;, &quot;&quot;, &quot;&quot;, &quot;&quot;, &quot;&quot;, &quot;&quot;, &quot;4&quot;, &quot;&quot;, &quot;&quot;]def rev_check(start, end, modulo): suma = 0 def_letter = &quot;d&quot; for i in range(start, start+end): if not key[i]: key[i] = def_letter suma += ord(key[i]) if suma % modulo != 0: tmp = suma % modulo key[i] = chr(ord(def_letter) - tmp)# from the binaryrev_check(0, 4, 3)rev_check(4, 5, 8)rev_check(8, 4, 5)rev_check(12, 4, 3)print(&quot;REV Check:&quot;, key)for c in range(len(key)): key[c] = chr(ord(key[c]) ^ 82)print(&quot;XOR:&quot;, key)with open(&quot;rev_out&quot;, &quot;w&quot;) as f: f.write(&quot;&quot;.join(key))print(&quot;password:&quot;, &quot;&quot;.join(key).encode())Not the prettiest code, but hey it works.2nd part is username: printf(&quot;Enter the username: &quot;); fgets_check = fgets(username,100,stdin); if (fgets_check == (char *)0) { puts(&quot;Error!&quot;); iVar2 = -1; } else { newline_index = strcspn(username,&quot;\n&quot;); iVar2 = compare_with_target(username,newline_index); if (iVar2 == 0) { fail(); } succeed(); iVar2 = 0; }Noticed that there is called the compare_with_target function, to check if the username is correct.Don’t get confused with the return “!=” it has to return the “1”.This function is a straight forward checking hard-coded variable with a small ASCII shift (+2).The reverse of this function in python would look like this:# usernameusername = &quot;&quot;for c in &quot;elb4rt0pwn&quot;: username += chr(ord(c) - 2)print(&quot;username:&quot;, username)After sending it all together into the binary you would get a flag.Final wordsThanks for reading, if someone is interested in collaboration write me on discord (bitr13x) or email me (sw33tbit@protonmail.com).]]></summary></entry><entry><title type="html">Solve equations and mathematical games with Z3 solver</title><link href="/articles/solve-equations-and-mathematical-games-with-z3-solver/" rel="alternate" type="text/html" title="Solve equations and mathematical games with Z3 solver" /><published>2025-03-14T00:00:00+00:00</published><updated>2025-03-14T00:00:00+00:00</updated><id>/articles/solve-equations-and-mathematical-games-with-z3-solver</id><content type="html" xml:base="/articles/solve-equations-and-mathematical-games-with-z3-solver/"><![CDATA[<p>How to efficiently solve problems ranging from simple mathematical equations to advanced logical satisfiability.</p><figure><img alt="" src="https://cdn-images-1.medium.com/max/540/1*2y4S8pFSL0YjvGiLuqOvaQ.png" /></figure><h3>What is Boolean Satisfiability (SAT) and Satisfiability Modulo Theories (SMT)</h3><p><strong>Boolean Satisfiability </strong>abbreviated<strong> SAT.</strong> Boolean stands for True or False and satisfiability is when it is true under some assignment of values to its variables. Meaning <strong>SAT</strong> solvers trying to find if the variables can be replaced by the values TRUE or FALSE in such a way that the formula evaluates to TRUE. The standard definition is:</p><blockquote>SAT solvers determine the ‘satisfiability’ of boolean set of equations for a set of inputs.</blockquote><p>In other hand the SMT practically doing the same thing, but it combines the power of SAT solvers and other types of solvers to solve more complicated formulas for example handling inequalities, uninterpreted functions. SMT can handle formulas that involve multiple theories such as <strong>linear arithmetic</strong>, <strong>bit-vectors</strong>, and <strong>arrays</strong>.</p><h3><strong>Intro into Z3 Solver</strong></h3><p>Why we were talking about <strong>SMT</strong> and <strong>SAT</strong>, because the <strong>Z3</strong> is <a href="https://smt-lib.org/solvers.shtml">one of the <strong>SMTs</strong></a><strong>. </strong>It can be used for a variety of purposes such as formal verification, model checking, static program analysis and lot more.</p><p>Often when navigating through this field you will come across the terms like:</p><p><strong>Symbols</strong> (= variables), <br><strong>Unsat/sat</strong> (= unsatisfiable/satisfiable), (= unsolvable/solvable)<br><strong>Concrete values</strong> (= strings, decimals and integers)<br><strong>Literals</strong> (= SAT variable in short)<br><strong>Clauses</strong> (= combination of literals)</p><h4>Bonus</h4><p><strong>P </strong>problem (Polynomial problem): Refers to problems that can be solved efficiently (in polynomial time [n² + n, n]) by a deterministic algorithm. Example: Sorting a list.</p><p><strong>NP </strong>problem<strong> </strong>(Nondeterministic Polynomial problem): Refers to problems for which a solution can be quickly verified (in polynomial time). Example: Verifying a solution to a Sudoku puzzle.</p><h3>How the Z3 actually works? Well here you go:</h3><p>The fastest way how to demonstrate it, is how to solve Facebook quiz:</p><figure><img alt="" src="https://cdn-images-1.medium.com/max/227/0*tllS_2trEwIevGkp" /></figure><p>We can rewrite it into Z3 form, where flowers will be the symbols (variables):</p><pre>from z3 import *<br><br># flowers =&gt; Symbolic [Int] type<br>rflower = Int(&quot;rflower&quot;)<br>bflower = Int(&quot;bflower&quot;)<br>yflower = Int(&quot;yflower&quot;)<br># rflower, bflower, yflower = Ints(&#39;rflower bflower yflower&#39;)<br><br>solver = Solver()<br><br># (Constraints) Equations<br>solver.add(rflower + rflower + rflower == 60)<br>solver.add(rflower + bflower + bflower == 30)<br>solver.add(bflower - yflower == 3)<br># note: if we know the result is positive, we can add constraint: flower &gt; 0<br><br># Solver.check =&gt; CheckSatResult[sat, unsat, unknown]<br>if solver.check() == sat:<br>    model = solver.model()<br>    print(&quot;Sat solution:&quot;)<br>    print(<br>        f&quot;Answer is: {model[yflower]} + {model[rflower]} + {model[bflower]} =&quot;, <br>        f&quot;{model[yflower].as_long() + model[rflower].as_long() + model[bflower].as_long()}&quot;<br>    )<br>else:<br>    print(&quot;unsat: No solution found.&quot;)</pre><p>I think everything is straight forward except one thing why “<em>.as_long()”</em>? That’s because <em>model[variable]</em> is not <em>Int</em>,<em> </em>but<em> </em>class <em>z3.z3.IntNumRef.</em></p><p>When we dive a little bit deeper and look how Z3 is actually solving these problems:</p><figure><img alt="" src="https://cdn-images-1.medium.com/max/752/1*4TO5cqFKNLvonWTaIp4Z3Q.png" /><figcaption>abstract path of Z3 solving equation</figcaption></figure><h3>Solving reverse engineering challenge:</h3><figure><img alt="" src="https://cdn-images-1.medium.com/max/755/1*qD43cdqRfw1f1Wn-JKUKwg.png" /><figcaption>Decompiled binary using Ghidra</figcaption></figure><p>What do we even see? It’s binary that checks whatever license format is right or not, the license is hardcoded under some if statement, which has to be true in order to crack the binary.</p><p>The argc arguments is the number of arguments supplied we know we need to run the binary with at least one argument and the length is 32 bytes.</p><p>There are two approaches about this problem using Z3, we use it to solve as equation or with angr that will control flow of the program and try to brute force it until everything is met.</p><p>We will apply Z3 by rewriting the if statement into equation (you don’t need to do it manually, help yourself, for example you can use global replace)</p><p>There is a small catch with the conversion, the chars are from -128 to 127 and when they overflow it will move back and forth.</p><figure><img alt="" src="https://cdn-images-1.medium.com/max/564/1*LxhfxKE7gq7nQ1qQGdTJqg.png" /><figcaption>Small C example of the char conversion</figcaption></figure><p>In order to solve this weird unusual acting we will use <em>BitVecs</em>, I thought of using a function to handle the logic, but I end up using <em>BitVecs</em> for the simplicity.</p><pre>from z3 import *<br><br><br>def check_license_with_z3():<br>    solver = Solver()<br>    # Create array of bitvecs with size of 32<br>    string = [BitVec(f&quot;string_{i}&quot;, 8) for i in range(32)]<br><br>    solver.add(<br>        string[29] == string[5] - string[3] + ord(&quot;F&quot;),<br>        string[2] + string[22] == string[13] + ord(&quot;{&quot;),<br>        string[12] + string[4] == string[5] + 0x1c,<br>        string[25] * string[23] == string[0] + string[17] + 0x17,<br>        string[27] * string[1] == string[5] + string[22] + -21,<br>        string[9] * string[13] == string[28] * string[3] + -9,<br>        string[9] == ord(&quot;p&quot;),<br>        string[19] + string[21] == string[6] + -128,<br>        string[16] == string[15] - string[11] + ord(&quot;0&quot;),<br>        string[7] * string[27] == string[1] * string[13] + ord(&quot;-&quot;),<br>        string[13] == string[18] + string[13] + -101,<br>        string[20] - string[8] == string[9] + ord(&quot;|&quot;),<br>        string[31] == string[8] - string[31] + -121,<br>        string[20] * string[31] == string[20] + 4,<br>        string[24] - string[17] == string[21] + string[8] + -23,<br>        string[7] + string[5] == string[5] + string[29] + ord(&quot;,&quot;),<br>        string[12] * string[10] == string[1] - string[11] + -36,<br>        string[31] * string[0] == string[26] + -27,<br>        string[1] + string[20] == string[10] + -125,<br>        string[18] == string[27] + string[14] + 2,<br>        string[30] * string[11] == string[21] + ord(&quot;D&quot;),<br>        string[5] * string[19] == string[1] + -44,<br>        string[13] - string[26] == string[21] + -127,<br>        string[23] == string[29] - string[0] + ord(&quot;X&quot;),<br>        string[19] == string[8] * string[13] + -23,<br>        string[6] + string[22] == string[3] + ord(&quot;S&quot;),<br>        string[12] == string[26] + string[7] + -114,<br>        string[16] == string[18] - string[5] + ord(&quot;3&quot;),<br>        string[30] - string[8] == string[29] + -77,<br>        string[20] - string[11] == string[3] + -76,<br>        string[16] - string[7] == string[17] + ord(&quot;f&quot;),<br>        string[1] + string[21] == string[11] + string[18] + ord(&quot;+&quot;),<br>    )<br><br>    if solver.check() == sat:<br>        model = solver.model()<br>        print(<br>            &quot;&quot;.join([<br>                chr(c.as_long())<br>                for c in [model.eval(string[i]) for i in range(len(string))]<br>            ])<br>        )<br>        print(&quot;License Correct&quot;)<br>        return True<br>    else:<br>        print(&quot;License Invalid&quot;)<br>        return False</pre><p>(Bonus if we want to just get the string “License Correct”, it’s done by overwriting the if instruction.)</p><h3><strong>Conclusion</strong></h3><p>We’ve learnt about Z3, the most fundamental terminology in Z3, and how to solve basic problems with Z3.</p><p>With a little knowledge about Z3, you will be able to solve complex problems like rubic cube, sudoku, magic square and <a href="https://ericpony.github.io/z3py-tutorial/guide-examples.htm">lot more</a>.</p><p>If you enjoyed this article, clap👋 and follow me! Thanks for reading! Looking forward to seeing you in the future.</p><h4>More Resources</h4><p>Exemplar challenges: <a href="https://github.com/PwnFunction/learn-z3">https://github.com/PwnFunction/learn-z3</a><br>Docs: <a href="https://github.com/Z3Prover/z3/wiki#background">https://github.com/Z3Prover/z3/wiki#background</a><br>YouTube explanation: <a href="https://www.youtube.com/watch?v=EacYNe7moSs">https://www.youtube.com/watch?v=EacYNe7moSs</a></p><img src="https://medium.com/_/stat?event=post.clientViewed&referrerSource=full_rss&postId=595d4de2719c" width="1" height="1" alt="">]]></content><author><name>BitR13x</name></author><category term="hacking" /><category term="reverse-engineering" /><category term="programming" /><category term="cybersecurity" /><summary type="html"><![CDATA[How to efficiently solve problems ranging from simple mathematical equations to advanced logical satisfiability.What is Boolean Satisfiability (SAT) and Satisfiability Modulo Theories (SMT)Boolean Satisfiability abbreviated SAT. Boolean stands for True or False and satisfiability is when it is true under some assignment of values to its variables. Meaning SAT solvers trying to find if the variables can be replaced by the values TRUE or FALSE in such a way that the formula evaluates to TRUE. The standard definition is:SAT solvers determine the ‘satisfiability’ of boolean set of equations for a set of inputs.In other hand the SMT practically doing the same thing, but it combines the power of SAT solvers and other types of solvers to solve more complicated formulas for example handling inequalities, uninterpreted functions. SMT can handle formulas that involve multiple theories such as linear arithmetic, bit-vectors, and arrays.Intro into Z3 SolverWhy we were talking about SMT and SAT, because the Z3 is one of the SMTs. It can be used for a variety of purposes such as formal verification, model checking, static program analysis and lot more.Often when navigating through this field you will come across the terms like:Symbols (= variables), Unsat/sat (= unsatisfiable/satisfiable), (= unsolvable/solvable)Concrete values (= strings, decimals and integers)Literals (= SAT variable in short)Clauses (= combination of literals)BonusP problem (Polynomial problem): Refers to problems that can be solved efficiently (in polynomial time [n² + n, n]) by a deterministic algorithm. Example: Sorting a list.NP problem (Nondeterministic Polynomial problem): Refers to problems for which a solution can be quickly verified (in polynomial time). Example: Verifying a solution to a Sudoku puzzle.How the Z3 actually works? Well here you go:The fastest way how to demonstrate it, is how to solve Facebook quiz:We can rewrite it into Z3 form, where flowers will be the symbols (variables):from z3 import *# flowers =&gt; Symbolic [Int] typerflower = Int(&quot;rflower&quot;)bflower = Int(&quot;bflower&quot;)yflower = Int(&quot;yflower&quot;)# rflower, bflower, yflower = Ints(&#39;rflower bflower yflower&#39;)solver = Solver()# (Constraints) Equationssolver.add(rflower + rflower + rflower == 60)solver.add(rflower + bflower + bflower == 30)solver.add(bflower - yflower == 3)# note: if we know the result is positive, we can add constraint: flower &gt; 0# Solver.check =&gt; CheckSatResult[sat, unsat, unknown]if solver.check() == sat: model = solver.model() print(&quot;Sat solution:&quot;) print( f&quot;Answer is: {model[yflower]} + {model[rflower]} + {model[bflower]} =&quot;, f&quot;{model[yflower].as_long() + model[rflower].as_long() + model[bflower].as_long()}&quot; )else: print(&quot;unsat: No solution found.&quot;)I think everything is straight forward except one thing why “.as_long()”? That’s because model[variable] is not Int, but class z3.z3.IntNumRef.When we dive a little bit deeper and look how Z3 is actually solving these problems:abstract path of Z3 solving equationSolving reverse engineering challenge:Decompiled binary using GhidraWhat do we even see? It’s binary that checks whatever license format is right or not, the license is hardcoded under some if statement, which has to be true in order to crack the binary.The argc arguments is the number of arguments supplied we know we need to run the binary with at least one argument and the length is 32 bytes.There are two approaches about this problem using Z3, we use it to solve as equation or with angr that will control flow of the program and try to brute force it until everything is met.We will apply Z3 by rewriting the if statement into equation (you don’t need to do it manually, help yourself, for example you can use global replace)There is a small catch with the conversion, the chars are from -128 to 127 and when they overflow it will move back and forth.Small C example of the char conversionIn order to solve this weird unusual acting we will use BitVecs, I thought of using a function to handle the logic, but I end up using BitVecs for the simplicity.from z3 import *def check_license_with_z3(): solver = Solver() # Create array of bitvecs with size of 32 string = [BitVec(f&quot;string_{i}&quot;, 8) for i in range(32)] solver.add( string[29] == string[5] - string[3] + ord(&quot;F&quot;), string[2] + string[22] == string[13] + ord(&quot;{&quot;), string[12] + string[4] == string[5] + 0x1c, string[25] * string[23] == string[0] + string[17] + 0x17, string[27] * string[1] == string[5] + string[22] + -21, string[9] * string[13] == string[28] * string[3] + -9, string[9] == ord(&quot;p&quot;), string[19] + string[21] == string[6] + -128, string[16] == string[15] - string[11] + ord(&quot;0&quot;), string[7] * string[27] == string[1] * string[13] + ord(&quot;-&quot;), string[13] == string[18] + string[13] + -101, string[20] - string[8] == string[9] + ord(&quot;|&quot;), string[31] == string[8] - string[31] + -121, string[20] * string[31] == string[20] + 4, string[24] - string[17] == string[21] + string[8] + -23, string[7] + string[5] == string[5] + string[29] + ord(&quot;,&quot;), string[12] * string[10] == string[1] - string[11] + -36, string[31] * string[0] == string[26] + -27, string[1] + string[20] == string[10] + -125, string[18] == string[27] + string[14] + 2, string[30] * string[11] == string[21] + ord(&quot;D&quot;), string[5] * string[19] == string[1] + -44, string[13] - string[26] == string[21] + -127, string[23] == string[29] - string[0] + ord(&quot;X&quot;), string[19] == string[8] * string[13] + -23, string[6] + string[22] == string[3] + ord(&quot;S&quot;), string[12] == string[26] + string[7] + -114, string[16] == string[18] - string[5] + ord(&quot;3&quot;), string[30] - string[8] == string[29] + -77, string[20] - string[11] == string[3] + -76, string[16] - string[7] == string[17] + ord(&quot;f&quot;), string[1] + string[21] == string[11] + string[18] + ord(&quot;+&quot;), ) if solver.check() == sat: model = solver.model() print( &quot;&quot;.join([ chr(c.as_long()) for c in [model.eval(string[i]) for i in range(len(string))] ]) ) print(&quot;License Correct&quot;) return True else: print(&quot;License Invalid&quot;) return False(Bonus if we want to just get the string “License Correct”, it’s done by overwriting the if instruction.)ConclusionWe’ve learnt about Z3, the most fundamental terminology in Z3, and how to solve basic problems with Z3.With a little knowledge about Z3, you will be able to solve complex problems like rubic cube, sudoku, magic square and lot more.If you enjoyed this article, clap👋 and follow me! Thanks for reading! Looking forward to seeing you in the future.More ResourcesExemplar challenges: https://github.com/PwnFunction/learn-z3Docs: https://github.com/Z3Prover/z3/wiki#backgroundYouTube explanation: https://www.youtube.com/watch?v=EacYNe7moSs]]></summary></entry><entry><title type="html">Cross-site scripting (XSS): Comprehensive guide on how to attack and defend</title><link href="/articles/cross-site-scripting-xss-comprehensive-guide-on-how-to-attack-and-defend/" rel="alternate" type="text/html" title="Cross-site scripting (XSS): Comprehensive guide on how to attack and defend" /><published>2024-08-26T00:00:00+00:00</published><updated>2024-08-26T00:00:00+00:00</updated><id>/articles/cross-site-scripting-xss-comprehensive-guide-on-how-to-attack-and-defend</id><content type="html" xml:base="/articles/cross-site-scripting-xss-comprehensive-guide-on-how-to-attack-and-defend/"><![CDATA[<p>This is a summary of XSS and everything needed to be able to find this vulnerability and protect yourself and others.</p><p>When starting out learning about XSS there is a lot of stuff, but most of it is just repeating, and you can’t find anything new. This guide should also cover the special cases that are hard to find on the web.</p><figure><img alt="" src="https://cdn-images-1.medium.com/max/1024/1*e3krx4Mi1ka6IKXa4IQILg.png" /></figure><h3>Why my JavaScript is not executing?</h3><ul><li><em>Browser protection against JavaScript execution</em></li></ul><h4>1) SOP (<a href="https://developer.mozilla.org/en-US/docs/Web/Security/Same-origin_policy">Same-Origin Policy</a>)</h4><p>It is a security rule that keeps data safe by making sure that web pages from one website (origin) can’t access data from another website (origin) without permission.</p><p>Anytime when we want to read the response from an API or different website (origin), the website has to answer with a CORS header to allow reading, otherwise we will get a SOP error:</p><figure><img alt="" src="https://cdn-images-1.medium.com/max/1024/1*3h4HqCb9UVGAhhEncDix0A.png" /><figcaption>Fetch request from different origin</figcaption></figure><h4>2) CSP (<a href="https://developer.mozilla.org/en-US/docs/Web/HTTP/CSP">Content Security Policy</a>)</h4><p>A security feature that allows website owners to control what content (like scripts, images, or styles) can be loaded onto their web pages.</p><p>You can set your <a href="https://content-security-policy.com/">CSP</a> in html using meta tag (or using header Content-Security-Policy):</p><pre>&lt;meta<br>  http-equiv=&quot;Content-Security-Policy&quot;<br>  content=&quot;default-src &#39;self&#39;; img-src https://*; child-src &#39;none&#39;;&quot; /&gt;</pre><h4>3) CORS (<a href="https://developer.mozilla.org/en-US/docs/Web/HTTP/CORS">Cross-Origin Resource Sharing</a>)</h4><p>Way for a website to request resources (like data) from another website even if they have different origins (domains).</p><p>It’s known under these headers:</p><pre>Access-Control-Allow-Origin: https://foo.example<br>Access-Control-Allow-Methods: POST, GET, OPTIONS<br>Access-Control-Allow-Headers: X-PINGOTHER, Content-Type<br>Access-Control-Max-Age: 86400</pre><p>It’s used to enable sharing of resources between different websites, but in a controlled way.</p><h4>4) Sanitized characters</h4><p>If a site properly sanitizes characters, the characters are rendered as HTML entities and the JavaScript or HTML tags are not executed.</p><ul><li>A double quote (“) as &amp;quot; or &amp;#34;</li><li>A single quote (‘) as &amp;apos; or &amp;#39;</li><li>An opening angle bracket (&lt;) as &amp;lt; or &amp;#60;</li><li>A closing angle bracket (&gt;) as &amp;gt; or &amp;#62;</li></ul><h3>Weird JavaScript</h3><ul><li><em>Encoding, function execution and much more is acting very weird when it comes to javascript</em></li></ul><h4>Encoding</h4><p>JavaScript supports various types of encoding, like Hex, Decimal, Unicode, named and HTML5 entities.</p><p>The weird thing about this, is that we can turn these encoding directly into chars or numbers without using a decoding function.</p><p>Also, it’s useful to know that a single character escape sequence exists:</p><pre>&#39;\b&#39; // backspace<br>&#39;\f&#39; // form feed<br>&#39;\n&#39; // new line<br>&#39;\r&#39; // carriage return<br>&#39;\t&#39; // tab<br>&#39;\v&#39; // vertical tab<br>&#39;\0&#39; // null<br>&#39;\&#39;&#39; // single quote<br>&#39;\&quot;&#39; // double quote<br>&#39;\\&#39; // backslash</pre><p>We can break down a word or sentence using this knowledge:</p><pre>&quot;A\W\E\S\O\M\E&quot; // &quot;AWESOME&quot;<br><br>&#39;Multiple \<br>lines&#39; // &quot;Multiple lines&quot;</pre><p><strong>Hex:</strong></p><p>We can encode using hex, but here is the problem that we can’t declare variables or call functions, because without a double quote it will cause an error.</p><pre>const a = () =&gt; 1;<br><br>&quot;\x61&quot; // returns &quot;a&quot;<br>\x61 // Invalid escape sequence</pre><p><strong>Unicode:</strong></p><p>We can declare functions and variables, we can also half encode word so that it won’t get filtred out.</p><pre>// unicode character &quot;63&quot; is allowed as a variable<br>const \u0061 = () =&gt; 1;<br>\u{63} = 1 <br><br>\u{61}() //correctly calls the function<br><br>&quot;H\u0065LLO&quot; // HELLO</pre><h4>Function Execution</h4><p>Functions may be quite fascinating in JavaScript, we can invoke them without parentheses:</p><pre>function printout(n1) {<br>  return n1;<br>};<br><br>printout(&quot;Hello World!&quot;); // output: &quot;Hello World&quot;<br>printout`Hello World!`; //  output: [&quot;Hello World&quot;]</pre><p>If we want to execute a function with more parameters, we can utilize <a href="https://developer.mozilla.org/en-US/docs/Web/JavaScript/Reference/Template_literals">template literals</a>. however, the indexing starts at 1 rather than 0.</p><pre>function sum(n1, n2) {<br>  console.log(n1, n2); // [&quot;n1&quot;, &quot;&quot;, &quot;&quot;], n2<br>  return Number(n1[0]) + n2;<br>}; <br><br>sum`5${4}`; // output: 9<br><br>// Easier way through arguments<br>function x() {<br>  console.log(arguments);<br>};<br><br>x`${1}${2}${3}`; // output [[&quot;&quot;, &quot;&quot;, &quot;&quot;], 1, 2, 3]</pre><p>There are more ways to execute a function. For example:</p><p>Interesting ways of executing alert found in book from <em>Gareth Heyes</em>:</p><pre>window.valueOf=alert;window+1<br>setTimeout`alert\x281337\x29`<br>&#39;1337,&#39;.replace`1337${alert}`<br>Reflect.apply.call`${alert}${window}${[1337]}`/</pre><p>And more from PayloadsAllTheThings:</p><pre>window[&#39;alert&#39;](0)<br>parent[&#39;alert&#39;](1)<br>self[&#39;alert&#39;](2)<br>top[&#39;alert&#39;](3)<br>this[&#39;alert&#39;](4)<br>frames[&#39;alert&#39;](5)<br><br>[7].map(alert);<br>[8].find(alert);<br>[9].every(alert);<br>[10].filter(alert);<br>[11].findIndex(alert);<br>[12].forEach(alert);</pre><h4><a href="https://book.hacktricks.xyz/pentesting-web/xss-cross-site-scripting/iframes-in-xss-and-csp">Iframe</a> and <a href="https://www.geeksforgeeks.org/window-object-in-javascript/">Window</a></h4><p>We can dereference window.alert and it will also dereference alert, because the origin of alert function lies on window.</p><figure><img alt="" src="https://cdn-images-1.medium.com/max/722/1*K9rUAMqiDLuQp4g__-_0zA.png" /><figcaption>Dereferencing alert object from window</figcaption></figure><p>Iframes can be used for JavaScript sandbox execution, suppose we got this code, and we want to execute a XSS to get the secret.</p><pre>var secret = &quot;MY-SECRET&quot;;<br>function createSandboxedEnvironment(code) {<br>    const iframe = document.createElement(&#39;iframe&#39;);<br>    iframe.style.display = &#39;none&#39;;<br>    document.body.appendChild(iframe);<br><br>    const sandboxWindow = iframe.contentWindow;<br>    const sandboxDocument = iframe.contentDocument;<br><br>    try {<br>        sandboxWindow.eval(code);<br>    } catch (error) {<br>        console.error(&#39;Error in sandboxed code:&#39;, error);<br>    } finally {<br>        document.body.removeChild(iframe);<br>    };<br>};<br><br>createSandboxedEnvironment(`console.log(&#39;Sandboxed:&#39;, secret);`); // undefined</pre><p>If we execute an XSS in the current scope, we will not receive any secrets or cookies. This means that it must be executed in the main window rather than the iframe window.</p><pre>createSandboxedEnvironment(<br>  `console.log(&#39;Sandboxed:&#39;, parent.secret);`<br>); // MY-SECRET<br><br>createSandboxedEnvironment(<br>  `console.log(&#39;Sandboxed:&#39;, window.top.secret);`<br>); // MY-SECRET<br><br>createSandboxedEnvironment(<br>  `console.log(&#39;Sandboxed:&#39;, window.parent.secret);`<br>); // MY-SECRET</pre><p>Another interesting aspect of the window object is that it allows you to launch a new tab and read from it if you are on the same origin. Assume we discovered XSS in a page and there is a /notes endpoint on the same origin. If we wish to read the /notes of another user, we may simply open a new window and read them.</p><pre>&lt;script&gt;<br>    window.open(&quot;http://localhost/notes.html&quot;, &quot;pwn&quot;);<br>    setTimeout(`console.log(window.open(&quot;&quot;, &quot;pwn&quot;).document.body.textContent)`, 1000);<br>&lt;/script&gt;</pre><p>But there is a catch that browsers usually block new windows. Still, we can get it through iframe .</p><pre>&lt;script&gt;<br>    const iframe = document.createElement(&#39;iframe&#39;);<br>    iframe.src = &quot;http://localhost/notes.html&quot;;<br>    iframe.style.display = &quot;none&quot;;<br>    document.body.appendChild(iframe);<br>    setTimeout(&quot;console.log(iframe.contentDocument.body.textContent)&quot;, 1000)<br>&lt;/script&gt;</pre><p>When we can’t access a window, the document.defaultView property is simply a way of obtaining the window object. For example, we can usually use a workaround that will allow us to access the “defaultView” property.</p><pre>let node = document.createElement(&#39;div&#39;);<br>node.ownerDocument.defaultView.alert(1337);</pre><h4>Payloads</h4><p>There are plenty of them, and I mean it. When it comes to XSS, we may get fairly creative, combining every mentioned aspect to overcome filters. The reason XSS is so dangerous is that it includes keyloggers, not to mention general user data and session hijacking.</p><p><strong><em>Most popular sources of XSS payloads:</em></strong></p><ul><li><a href="https://github.com/swisskyrepo/PayloadsAllTheThings/tree/master/XSS%20Injection">PayloadsAllTheThings</a></li><li><a href="https://portswigger.net/web-security/cross-site-scripting/cheat-sheet">Portswigger.net</a></li><li><a href="https://github.com/payloadbox/xss-payload-list/blob/master/Intruder/xss-payload-list.txt">Payloadbox</a></li></ul><h3>Weird browser</h3><h4>Document.getelementById()</h4><p>Did you know that you could get the element by id simply with a variable:</p><pre>&lt;a href=&quot;clobbered:1337&quot; id=x&gt;&lt;/a&gt;<br>&lt;script&gt;<br>  alert(x);//clobbered:1337<br>  alert(typeof x);//object<br>&lt;/script&gt;</pre><h4><a href="https://developer.mozilla.org/en-US/docs/Web/HTTP/Basics_of_HTTP/Data_URLs">Data URLs</a></h4><p>data:,Hello%2C%20World%21</p><p>Data URLs are URLs that can render a webpage with scripts and tags in a browser; for example, we can use them to render a webpage directly in a <a href="https://ctftime.org/writeup/27125">redirect</a>.</p><h4><a href="https://www.jitbit.com/alexblog/256-targetblank---the-most-underestimated-vulnerability-ever/">Target property</a></h4><p>There was a time when element a with parameter _blank could access the original page, but this is no longer the case. However, if the parameter rel is set to opener, there may still be an issue.</p><pre>&lt;a href=&quot;http://localhost&quot; target=&quot;_blank&quot; rel=&quot;opener&quot;&gt;EXAMPLE&lt;/a&gt;</pre><p>The attacker can redirect the original webpage to his own destination or can just execute on the window JavaScript:</p><pre>if (window.opener) {<br>  window.opener.location = &#39;https://you-re-hacked.com&#39;;<br>};<br><br>if (window.opener) {<br>  window.opener.alert(&quot;YOUR COOKIES ARE MINE&quot;);<br>};</pre><h3>Defending</h3><h4>Snyk</h4><p>Automated security tool for scanning and monitoring your software development. It’s incredibly simple to set up and utilize. Sometimes snyk produces false positives, but it is still worthwhile to verify.</p><h4>Keep your libraries up-to-date</h4><p>Most vulnerabilities are not detected immediately, and people strive to address them as soon as possible when strange things occur. Keeping your libraries up-to-date is also important and sometimes painful.</p><h4>Javascript/Markdown sanitilization</h4><p>Sanitization is a good security practice to use when including or reflecting client-side HTML on your website. There are several open-source libraries. One example is: <a href="https://www.npmjs.com/package/sanitize-html">sanitize-html</a></p><h4>CSP (<a href="https://developer.mozilla.org/en-US/docs/Web/HTTP/CSP">Content Security Policy</a>)</h4><p>As mentioned, CSP can enhance your security by preventing cross-domain scripts from being loaded. However, it is not sufficient to include only CSP.</p><h3>Conclusion</h3><p>XSS is one of the most pervasive and dangerous vulnerabilities in web security, capable of compromising user data, hijacking sessions, and executing malicious code.</p><p>Theoretically, any user input might be utilized as an attack vector, potentially resulting in a vulnerability. You should pay special attention to these areas to ensure that they do not cause any strange behavior.</p><p>If you enjoyed this article, clap and follow me! Thanks for reading, and I wish you the best luck on your journey👋.</p><img src="https://medium.com/_/stat?event=post.clientViewed&referrerSource=full_rss&postId=5a5bfb2dbce2" width="1" height="1" alt="">]]></content><author><name>BitR13x</name></author><category term="web-security" /><category term="infosec" /><category term="cross-site-scripting" /><category term="owasp" /><category term="cybersecurity" /><summary type="html"><![CDATA[This is a summary of XSS and everything needed to be able to find this vulnerability and protect yourself and others.When starting out learning about XSS there is a lot of stuff, but most of it is just repeating, and you can’t find anything new. This guide should also cover the special cases that are hard to find on the web.Why my JavaScript is not executing?Browser protection against JavaScript execution1) SOP (Same-Origin Policy)It is a security rule that keeps data safe by making sure that web pages from one website (origin) can’t access data from another website (origin) without permission.Anytime when we want to read the response from an API or different website (origin), the website has to answer with a CORS header to allow reading, otherwise we will get a SOP error:Fetch request from different origin2) CSP (Content Security Policy)A security feature that allows website owners to control what content (like scripts, images, or styles) can be loaded onto their web pages.You can set your CSP in html using meta tag (or using header Content-Security-Policy):&lt;meta http-equiv=&quot;Content-Security-Policy&quot; content=&quot;default-src &#39;self&#39;; img-src https://*; child-src &#39;none&#39;;&quot; /&gt;3) CORS (Cross-Origin Resource Sharing)Way for a website to request resources (like data) from another website even if they have different origins (domains).It’s known under these headers:Access-Control-Allow-Origin: https://foo.exampleAccess-Control-Allow-Methods: POST, GET, OPTIONSAccess-Control-Allow-Headers: X-PINGOTHER, Content-TypeAccess-Control-Max-Age: 86400It’s used to enable sharing of resources between different websites, but in a controlled way.4) Sanitized charactersIf a site properly sanitizes characters, the characters are rendered as HTML entities and the JavaScript or HTML tags are not executed.A double quote (“) as &amp;quot; or &amp;#34;A single quote (‘) as &amp;apos; or &amp;#39;An opening angle bracket (&lt;) as &amp;lt; or &amp;#60;A closing angle bracket (&gt;) as &amp;gt; or &amp;#62;Weird JavaScriptEncoding, function execution and much more is acting very weird when it comes to javascriptEncodingJavaScript supports various types of encoding, like Hex, Decimal, Unicode, named and HTML5 entities.The weird thing about this, is that we can turn these encoding directly into chars or numbers without using a decoding function.Also, it’s useful to know that a single character escape sequence exists:&#39;\b&#39; // backspace&#39;\f&#39; // form feed&#39;\n&#39; // new line&#39;\r&#39; // carriage return&#39;\t&#39; // tab&#39;\v&#39; // vertical tab&#39;\0&#39; // null&#39;\&#39;&#39; // single quote&#39;\&quot;&#39; // double quote&#39;\\&#39; // backslashWe can break down a word or sentence using this knowledge:&quot;A\W\E\S\O\M\E&quot; // &quot;AWESOME&quot;&#39;Multiple \lines&#39; // &quot;Multiple lines&quot;Hex:We can encode using hex, but here is the problem that we can’t declare variables or call functions, because without a double quote it will cause an error.const a = () =&gt; 1;&quot;\x61&quot; // returns &quot;a&quot;\x61 // Invalid escape sequenceUnicode:We can declare functions and variables, we can also half encode word so that it won’t get filtred out.// unicode character &quot;63&quot; is allowed as a variableconst \u0061 = () =&gt; 1;\u{63} = 1 \u{61}() //correctly calls the function&quot;H\u0065LLO&quot; // HELLOFunction ExecutionFunctions may be quite fascinating in JavaScript, we can invoke them without parentheses:function printout(n1) { return n1;};printout(&quot;Hello World!&quot;); // output: &quot;Hello World&quot;printout`Hello World!`; // output: [&quot;Hello World&quot;]If we want to execute a function with more parameters, we can utilize template literals. however, the indexing starts at 1 rather than 0.function sum(n1, n2) { console.log(n1, n2); // [&quot;n1&quot;, &quot;&quot;, &quot;&quot;], n2 return Number(n1[0]) + n2;}; sum`5${4}`; // output: 9// Easier way through argumentsfunction x() { console.log(arguments);};x`${1}${2}${3}`; // output [[&quot;&quot;, &quot;&quot;, &quot;&quot;], 1, 2, 3]There are more ways to execute a function. For example:Interesting ways of executing alert found in book from Gareth Heyes:window.valueOf=alert;window+1setTimeout`alert\x281337\x29`&#39;1337,&#39;.replace`1337${alert}`Reflect.apply.call`${alert}${window}${[1337]}`/And more from PayloadsAllTheThings:window[&#39;alert&#39;](0)parent[&#39;alert&#39;](1)self[&#39;alert&#39;](2)top[&#39;alert&#39;](3)this[&#39;alert&#39;](4)frames[&#39;alert&#39;](5)[7].map(alert);[8].find(alert);[9].every(alert);[10].filter(alert);[11].findIndex(alert);[12].forEach(alert);Iframe and WindowWe can dereference window.alert and it will also dereference alert, because the origin of alert function lies on window.Dereferencing alert object from windowIframes can be used for JavaScript sandbox execution, suppose we got this code, and we want to execute a XSS to get the secret.var secret = &quot;MY-SECRET&quot;;function createSandboxedEnvironment(code) { const iframe = document.createElement(&#39;iframe&#39;); iframe.style.display = &#39;none&#39;; document.body.appendChild(iframe); const sandboxWindow = iframe.contentWindow; const sandboxDocument = iframe.contentDocument; try { sandboxWindow.eval(code); } catch (error) { console.error(&#39;Error in sandboxed code:&#39;, error); } finally { document.body.removeChild(iframe); };};createSandboxedEnvironment(`console.log(&#39;Sandboxed:&#39;, secret);`); // undefinedIf we execute an XSS in the current scope, we will not receive any secrets or cookies. This means that it must be executed in the main window rather than the iframe window.createSandboxedEnvironment( `console.log(&#39;Sandboxed:&#39;, parent.secret);`); // MY-SECRETcreateSandboxedEnvironment( `console.log(&#39;Sandboxed:&#39;, window.top.secret);`); // MY-SECRETcreateSandboxedEnvironment( `console.log(&#39;Sandboxed:&#39;, window.parent.secret);`); // MY-SECRETAnother interesting aspect of the window object is that it allows you to launch a new tab and read from it if you are on the same origin. Assume we discovered XSS in a page and there is a /notes endpoint on the same origin. If we wish to read the /notes of another user, we may simply open a new window and read them.&lt;script&gt; window.open(&quot;http://localhost/notes.html&quot;, &quot;pwn&quot;); setTimeout(`console.log(window.open(&quot;&quot;, &quot;pwn&quot;).document.body.textContent)`, 1000);&lt;/script&gt;But there is a catch that browsers usually block new windows. Still, we can get it through iframe .&lt;script&gt; const iframe = document.createElement(&#39;iframe&#39;); iframe.src = &quot;http://localhost/notes.html&quot;; iframe.style.display = &quot;none&quot;; document.body.appendChild(iframe); setTimeout(&quot;console.log(iframe.contentDocument.body.textContent)&quot;, 1000)&lt;/script&gt;When we can’t access a window, the document.defaultView property is simply a way of obtaining the window object. For example, we can usually use a workaround that will allow us to access the “defaultView” property.let node = document.createElement(&#39;div&#39;);node.ownerDocument.defaultView.alert(1337);PayloadsThere are plenty of them, and I mean it. When it comes to XSS, we may get fairly creative, combining every mentioned aspect to overcome filters. The reason XSS is so dangerous is that it includes keyloggers, not to mention general user data and session hijacking.Most popular sources of XSS payloads:PayloadsAllTheThingsPortswigger.netPayloadboxWeird browserDocument.getelementById()Did you know that you could get the element by id simply with a variable:&lt;a href=&quot;clobbered:1337&quot; id=x&gt;&lt;/a&gt;&lt;script&gt; alert(x);//clobbered:1337 alert(typeof x);//object&lt;/script&gt;Data URLsdata:,Hello%2C%20World%21Data URLs are URLs that can render a webpage with scripts and tags in a browser; for example, we can use them to render a webpage directly in a redirect.Target propertyThere was a time when element a with parameter _blank could access the original page, but this is no longer the case. However, if the parameter rel is set to opener, there may still be an issue.&lt;a href=&quot;http://localhost&quot; target=&quot;_blank&quot; rel=&quot;opener&quot;&gt;EXAMPLE&lt;/a&gt;The attacker can redirect the original webpage to his own destination or can just execute on the window JavaScript:if (window.opener) { window.opener.location = &#39;https://you-re-hacked.com&#39;;};if (window.opener) { window.opener.alert(&quot;YOUR COOKIES ARE MINE&quot;);};DefendingSnykAutomated security tool for scanning and monitoring your software development. It’s incredibly simple to set up and utilize. Sometimes snyk produces false positives, but it is still worthwhile to verify.Keep your libraries up-to-dateMost vulnerabilities are not detected immediately, and people strive to address them as soon as possible when strange things occur. Keeping your libraries up-to-date is also important and sometimes painful.Javascript/Markdown sanitilizationSanitization is a good security practice to use when including or reflecting client-side HTML on your website. There are several open-source libraries. One example is: sanitize-htmlCSP (Content Security Policy)As mentioned, CSP can enhance your security by preventing cross-domain scripts from being loaded. However, it is not sufficient to include only CSP.ConclusionXSS is one of the most pervasive and dangerous vulnerabilities in web security, capable of compromising user data, hijacking sessions, and executing malicious code.Theoretically, any user input might be utilized as an attack vector, potentially resulting in a vulnerability. You should pay special attention to these areas to ensure that they do not cause any strange behavior.If you enjoyed this article, clap and follow me! Thanks for reading, and I wish you the best luck on your journey👋.]]></summary></entry><entry><title type="html">Neural Networks: A Beginner’s Guide to Understanding the Magic Behind AI</title><link href="/articles/neural-networks-a-beginner-s-guide-to-understanding-the-magic-behind-ai/" rel="alternate" type="text/html" title="Neural Networks: A Beginner’s Guide to Understanding the Magic Behind AI" /><published>2023-09-17T00:00:00+00:00</published><updated>2023-09-17T00:00:00+00:00</updated><id>/articles/neural-networks-a-beginner-s-guide-to-understanding-the-magic-behind-ai</id><content type="html" xml:base="/articles/neural-networks-a-beginner-s-guide-to-understanding-the-magic-behind-ai/"><![CDATA[<p>Welcome traveler, in the growing world of intelligence there is a term that always stands out as incredibly influential, “neural networks.” These computerized structures, which draw inspiration from the mechanisms of the brain serve as the foundation, for state of the art technologies that drive various applications, like autonomous vehicles and voice recognition systems.</p><p>After a short break, I’m back with another interesting article, where we look deep into how neural networks work. I will try to explain it in a simple way and hopefully, you will find out that in the end it’s not that hard.</p><figure><img alt="" src="https://cdn-images-1.medium.com/max/1024/1*KEJjZa_Z27qWZVhr6S-Jyw.jpeg" /></figure><p>I’m not a professional and I could be wrong if you spot any mistakes, head into comments 🙂.</p><p>With that said let’s jump into the darkness…</p><h3>You will learn</h3><h4><strong>Fundamentals of Neural Networks</strong></h4><ul><li>What Are Neural Networks?</li><li>Neurons</li></ul><h4><strong>Neural Network Layers</strong></h4><ul><li>Input Layer</li><li>Hidden Layers</li><li>Output Layer</li></ul><h4><strong>Common Implementations</strong></h4><ul><li>Feedforward Neural Networks (FNN)</li><li>Convolutional Neural Networks (CNN)</li><li>Recurrent Neural Networks (RNN)</li><li>Long Short-Term Memory Networks (LSTM)</li></ul><h3>What Are Neural Networks?</h3><p>You could think of them like equivalent of the human brain’s information processing system. They are designed to mimic the brain’s ability to learn, adapt, and process data. These networks consist of artificial neurons, or nodes, interconnected by weighted connections, the whole calls it self: Artificial Neural Network (ANN).</p><figure><img alt="" src="https://cdn-images-1.medium.com/max/1024/0*da54QdIzKOetYf98" /><figcaption>Visual representation of “neural network”.</figcaption></figure><p>Neural networks are inspired by the workings of the brain. In our brains neurons communicate by transmitting signals through synapses. Artificial neural networks replicate this process using models.</p><p>These networks are exceptional, at recognizing patterns making predictions and handling volumes of data, which is crucial for tasks such, as image recognition, language comprehension and recommendation systems.</p><h3>Neurons</h3><blockquote>Building Blocks of Neural Networks</blockquote><p>In a neural network, each neuron acts as a processing unit.</p><p>Artificial neurons take input data, perform calculations on it, and produce an output.</p><p>These outputs are then used as inputs for subsequent layers or are the final predictions of the network.</p><h4><strong>Weights and Biases</strong></h4><p>Two essential components are weights and biases. These elements determine how strongly an input signal influences the neuron’s output.</p><ul><li><strong>Weights</strong>💪<strong>:</strong> Weights is the strength of connections between neurons. Each connection between neurons has an associated weight. Larger weights amplify the input’s impact on the neuron’s output, while smaller weights diminish it.</li><li><strong>Biases</strong>👤<strong>:</strong> Biases are like an offset or threshold for the neuron. They are shifting the activation function left or right. If you want to read more about biases you can click <a href="https://www.turing.com/kb/necessity-of-bias-in-neural-networks">here</a>.</li></ul><p>Weights and biases enable neurons to learn and adjust their behavior during training. The process of determining the appropriate weights and biases, often known as model training or optimization.</p><p>They are capable of learning complicated patterns and correlations among data, making them useful for tasks like as image recognition, natural language interpretation, and many others.</p><h4>Example of neural prediction</h4><p>Imagine you are training a neural network to predict whether a student will pass a test based on the number of hours they study. Your input data consists of the number of hours a student studied, and the output is representing whether they passed (1) or failed (0).</p><p>To make this prediction, the neuron performs the following operation:</p><blockquote>Output = Activation Function(Weight × Number of Hours Studied + Bias)</blockquote><ul><li><strong>Activation function</strong>⚡️: It determines whether a neuron should “fire” (output a signal) or not based on the input it receives. The most frequent functions are <strong>Sigmoid</strong>, <strong>ReLU </strong>(Rectified Linear Unit), <strong>Tanh</strong> (hyperbolic tangent)<strong>.</strong></li></ul><p>Here the bias can represent how hard is the test, Let’s say the weight is 0.1, and the bias is -5 and you studied for 40hours.</p><blockquote>Output = Activation Function(0.1 x 40 x -5) = -1</blockquote><p>Since it’s -1 meaning you wouldn’t pass. Of course predicting the test like this is nonce, but you got the point.</p><h3><strong>Neural Network Layers</strong></h3><p>Neural networks are made up of layers, each having its own function and characteristics.</p><p>Understanding these levels is critical for understanding how information moves through a network and how the decisions are made.</p><p>We’ll look at the three main types of layers in a neural network architecture: the Input Layer, Hidden Layers, and Output Layer.</p><figure><img alt="" src="https://cdn-images-1.medium.com/max/538/1*REzVHUebWj8lFpsqWSnpdw.png" /><figcaption>Network Layers</figcaption></figure><h4><strong>Input Layer</strong></h4><blockquote>The Entry Point of Data</blockquote><p>The first layer of a neural network is the Input Layer. Its major duty is to receive data and forward it to the following layers for processing.</p><p>Each neuron in the input layer corresponds to a feature or input variable, it serves as an important link between the external data and the neural network.</p><ul><li><strong>No Computation</strong>🚧<strong>:</strong> Neurons in the input layer don’t perform any computation. They simply transmit the input data to the hidden layers.</li><li><strong>Size Determination</strong>🔍<strong>:</strong> The number of neurons in the input layer is determined by the dimensionality of the input data. For instance, in an image classification task, each pixel might correspond to a neuron in the input layer.</li></ul><p>You may encounter situations where input values are constrained to a specific range [0, 1] that’s called standardization and normalization. It can help the neural network converge faster during training and make it more robust to different input scales. However, these techniques are not always necessary and depend on the type of data.</p><h4><strong>Hidden Layers</strong></h4><blockquote>The Workhorses of the Network</blockquote><p>In a neural network, the true computing takes place in the Hidden Layers. These layers are in charge of extracting characteristics from input data as well as learning complex patterns and representations.</p><p>While a network can have numerous hidden layers, the number and size of hidden layers are determined by the network’s architecture and the task’s complexity.</p><ul><li><strong>Weighted Sum</strong>➕: The values provided are multiplied by their weights. These weighted sums are computed by taking the dot product, between the input values and the corresponding neuron weights. The outcome is a collection of sums.</li><li><strong>Bias Addition</strong>➕: After calculating the weighted sums, each neuron adds a bias term.</li><li><strong>Activation Function</strong>⚡️: The result of the weighted sum plus the bias for each neuron is then passed through an activation function.</li><li><strong>Hierarchical Learning</strong>🧠<strong>:</strong> Hidden layers progressively learn more abstract and high-level features as information flows through the network’s layers.</li></ul><p>The hidden layers of a neural network act as feature extractors.</p><h4><strong>Output Layer</strong></h4><blockquote>Making Predictions</blockquote><p>Final layer of the neural network. It produces the network’s predictions or outputs based on the processed information from the hidden layers. The structure and number of neurons in the output layer depend on the nature of the task.</p><ul><li><strong>Loss Calculation</strong>📉: Once the network produces its output, the loss or error between the predicted values and the actual target values (ground truth) is calculated. This loss is a measure of how well the network is performing.</li><li><strong>Backpropagation and Training</strong>🔄: The computed loss is used to update the network’s weights and biases through a process called backpropagation and optimization algorithms like gradient descent. The network learns to adjust its parameters to minimize the loss, making its predictions more accurate over time.</li><li><strong>Interpretation</strong>📖<strong>:</strong> The values produced by the neurons in the output layer are often interpreted as probabilities or class scores, depending on the problem. The highest-scoring class or classes are the network’s final predictions.</li></ul><p>The final predictions or values are created in the output layer based on the network’s learnt weights and biases. Network’s performance is enhanced by training, in which it learns to make better predictions by altering its parameters.</p><h3><strong>Common Implementations</strong></h3><p>Neural networks come in a variety of shapes and sizes, each one customized to specific types of data and activities. I’ll introduce you to four common neural network implementations and share insights on where they thrive.</p><figure><img alt="" src="https://cdn-images-1.medium.com/max/1024/1*vTsDqjgjM1ROqYW9ITIgDw.jpeg" /></figure><h4><strong>Feedforward Neural Networks (FNN)</strong></h4><blockquote>The Foundation of Neural Networks</blockquote><p>Feedforward Neural Networks, often referred to as multilayer perceptrons (MLPs), serve as the foundational architecture for neural networks. They are versatile and can be used for a wide range of tasks, including classification and regression.</p><ul><li><strong>Architecture</strong>🏰<strong>:</strong> FNNs consist of an input layer, one or more hidden layers, and an output layer. Information flows in one direction, from input to output, without loops or cycles.</li><li><strong>Applications</strong>📋<strong>:</strong> FNNs find applications in image classification, sentiment analysis, and other structured data tasks. Their simplicity and effectiveness make them a valuable choice for many problems.</li></ul><h4><strong>Convolutional Neural Networks (CNN)</strong></h4><blockquote>Unraveling Image and Spatial Data</blockquote><p>Convolutional Neural Networks are specifically designed for tasks involving grid-like data, such as images and spatial data. They excel at capturing spatial hierarchies and patterns.</p><ul><li><strong>Architecture</strong>🏰<strong>:</strong> CNNs incorporate convolutional layers for feature extraction and pooling layers for dimensionality reduction. These layers allow the network to understand spatial relationships in the data.</li><li><strong>Applications</strong>📋<strong>:</strong> CNNs are the go-to choice for image classification, object detection, facial recognition, and tasks involving grid-like data.</li></ul><h4><strong>Recurrent Neural Networks (RNN)</strong></h4><blockquote>Mastering Sequential Data</blockquote><p>Recurrent Neural Networks are designed for tasks that involve sequential data, where the order of elements matters. They have memory cells that enable them to retain information from previous time steps.</p><ul><li><strong>Architecture</strong>🏰<strong>:</strong> RNNs have recurrent connections that loop back on themselves, allowing them to maintain a form of memory. This makes them suitable for tasks like natural language processing, time series prediction, and speech recognition.</li><li><strong>Applications</strong>📋<strong>:</strong> RNNs are used in machine translation, text generation, speech synthesis, and any task involving sequences.</li></ul><h4><strong>Long Short-Term Memory Networks (LSTM)</strong></h4><blockquote>Overcoming the Shortcomings of RNNs</blockquote><p>While RNNs are powerful for sequential data, they suffer from vanishing gradient problems. Long Short-Term Memory Networks (LSTMs) were developed to address these issues by introducing specialized memory cells.</p><ul><li><strong>Architecture</strong>🏰<strong>:</strong> LSTMs include memory cells with gating mechanisms that control the flow of information, allowing them to capture long-range dependencies in sequential data.</li><li><strong>Applications</strong>📋<strong>:</strong> LSTMs are widely used in tasks requiring long-term dependencies, such as speech recognition, language modeling, and sentiment analysis.</li></ul><p>These are just a few of the common neural network architectures, each tailored to different data types and tasks. As we explore these implementations further, you’ll gain a deeper understanding of how to choose the right architecture for your specific AI and machine learning projects.</p><h3>Conclusion</h3><p>They can be used almost everywhere and they are ground breaking because they can remove the repetitive tasks from daily life, but at their core they cannot replace humans.. So, no worries 😊.</p><p>Anyway, If you enjoyed this article, clap👋 and follow me📑! Thanks for reading! Looking forward to seeing you in the future.</p><img src="https://medium.com/_/stat?event=post.clientViewed&referrerSource=full_rss&postId=153bae652a2d" width="1" height="1" alt="">]]></content><author><name>BitR13x</name></author><category term="ai" /><category term="neural-networks" /><category term="computer-science" /><summary type="html"><![CDATA[Welcome traveler, in the growing world of intelligence there is a term that always stands out as incredibly influential, “neural networks.” These computerized structures, which draw inspiration from the mechanisms of the brain serve as the foundation, for state of the art technologies that drive various applications, like autonomous vehicles and voice recognition systems.After a short break, I’m back with another interesting article, where we look deep into how neural networks work. I will try to explain it in a simple way and hopefully, you will find out that in the end it’s not that hard.I’m not a professional and I could be wrong if you spot any mistakes, head into comments 🙂.With that said let’s jump into the darkness…You will learnFundamentals of Neural NetworksWhat Are Neural Networks?NeuronsNeural Network LayersInput LayerHidden LayersOutput LayerCommon ImplementationsFeedforward Neural Networks (FNN)Convolutional Neural Networks (CNN)Recurrent Neural Networks (RNN)Long Short-Term Memory Networks (LSTM)What Are Neural Networks?You could think of them like equivalent of the human brain’s information processing system. They are designed to mimic the brain’s ability to learn, adapt, and process data. These networks consist of artificial neurons, or nodes, interconnected by weighted connections, the whole calls it self: Artificial Neural Network (ANN).Visual representation of “neural network”.Neural networks are inspired by the workings of the brain. In our brains neurons communicate by transmitting signals through synapses. Artificial neural networks replicate this process using models.These networks are exceptional, at recognizing patterns making predictions and handling volumes of data, which is crucial for tasks such, as image recognition, language comprehension and recommendation systems.NeuronsBuilding Blocks of Neural NetworksIn a neural network, each neuron acts as a processing unit.Artificial neurons take input data, perform calculations on it, and produce an output.These outputs are then used as inputs for subsequent layers or are the final predictions of the network.Weights and BiasesTwo essential components are weights and biases. These elements determine how strongly an input signal influences the neuron’s output.Weights💪: Weights is the strength of connections between neurons. Each connection between neurons has an associated weight. Larger weights amplify the input’s impact on the neuron’s output, while smaller weights diminish it.Biases👤: Biases are like an offset or threshold for the neuron. They are shifting the activation function left or right. If you want to read more about biases you can click here.Weights and biases enable neurons to learn and adjust their behavior during training. The process of determining the appropriate weights and biases, often known as model training or optimization.They are capable of learning complicated patterns and correlations among data, making them useful for tasks like as image recognition, natural language interpretation, and many others.Example of neural predictionImagine you are training a neural network to predict whether a student will pass a test based on the number of hours they study. Your input data consists of the number of hours a student studied, and the output is representing whether they passed (1) or failed (0).To make this prediction, the neuron performs the following operation:Output = Activation Function(Weight × Number of Hours Studied + Bias)Activation function⚡️: It determines whether a neuron should “fire” (output a signal) or not based on the input it receives. The most frequent functions are Sigmoid, ReLU (Rectified Linear Unit), Tanh (hyperbolic tangent).Here the bias can represent how hard is the test, Let’s say the weight is 0.1, and the bias is -5 and you studied for 40hours.Output = Activation Function(0.1 x 40 x -5) = -1Since it’s -1 meaning you wouldn’t pass. Of course predicting the test like this is nonce, but you got the point.Neural Network LayersNeural networks are made up of layers, each having its own function and characteristics.Understanding these levels is critical for understanding how information moves through a network and how the decisions are made.We’ll look at the three main types of layers in a neural network architecture: the Input Layer, Hidden Layers, and Output Layer.Network LayersInput LayerThe Entry Point of DataThe first layer of a neural network is the Input Layer. Its major duty is to receive data and forward it to the following layers for processing.Each neuron in the input layer corresponds to a feature or input variable, it serves as an important link between the external data and the neural network.No Computation🚧: Neurons in the input layer don’t perform any computation. They simply transmit the input data to the hidden layers.Size Determination🔍: The number of neurons in the input layer is determined by the dimensionality of the input data. For instance, in an image classification task, each pixel might correspond to a neuron in the input layer.You may encounter situations where input values are constrained to a specific range [0, 1] that’s called standardization and normalization. It can help the neural network converge faster during training and make it more robust to different input scales. However, these techniques are not always necessary and depend on the type of data.Hidden LayersThe Workhorses of the NetworkIn a neural network, the true computing takes place in the Hidden Layers. These layers are in charge of extracting characteristics from input data as well as learning complex patterns and representations.While a network can have numerous hidden layers, the number and size of hidden layers are determined by the network’s architecture and the task’s complexity.Weighted Sum➕: The values provided are multiplied by their weights. These weighted sums are computed by taking the dot product, between the input values and the corresponding neuron weights. The outcome is a collection of sums.Bias Addition➕: After calculating the weighted sums, each neuron adds a bias term.Activation Function⚡️: The result of the weighted sum plus the bias for each neuron is then passed through an activation function.Hierarchical Learning🧠: Hidden layers progressively learn more abstract and high-level features as information flows through the network’s layers.The hidden layers of a neural network act as feature extractors.Output LayerMaking PredictionsFinal layer of the neural network. It produces the network’s predictions or outputs based on the processed information from the hidden layers. The structure and number of neurons in the output layer depend on the nature of the task.Loss Calculation📉: Once the network produces its output, the loss or error between the predicted values and the actual target values (ground truth) is calculated. This loss is a measure of how well the network is performing.Backpropagation and Training🔄: The computed loss is used to update the network’s weights and biases through a process called backpropagation and optimization algorithms like gradient descent. The network learns to adjust its parameters to minimize the loss, making its predictions more accurate over time.Interpretation📖: The values produced by the neurons in the output layer are often interpreted as probabilities or class scores, depending on the problem. The highest-scoring class or classes are the network’s final predictions.The final predictions or values are created in the output layer based on the network’s learnt weights and biases. Network’s performance is enhanced by training, in which it learns to make better predictions by altering its parameters.Common ImplementationsNeural networks come in a variety of shapes and sizes, each one customized to specific types of data and activities. I’ll introduce you to four common neural network implementations and share insights on where they thrive.Feedforward Neural Networks (FNN)The Foundation of Neural NetworksFeedforward Neural Networks, often referred to as multilayer perceptrons (MLPs), serve as the foundational architecture for neural networks. They are versatile and can be used for a wide range of tasks, including classification and regression.Architecture🏰: FNNs consist of an input layer, one or more hidden layers, and an output layer. Information flows in one direction, from input to output, without loops or cycles.Applications📋: FNNs find applications in image classification, sentiment analysis, and other structured data tasks. Their simplicity and effectiveness make them a valuable choice for many problems.Convolutional Neural Networks (CNN)Unraveling Image and Spatial DataConvolutional Neural Networks are specifically designed for tasks involving grid-like data, such as images and spatial data. They excel at capturing spatial hierarchies and patterns.Architecture🏰: CNNs incorporate convolutional layers for feature extraction and pooling layers for dimensionality reduction. These layers allow the network to understand spatial relationships in the data.Applications📋: CNNs are the go-to choice for image classification, object detection, facial recognition, and tasks involving grid-like data.Recurrent Neural Networks (RNN)Mastering Sequential DataRecurrent Neural Networks are designed for tasks that involve sequential data, where the order of elements matters. They have memory cells that enable them to retain information from previous time steps.Architecture🏰: RNNs have recurrent connections that loop back on themselves, allowing them to maintain a form of memory. This makes them suitable for tasks like natural language processing, time series prediction, and speech recognition.Applications📋: RNNs are used in machine translation, text generation, speech synthesis, and any task involving sequences.Long Short-Term Memory Networks (LSTM)Overcoming the Shortcomings of RNNsWhile RNNs are powerful for sequential data, they suffer from vanishing gradient problems. Long Short-Term Memory Networks (LSTMs) were developed to address these issues by introducing specialized memory cells.Architecture🏰: LSTMs include memory cells with gating mechanisms that control the flow of information, allowing them to capture long-range dependencies in sequential data.Applications📋: LSTMs are widely used in tasks requiring long-term dependencies, such as speech recognition, language modeling, and sentiment analysis.These are just a few of the common neural network architectures, each tailored to different data types and tasks. As we explore these implementations further, you’ll gain a deeper understanding of how to choose the right architecture for your specific AI and machine learning projects.ConclusionThey can be used almost everywhere and they are ground breaking because they can remove the repetitive tasks from daily life, but at their core they cannot replace humans.. So, no worries 😊.Anyway, If you enjoyed this article, clap👋 and follow me📑! Thanks for reading! Looking forward to seeing you in the future.]]></summary></entry><entry><title type="html">Quick introduction in Godot 4 Multiplayer</title><link href="/articles/quick-introduction-in-godot-4-multiplayer/" rel="alternate" type="text/html" title="Quick introduction in Godot 4 Multiplayer" /><published>2023-05-17T00:00:00+00:00</published><updated>2023-05-17T00:00:00+00:00</updated><id>/articles/quick-introduction-in-godot-4-multiplayer</id><content type="html" xml:base="/articles/quick-introduction-in-godot-4-multiplayer/"><![CDATA[<p>Greetings to everyone! Today I bring you a quick introduction to Godot version 4 multiplayer.</p><figure><img alt="" src="https://cdn-images-1.medium.com/max/1024/0*p4vBXVLhwr_A3n9A.png" /></figure><p>If you want a better understanding, I recommend you read the <a href="https://godotengine.org/article/multiplayer-in-godot-4-0-scene-replication/">documentation</a> or at least know the differences between server-side and client-side. With that said, let’s go straight into it.</p><h3>Setup the Network</h3><p>This is similar to Godot 3.5, but the syntax is a little bit different:</p><p>For example, now everything about multiplayer is actually under a global class named “multiplayer” (MultiplayerAPI), meaning when we connect signals, it’s under the multiplayer class.</p><pre># GODOT 3.5<br>get_tree().connect(&quot;connected_to_server&quot;, self, &quot;_connected_to_server&quot;)<br># GODOT 4<br>multiplayer.connected_to_server.connect(self._connected_to_server)</pre><p>For quick setup, you can use this code:</p><iframe src="" width="0" height="0" frameborder="0" scrolling="no"><a href="https://medium.com/media/5f6bde75c622a4a6510fb1500ba0d209/href">https://medium.com/media/5f6bde75c622a4a6510fb1500ba0d209/href</a></iframe><p>This code you will add as auto-load and then a create node with lobby and connect the signals, then button to switch scenes. To better understand the code, you can check my <a href="https://medium.com/@bitr13x/how-to-make-a-simple-2d-multiplayer-game-in-godot-6247b68d0af0">previous guide</a> to multiplayer 3.5.</p><h3>Multiplayer Synchronizer</h3><p>In this version of Godot, they added the multiplayer synchronizer, which simplifies the programming of multiplayer. Now you need to add it to the player tree, and then just set the properties that you want to synchronize.</p><figure><img alt="" src="https://cdn-images-1.medium.com/max/1024/1*DxqiAwZZx7rZoGDVM0SF2A.png" /></figure><p>This is so helpful and can save you a lot of time.</p><h3>Multiplayer Spawner</h3><p>Another new feature that also simplifies the process of spawning and managing networked objects in multiplayer games</p><p>But when I was using it, I fell into lots of errors, and then I just implemented my own spawner. If you want to play with it on your own, I recommend you look up the <a href="https://docs.godotengine.org/en/stable/classes/class_multiplayerspawner.html">documentation</a>.</p><h3>RPC Calls</h3><p>RPCs are essential for implementing networked gameplay and interactions, and that’s why it’s useful to know how to use them properly.</p><p>RPC changed syntax to a much simpler version.</p><p>For example, now you don’t have any master, puppet, remote, etc., but you have much simpler syntax.</p><h4>Syntax of RPC Calls in Godot 4:</h4><p>You will start with “@”, and then you will specify RPC’s mode, sync, transfer_mode.</p><pre># mode, sync, transfer_mode (order doesn&#39;t matter)<br># reliable -&gt; tcp, unreliable -&gt; udp (spamming), unreliable_ordered<br>@rpc(&quot;any_peer&quot;, &quot;call_local&quot;, &quot;reliable&quot;)<br>func totaly_sync():<br>  print(&quot;Running locally and any_connected_client running this function&quot;)<br><br>@rpc(&quot;call_local&quot;)<br>func local_call():<br>  print(&quot;calling just local function&quot;)<br><br># You also can use different channels used mostly for optimizations <br>@rpc(any_peer, 1)<br>func my_chat_func(message):<br> print(&quot;RPC received on channel 1, message: &quot; + str(message))<br><br># Calling rpc function:<br># rpc() == self.rpc<br>rpc(&quot;totaly_sync&quot;)<br># with arguments:<br>rpc(&quot;my_chat_func&quot;, &quot;Hello&quot;)</pre><p>But be careful, you can’t send any node because that could lead to an RCE vulnerability, so you need to work around it. Usually, I declare a list of items that I want to sync and then just send the index through the network.</p><pre>@onready var items = [<br> preload(&quot;res://path/to/scene.tscn&quot;),<br> preload(&quot;res://path/to/scene.tscn&quot;),<br>]<br><br>@rpc(&quot;any_peer&quot;, &quot;call_local&quot;, &quot;reliable&quot;)<br>func sync_items(index: int) -&gt; void:<br> spawn_item(items[index])</pre><h3>Controlling the execution flow</h3><p>The last thing on our list is how to actually control the execution flow. The main way to control the flow is by:</p><pre># check whoever executing the code if its the owner of current node<br>mutiplayer.is_mutliplayer_authority()<br># check if its the server<br>multiplayer.is_server()<br># set the ownership of the node<br>NODE.set_multiplayer_authority()<br></pre><p>When you instancing the player, you need to set him as the multiplayer_authority of its node. This will make your life much simpler.</p><p>And keep in mind that when using the “_ready()” function, the execution of this function usually happens before the multiplayer_authority is set.</p><h3>Conclusion</h3><p>With this article, you should be able to program multiplayer into your game. Sometimes multiplayer can be a pain because something is not syncing properly, and debugging the error is a little bit difficult, but with a cool head, you eventually find the error and gain a little bit more knowledge.</p><p>If you enjoyed this article, clap and follow me! Thanks for reading, and I wish you the best luck on your journey.</p><img src="https://medium.com/_/stat?event=post.clientViewed&referrerSource=full_rss&postId=ed7e35cbfec5" width="1" height="1" alt="">]]></content><author><name>BitR13x</name></author><category term="game-development" /><category term="godot-4" /><category term="godot-engine" /><category term="godot" /><category term="programming" /><summary type="html"><![CDATA[Greetings to everyone! Today I bring you a quick introduction to Godot version 4 multiplayer.If you want a better understanding, I recommend you read the documentation or at least know the differences between server-side and client-side. With that said, let’s go straight into it.Setup the NetworkThis is similar to Godot 3.5, but the syntax is a little bit different:For example, now everything about multiplayer is actually under a global class named “multiplayer” (MultiplayerAPI), meaning when we connect signals, it’s under the multiplayer class.# GODOT 3.5get_tree().connect(&quot;connected_to_server&quot;, self, &quot;_connected_to_server&quot;)# GODOT 4multiplayer.connected_to_server.connect(self._connected_to_server)For quick setup, you can use this code:https://medium.com/media/5f6bde75c622a4a6510fb1500ba0d209/hrefThis code you will add as auto-load and then a create node with lobby and connect the signals, then button to switch scenes. To better understand the code, you can check my previous guide to multiplayer 3.5.Multiplayer SynchronizerIn this version of Godot, they added the multiplayer synchronizer, which simplifies the programming of multiplayer. Now you need to add it to the player tree, and then just set the properties that you want to synchronize.This is so helpful and can save you a lot of time.Multiplayer SpawnerAnother new feature that also simplifies the process of spawning and managing networked objects in multiplayer gamesBut when I was using it, I fell into lots of errors, and then I just implemented my own spawner. If you want to play with it on your own, I recommend you look up the documentation.RPC CallsRPCs are essential for implementing networked gameplay and interactions, and that’s why it’s useful to know how to use them properly.RPC changed syntax to a much simpler version.For example, now you don’t have any master, puppet, remote, etc., but you have much simpler syntax.Syntax of RPC Calls in Godot 4:You will start with “@”, and then you will specify RPC’s mode, sync, transfer_mode.# mode, sync, transfer_mode (order doesn&#39;t matter)# reliable -&gt; tcp, unreliable -&gt; udp (spamming), unreliable_ordered@rpc(&quot;any_peer&quot;, &quot;call_local&quot;, &quot;reliable&quot;)func totaly_sync(): print(&quot;Running locally and any_connected_client running this function&quot;)@rpc(&quot;call_local&quot;)func local_call(): print(&quot;calling just local function&quot;)# You also can use different channels used mostly for optimizations @rpc(any_peer, 1)func my_chat_func(message): print(&quot;RPC received on channel 1, message: &quot; + str(message))# Calling rpc function:# rpc() == self.rpcrpc(&quot;totaly_sync&quot;)# with arguments:rpc(&quot;my_chat_func&quot;, &quot;Hello&quot;)But be careful, you can’t send any node because that could lead to an RCE vulnerability, so you need to work around it. Usually, I declare a list of items that I want to sync and then just send the index through the network.@onready var items = [ preload(&quot;res://path/to/scene.tscn&quot;), preload(&quot;res://path/to/scene.tscn&quot;),]@rpc(&quot;any_peer&quot;, &quot;call_local&quot;, &quot;reliable&quot;)func sync_items(index: int) -&gt; void: spawn_item(items[index])Controlling the execution flowThe last thing on our list is how to actually control the execution flow. The main way to control the flow is by:# check whoever executing the code if its the owner of current nodemutiplayer.is_mutliplayer_authority()# check if its the servermultiplayer.is_server()# set the ownership of the nodeNODE.set_multiplayer_authority()When you instancing the player, you need to set him as the multiplayer_authority of its node. This will make your life much simpler.And keep in mind that when using the “_ready()” function, the execution of this function usually happens before the multiplayer_authority is set.ConclusionWith this article, you should be able to program multiplayer into your game. Sometimes multiplayer can be a pain because something is not syncing properly, and debugging the error is a little bit difficult, but with a cool head, you eventually find the error and gain a little bit more knowledge.If you enjoyed this article, clap and follow me! Thanks for reading, and I wish you the best luck on your journey.]]></summary></entry></feed>